




If you’re anything like me, the moment chocolate and peanut butter come together, it’s an instant yes. There’s something magical about that rich chocolate shell giving way to a smooth, sweet-and-salty peanut butter center—especially when it’s homemade. These decadent chocolate–peanut butter cups are one of those simple, no-bake treats that feel indulgent without requiring a candy thermometer or complicated steps.
Whether you’re craving a quick sweet bite, looking for a kid-friendly dessert, or simply want a small-batch treat that’s even better than store-bought, this recipe fits the moment. With just a few pantry staples—semisweet chocolate, creamy peanut butter, and powdered sugar—you can whip up the kind of homemade candy that disappears the second it hits the table.
So grab your muffin liners and a microwave-safe bowl. Let’s make a treat that’s nostalgic, crowd-pleasing, and effortlessly delicious.
Key Benefits & Why You’ll Love This Recipe
If you’re searching for a dessert that’s rich, nostalgic, and unbelievably easy to make, these decadent chocolate–peanut butter cups check every box. They’re the perfect blend of smooth peanut butter filling and a luscious chocolate shell—simple enough for beginners yet satisfying enough for seasoned home bakers who appreciate a good no-bake dessert.
Here’s why this recipe might become your new go-to treat:
- Simple ingredients, big flavor: With just chocolate chips, peanut butter, and powdered sugar, you create a treat that tastes like premium homemade candy—without any fancy equipment.
- Quick to prepare: Everything comes together in minutes. Most of the time is simply chilling, which makes this a great make-ahead dessert for parties or last-minute cravings.
- Better than store-bought: These cups offer a fresher, creamier center and a richer chocolate coating than anything you’d pick up in the candy aisle.
- Kid-friendly and crowd-pleasing: Whether you’re making these with children or surprising guests, everyone loves a bite-sized, perfectly sweet treat.
- Easy to customize: You can switch up the chocolate, adjust the sweetness, or add crunchy toppings—this recipe adapts beautifully to your personal style.
What I love most is how approachable this recipe is. Even if you’ve never made homemade peanut butter cups, the process is straightforward, relaxing, and surprisingly fun. By the time you pull them from the fridge, you’ll wonder why you ever bought them premade.
If you’re ready for a dessert that delivers indulgence with minimal effort, you’re in exactly the right place. Let’s dive in.
Ingredients
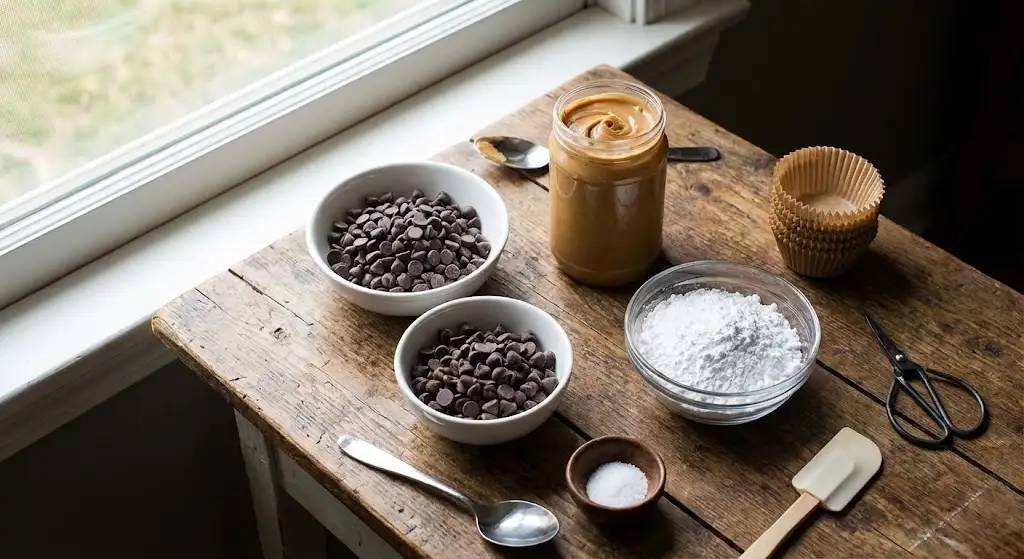
One of the best parts about making homemade chocolate–peanut butter cups is how simple the ingredient list is. You don’t need anything fancy—just a handful of pantry staples that come together to create a rich, sweet-and-salty treat. Before you begin, take a quick look at what you’ll need:
Essential Ingredients
- 12 paper muffin cup liners
These help shape your cups and make them easy to remove once chilled. - 1 cup semisweet chocolate chips
Semisweet chocolate melts smoothly and gives you that classic, rich chocolate shell. - 1/2 cup creamy peanut butter
Creamy peanut butter creates a silky, smooth filling that blends beautifully with sugar. - 1/2 cup powdered sugar
Adds light sweetness and helps firm up the peanut butter mixture. - A pinch of salt
Just enough to enhance the balance of sweet and salty flavors.
Why These Ingredients Work
- Chocolate chips give structure and snap once chilled—perfect for forming sturdy chocolate shells.
- Powdered sugar dissolves quickly, preventing any grainy texture in the filling.
- Salt might seem minor, but it elevates the natural richness of the peanut butter.
Instructions
Making these decadent chocolate–peanut butter cups is simpler than you might expect. With just a few steps and a little chill time, you’ll have a batch of rich, homemade treats ready to enjoy. Follow along—I’ll walk you through each part so everything turns out smooth, neat, and delicious.
1. Prepare the Muffin Cups
- Trim 12 paper muffin liners to half their height.
This helps the chocolate set more evenly and makes the cups easier to handle later.
2. Melt the First Layer of Chocolate
- Add 1/2 cup semisweet chocolate chips to a microwave-safe bowl.
- Microwave for 2 minutes, stirring every minute to prevent overheating.
The chocolate should be fully melted and silky.
3. Create the Chocolate Shells
- Spoon the melted chocolate into each liner, filling them about halfway.
- Use the back of a spoon to gently coat the sides, forming even chocolate “walls.”
- Place the liners in the refrigerator so the shells can firm up.
4. Make the Peanut Butter Filling
- In a small bowl, mix together:
- 1/2 cup creamy peanut butter
- 1/2 cup powdered sugar
- A pinch of salt
- Stir until smooth. The mixture should be thick but spreadable.
5. Fill the Cups
- Once the chocolate shells are firm, divide the peanut butter mixture evenly among them.
- A small spoon or piping bag works best for clean, even layers.
6. Add the Top Chocolate Layer
- Melt the remaining 1/2 cup chocolate chips in the microwave, stirring every minute.
- Spoon the melted chocolate over the peanut butter centers, making sure it reaches the edges to seal each cup.
7. Chill and Serve
- Return the filled cups to the refrigerator until the top layer sets completely.
- Once firm, peel back the liners and enjoy your homemade candy chilled for the best texture and flavor.
Pro Tips & Variations
Making homemade chocolate–peanut butter cups is already simple, but a few smart tricks can make the process even smoother—and the results even more decadent. Here are some helpful tips and fun variations to try:
Pro Tips for Perfect Peanut Butter Cups
- Use room-temperature peanut butter:
It blends more easily with powdered sugar, giving you a smoother, creamier filling. - Don’t overheat the chocolate:
Chocolate burns quickly. Stirring every 30–60 seconds keeps it glossy and prevents graininess. - Tap the tray gently:
After adding chocolate or filling, lightly tap the muffin tin on the counter to remove air bubbles and create even layers. - Chill between layers:
Allowing the chocolate to firm up before adding the filling prevents the layers from mixing and gives the cups a cleaner look. - Use high-quality chocolate:
The flavor really shines through in a recipe this simple, so choose chocolate you genuinely enjoy eating on its own. - Keep them chilled:
These cups taste amazing straight from the fridge, and staying cold helps maintain that perfect chocolate snap.
Delicious Variations to Try
- Dark Chocolate Cups:
Swap the semisweet chips for dark chocolate for a deeper, bittersweet flavor. - Crunchy Peanut Butter Filling:
Use crunchy peanut butter or fold in chopped peanuts for added texture. - Salted Chocolate Topping:
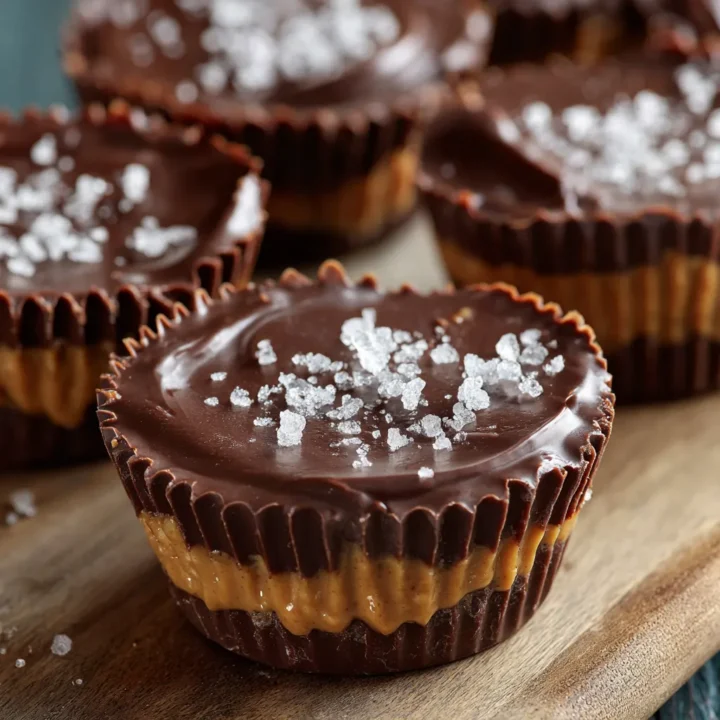
Sprinkle a tiny pinch of flaky sea salt on top before chilling—perfect for sweet-and-salty lovers. - Nut-Free Version:
Almond butter, cashew butter, or sunflower seed butter make excellent substitutes. - Sweet Add-Ins:
Try mixing a little honey, maple syrup, or crushed graham crackers into the filling for extra richness. - Mini Cups:
Use mini muffin liners to create bite-sized treats—great for parties or snacking.
Serving & Pairing Suggestions
These decadent chocolate–peanut butter cups are wonderfully versatile, making them perfect for everything from casual snacking to special-occasion desserts. Here are a few creative ways to enjoy and present them so they shine in any setting:
How to Serve These Homemade Treats
- Chilled for the perfect texture:
Serve the cups straight from the refrigerator for that satisfying chocolate snap and creamy center. - As part of a dessert board:
Arrange them with fresh berries, pretzels, mini cookies, and nuts for an easy, crowd-pleasing sweet board. - With warm beverages:
These cups pair beautifully with hot coffee, espresso, chai tea, or even a cozy mug of hot chocolate. - As a mini dessert course:
Place one or two cups on a small plate with a drizzle of melted chocolate or caramel for a restaurant-style finish.
Pairing Ideas to Elevate the Experience
- Coffee & Espresso:
The bitterness of coffee balances the sweetness of the chocolate and peanut butter beautifully. - Cold Brew or Iced Latte:
A refreshing pairing that works especially well if you’re enjoying these treats on a warm day. - Milk—classic or flavored:
Chocolate milk or vanilla almond milk makes a nostalgic, comforting combo. - Fresh Fruit:
Strawberries, raspberries, or sliced bananas are great additions, offering a bright contrast to the rich flavor.
When to Serve These Peanut Butter Cups
- Movie nights
- Birthday parties
- Holiday dessert tables
- After-dinner treats
- Potlucks & gatherings
- Midday cravings (the most common one!)
Tools and Equipment Guide
One of the reasons these homemade chocolate–peanut butter cups are so beginner-friendly is that they require only a handful of simple tools. You don’t need special candy molds or advanced kitchen gadgets—just everyday items you already have at home. Here’s a quick guide to help you stay organized and confident from start to finish.
Essential Tools
- 12 paper muffin cup liners
These act as your molds and make the cups easy to remove once the chocolate sets. - Muffin tin or tray
Helps the liners stay upright and stable as you fill them with chocolate and peanut butter. - Microwave-safe bowl
Perfect for melting semisweet chocolate chips quickly and evenly. - Mixing bowl
Used for blending the creamy peanut butter, powdered sugar, and salt. - Spoon or small spatula
Ideal for spreading chocolate along the sides of the liners and scooping the peanut butter filling. - Piping bag (optional)
Great for creating neat, even layers of filling if you prefer cleaner edges.
Helpful Extras
- Measuring cups & spoons
For accurate proportions that ensure the perfect sweet-and-salty balance. - Silicone spatula
Makes it easy to scrape every bit of melted chocolate from the bowl—nothing goes to waste. - Refrigerator space
Since this is a no-bake dessert, chilling is what sets the layers and shapes the cups.
Troubleshooting Common Issues
Even though these no-bake chocolate–peanut butter cups are simple to make, a few small hiccups can happen—especially when working with melted chocolate. Don’t worry! Here are the most common issues people run into and how to fix them quickly and confidently.
Issue 1: The Chocolate Burns or Turns Grainy
What happened: Chocolate overheated or wasn’t stirred enough.
How to fix it:
- Always melt in 20–30 second intervals, stirring each time.
- If it becomes thick or grainy, add ½ teaspoon of coconut oil and stir gently to smooth it out.
- Avoid using wet utensils—water can cause chocolate to seize.
Issue 2: The Peanut Butter Filling Is Too Soft
What happened: The peanut butter may be warmer or oilier than expected.
How to fix it:
- Add 1–2 extra tablespoons of powdered sugar to firm it up.
- Chill the filling for 5 minutes before spooning it into the chocolate shells.
Issue 3: The Chocolate Shell Cracks When Unwrapping
What happened: The chocolate layer was too thin or not fully set.
How to fix it:
- Add slightly more chocolate on the bottom and sides when forming the shell.
- Make sure the first layer is completely chilled before adding the peanut butter filling.
Issue 4: The Layers Mix Together
What happened: The chocolate wasn’t set before the filling was added.
How to fix it:
- Chill the chocolate layer for at least 10–15 minutes until firm to the touch.
- Avoid adding warm filling—use room temperature or slightly chilled peanut butter mix.
Issue 5: The Cups Stick to the Liners
What happened: The chocolate wasn’t fully hardened or the liners were too snug.
How to fix it:
- Chill the cups longer until the top feels firm and solid.
- Peel the liners back gently and slowly to avoid cracking.
Issue 6: The Cups Melt Too Quickly at Room Temperature
What happened: Chocolate with a lower cocoa percentage softens faster.
How to fix it:
- Store the cups in the refrigerator and serve chilled.
- Use dark chocolate for a more stable shell if you prefer room-temperature serving.
FAQs
Decadent Chocolate–Peanut Butter Cups
If you’re searching for a dessert that’s rich, nostalgic, and unbelievably easy to make, these decadent chocolate–peanut butter cups check every box.
Ingredients
- 12 paper muffin cup liners
- 1 cup semisweet chocolate chips (divided into ½ cup + ½ cup)
- 1/2 cup creamy peanut butter
- 1/2 cup powdered sugar
- A pinch of salt
Instructions
1. Prepare the Liners
Trim 12 paper muffin liners to half their height so they stand upright and create neat, compact cups.
2. Melt the First Layer of Chocolate
Place ½ cup chocolate chips in a microwave-safe bowl. Microwave for 2 minutes, stirring every minute until smooth.
3. Form the Chocolate Shells
Spoon the melted chocolate into each liner, filling halfway. Spread chocolate up the sides to form an even coating. Refrigerate to set.
4. Make the Peanut Butter Filling
Mix together creamy peanut butter, powdered sugar, and salt until smooth and slightly firm.
5. Add the Filling
Once the shells are firm, divide the peanut butter mixture evenly among them. Use a spoon or piping bag for tidy layers.
6. Top with Chocolate
Melt the remaining ½ cup chocolate chips using the same method. Spoon over the filling, spreading to the edges to seal each cup.
7. Chill and Serve
Refrigerate until the top layer is completely set. Peel back the liners and enjoy chilled for the best flavor and texture.
Notes
- Avoid overheating chocolate: Melt in intervals and stir frequently for a glossy, smooth finish.
- For a firmer filling: Add 1–2 extra tablespoons of powdered sugar.
- Level up the flavor: Add a sprinkle of flaky sea salt on top before chilling.
- Make it vegan: Use dairy-free chocolate and natural vegan peanut butter.
- Storage: Keep in an airtight container in the refrigerator for up to 5 days, or freeze for up to 2 months.
Nutrition Information:
Yield: 12 Serving Size: 1Amount Per Serving: Calories: 180Total Fat: 11gSaturated Fat: 4gSodium: 65mgCarbohydrates: 18gFiber: 1gSugar: 15gProtein: 3g