

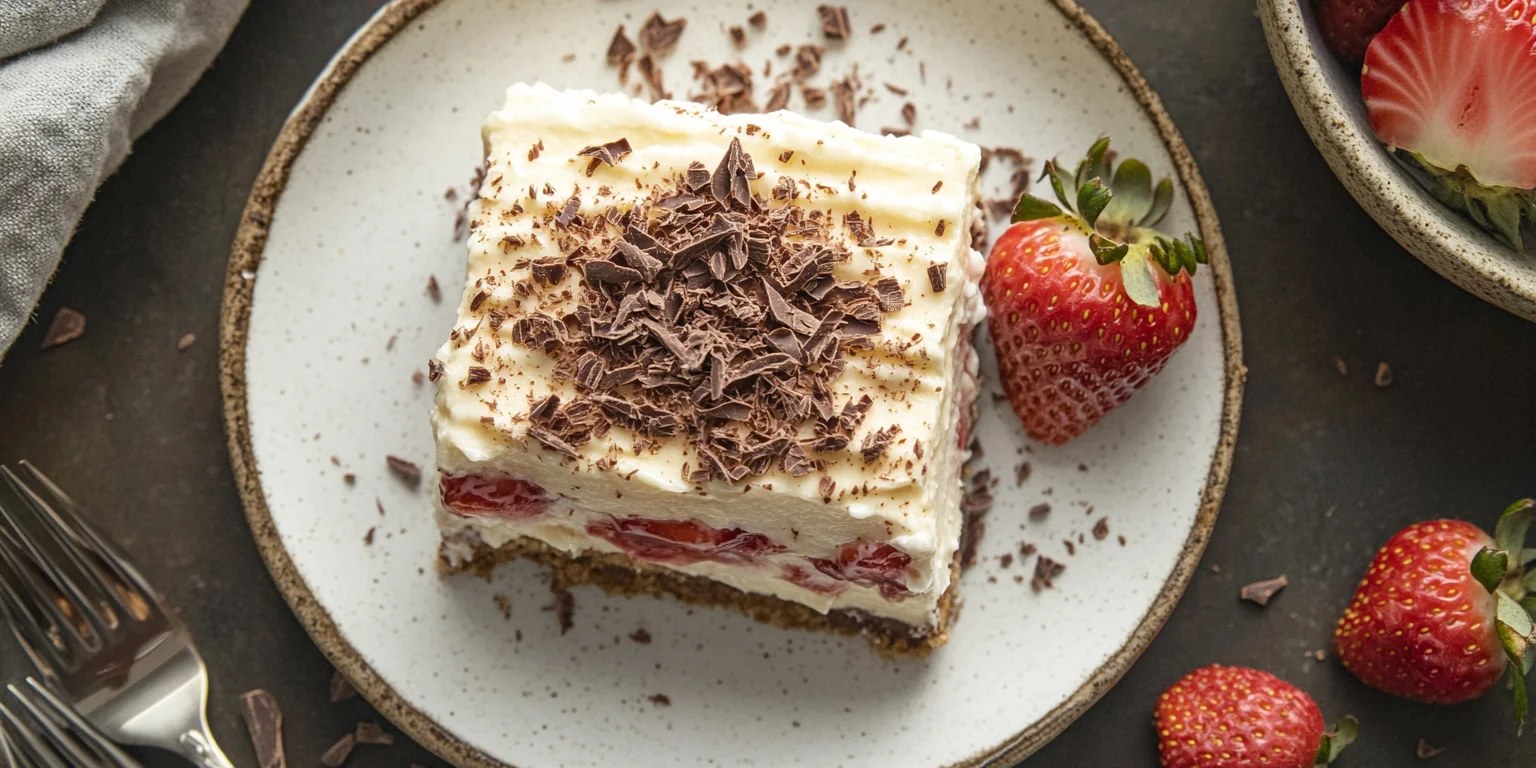



Have you ever tasted a dessert so creamy, indulgent, and utterly irresistible that it feels like a hug in every bite? Meet Brazilian pave dessert, a no-bake masterpiece that’s as easy to make as it is delicious. This traditional Brazilian treat layers buttery digestive biscuits with velvety custard made from condensed milk, egg yolks, and a hint of vanilla, creating a dessert that’s both luxurious and comforting.
Whether you’re hosting a dinner party or simply craving something sweet, this pave recipe is your ticket to impressing guests or treating yourself. Plus, it’s incredibly versatile—swap in chocolate, fruit, or even coffee for a twist on the classic. Ready to dive into the world of Brazilian sweets? Let’s create a dessert that’s as unforgettable as it is easy to make!
Why You Will Love Brazilian Pavê Dessert
If you’re looking for a dessert that’s equal parts impressive and easy to make, Brazilian pave dessert is your answer. This no-bake treat is a crowd-pleaser, perfect for both beginners and seasoned bakers. Here’s why you’ll love it:
- Irresistibly Creamy Texture: Layers of buttery digestive biscuits and rich custard create a melt-in-your-mouth experience that’s pure bliss.
- No-Bake Simplicity: Skip the oven! This recipe comes together with just a few simple steps and minimal effort.
- Versatile and Customizable: Love chocolate? Add cocoa powder to the custard. Prefer fruit? Layer in fresh berries or a fruit compote. The possibilities are endless!
- Perfect for Any Occasion: Whether it’s a holiday gathering, a dinner party, or a cozy night in, this dessert fits every occasion.
- Make-Ahead Magic: Assemble it ahead of time and let it chill in the fridge—perfect for stress-free entertaining.
Imagine slicing into a perfectly layered pave, each bite a harmonious blend of creamy custard and tender biscuits. It’s not just a dessert; it’s a celebration of flavors and textures that will leave everyone asking for seconds. Ready to get started? Let’s gather your ingredients and dive into this delicious journey!
Ingredients for Making Brazilian Pavê Dessert
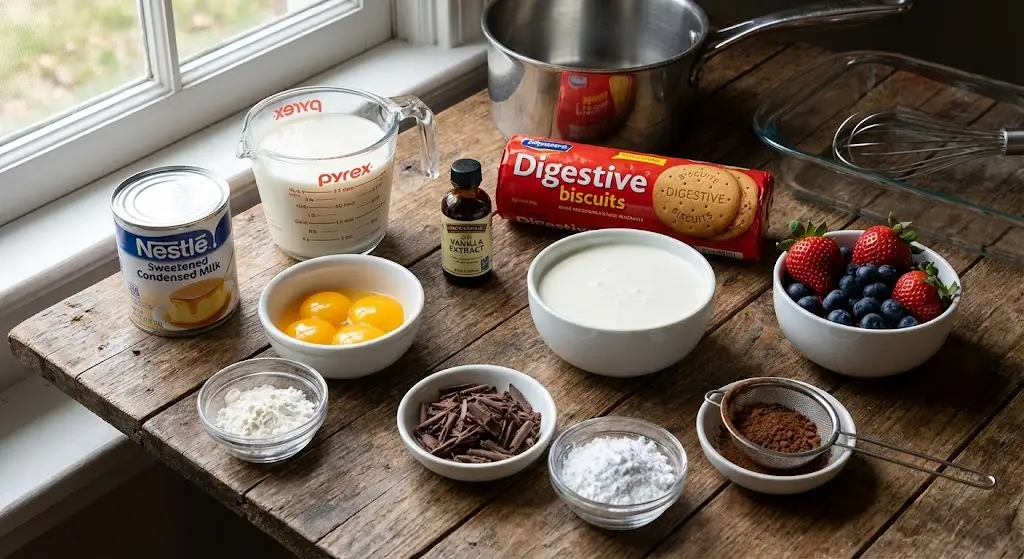
To create this delightful Brazilian pave dessert, you’ll need a handful of simple, high-quality ingredients. Here’s everything you’ll need to make this no-bake treat:
For the Custard
- 1 can (14 oz) sweetened condensed milk – The base of the creamy custard, adding richness and sweetness.
- 2 cups whole milk – For a smooth, velvety texture.
- 4 egg yolks – These give the custard its luxurious thickness.
- 2 tablespoons cornstarch – Helps thicken the custard to the perfect consistency.
- 1 teaspoon vanilla extract – Adds a warm, aromatic flavor.
For the Layers
- 1 package (200g) digestive biscuits or ladyfingers – These form the buttery, tender layers that soak up the custard.
- 1 cup heavy cream or whipping cream – For a light, fluffy topping.
- 2 tablespoons powdered sugar – To sweeten the whipped cream.
Optional Garnishes
- Chocolate shavings or cocoa powder – For a touch of elegance.
- Fresh berries or fruit compote – To add a fruity twist.
Pro Tip:
If you’re feeling adventurous, swap out the vanilla custard for a chocolate version by adding 2 tablespoons of cocoa powder to the custard mixture. It’s an easy way to customize this dessert to your taste!
Instructions for Making Brazilian Pavê Dessert
Ready to create your Brazilian pave dessert? Follow these easy, step-by-step instructions to assemble this no-bake treat like a pro. Don’t worry—it’s simpler than it looks, and the results are absolutely worth it!
Step 1: Prepare the Custard
- In a medium saucepan, whisk together the sweetened condensed milk, whole milk, egg yolks, and cornstarch until smooth.
- Place the saucepan over medium heat and cook, stirring constantly, until the mixture thickens into a creamy custard (about 8-10 minutes).
- Remove from heat and stir in the vanilla extract. Let the custard cool slightly while you prepare the other components.
Step 2: Assemble the Layers
- In a rectangular or square baking dish, spread a thin layer of custard to coat the bottom.
- Arrange a single layer of digestive biscuits or ladyfingers over the custard, breaking them into smaller pieces if needed to fit.
- Pour a generous layer of custard over the biscuits, ensuring they’re fully covered.
- Repeat the process, alternating between layers of biscuits and custard, until you’ve used up all the ingredients. Finish with a final layer of custard on top.
Step 3: Add the Whipped Cream Topping
- In a large bowl, whip the heavy cream and powdered sugar together until stiff peaks form.
- Spread the whipped cream evenly over the top layer of custard for a light, fluffy finish.
Step 4: Chill and Set
- Cover the dish with plastic wrap and refrigerate for at least 4 hours, or preferably overnight. This allows the biscuits to soften and the flavors to meld together beautifully.
Step 5: Garnish and Serve
- Before serving, sprinkle with chocolate shavings, cocoa powder, or fresh berries for an extra touch of elegance.
- Slice into squares or rectangles and enjoy your creamy, dreamy Brazilian pave dessert!
Pro Tip:
For a firmer texture, let the dessert sit at room temperature for 10-15 minutes before serving. This makes it easier to slice and enhances the flavors.
Pro Tips and Variations
Want to take your Brazilian pave dessert to the next level? Here are some expert tips and creative variations to make this recipe your own. Whether you’re a beginner or a seasoned baker, these ideas will help you customize and perfect your pave.
Pro Tips for Success
- Soak the Biscuits: For an extra tender texture, lightly dip the digestive biscuits or ladyfingers in milk before layering. This ensures they soften perfectly without becoming soggy.
- Chill Thoroughly: Patience is key! Let the dessert chill for at least 4 hours, or overnight, to allow the layers to set and the flavors to meld.
- Use High-Quality Ingredients: Since this dessert relies on simple ingredients, opt for high-quality vanilla extract and fresh dairy for the best flavor.
- Layer Evenly: Spread each layer of custard and biscuits evenly to ensure every bite is perfectly balanced.
- Avoid Overcooking the Custard: Stir constantly while cooking the custard to prevent lumps or curdling. It should coat the back of a spoon when done.
Creative Variations
- Chocolate Pave: Add 2 tablespoons of cocoa powder to the custard mixture for a rich, chocolatey twist. Top with chocolate shavings for extra decadence.
- Fruit-Infused Pave: Layer in fresh berries, sliced bananas, or a fruit compote between the custard and biscuits for a refreshing contrast.
- Coffee Pave: Mix 1-2 tablespoons of instant coffee or espresso powder into the custard for a mocha-inspired flavor.
- Nutty Crunch: Sprinkle crushed nuts like almonds, pistachios, or hazelnuts between the layers for added texture.
- Coconut Pave: Replace some of the milk with coconut milk and sprinkle toasted coconut flakes on top for a tropical vibe.
Make-Ahead Tip
This dessert is perfect for preparing in advance! Assemble it a day ahead and let it chill in the fridge until you’re ready to serve. It’s a lifesaver for busy hosts.
Serving Suggestions
Now that your Brazilian pave dessert is ready, it’s time to think about how to serve it in a way that wows your guests or makes your treat-yourself moment extra special. Here are some ideas to elevate your presentation and pairing game:
How to Serve
- Slice Neatly: Use a sharp knife dipped in hot water to cut clean, even slices. Wipe the knife between cuts for a polished look.
- Individual Portions: For a fancier touch, assemble the pave in individual glasses or jars. Layer the biscuits and custard in clear containers for a stunning visual effect.
- Family-Style: Serve the dessert directly from the baking dish for a cozy, communal vibe. Let everyone scoop out their own portion.
Garnishing Ideas
- Chocolate Shavings: Sprinkle dark or milk chocolate shavings on top for a touch of elegance.
- Fresh Berries: Add a pop of color with strawberries, raspberries, or blueberries.
- Mint Leaves: A few fresh mint leaves can make the dessert look fresh and inviting.
- Caramel Drizzle: Drizzle store-bought or homemade caramel sauce over the top for extra indulgence.
- Powdered Sugar: A light dusting of powdered sugar adds a classic, elegant finish.
Pairing Suggestions
- Coffee: Serve with a cup of strong Brazilian coffee or espresso to complement the creamy sweetness.
- Fruit Compote: Offer a side of tangy fruit compote (like passion fruit or mango) to balance the richness.
- Vanilla Ice Cream: Add a scoop of vanilla ice cream for an extra indulgent dessert experience.
Pro Tip:
If you’re serving this at a party, consider adding a small sign or note explaining what Brazilian pave is. It’s a great conversation starter and adds a personal touch to your presentation.
Decoration Tips
Want to make your Brazilian pave dessert as beautiful as it is delicious? Here are some creative and easy decoration ideas to turn your dessert into a show-stopping centerpiece. Whether you’re hosting a party or just want to impress your family, these tips will take your pave to the next level.
1. Elegant Toppings
- Chocolate Shavings: Use a vegetable peeler to create delicate curls from a bar of dark, milk, or white chocolate.
- Edible Flowers: Add a touch of sophistication with edible flowers like pansies or rose petals.
- Gold Leaf: For a luxurious touch, apply a small piece of edible gold leaf to the top of your dessert.
2. Layered Patterns
- Swirls and Drizzles: Use a spoon or piping bag to create swirls of whipped cream or chocolate sauce on top.
- Geometric Designs: Arrange sliced strawberries, kiwi, or other fruits in a geometric pattern for a modern look.
3. Themed Decor
- Festive Touches: For holidays, use themed sprinkles, colored whipped cream, or seasonal fruits like pomegranate seeds or cranberries.
- Tropical Vibes: Add toasted coconut flakes, pineapple slices, or mango chunks for a tropical-inspired pave.
4. Individual Servings
- Mini Mason Jars: Layer the pave in small mason jars for a cute, portable dessert. Top with a dollop of whipped cream and a sprinkle of cocoa powder.
- Glass Trifle Bowls: Use clear glass bowls to showcase the beautiful layers of your dessert.
5. Textured Finishes
- Dusting of Cocoa or Matcha: Use a fine sieve to dust cocoa powder or matcha over the top for a sleek, professional look.
- Crushed Nuts or Cookies: Sprinkle crushed pistachios, almonds, or cookie crumbs for added texture and flavor.
Pro Tip:
When decorating, remember that less is often more. Choose one or two elements to highlight, so the dessert doesn’t look overcrowded.
Tools and Equipment Guide
Having the right tools on hand can make preparing your Brazilian pave dessert a smooth and enjoyable experience. Here’s a list of essential kitchen equipment you’ll need, along with tips on how to use them effectively.
1. Mixing Bowls
- Purpose: For whisking the custard ingredients and whipping the cream.
- Tip: Use a large, sturdy bowl for the custard and a separate, chilled bowl for whipping cream to ensure it fluffs up perfectly.
2. Saucepan
- Purpose: To cook the custard on the stovetop.
- Tip: Choose a heavy-bottomed saucepan to prevent the custard from burning or sticking.
3. Whisk
- Purpose: To blend the custard ingredients smoothly and prevent lumps.
- Tip: Use a balloon whisk for even mixing and a silky custard texture.
4. Baking Dish
- Purpose: To assemble and chill the pave.
- Tip: A rectangular or square glass dish works best, as it allows you to see the beautiful layers.
5. Measuring Cups and Spoons
- Purpose: For accurately measuring ingredients like milk, cornstarch, and vanilla extract.
- Tip: Use liquid measuring cups for wet ingredients and dry measuring cups for powders like cornstarch.
6. Electric Mixer or Hand Whisk
- Purpose: To whip the heavy cream into stiff peaks for the topping.
- Tip: If using a hand whisk, chill the bowl and whisk beforehand for better results.
7. Spatula
- Purpose: To spread the custard and whipped cream layers evenly.
- Tip: A silicone spatula is ideal for scraping every bit of custard from the saucepan.
8. Knife
- Purpose: To slice the dessert neatly before serving.
- Tip: Dip the knife in hot water and wipe it clean between cuts for smooth, clean slices.
9. Plastic Wrap
- Purpose: To cover the dessert while it chills in the fridge.
- Tip: Press the wrap directly onto the surface of the custard to prevent a skin from forming.
10. Optional: Piping Bag
- Purpose: For decorative whipped cream swirls or toppings.
- Tip: If you don’t have a piping bag, use a resealable plastic bag with the corner snipped off.
Troubleshooting Common Issues
Even the most experienced bakers run into hiccups now and then. Don’t worry—here are some common issues you might encounter while making your Brazilian pave dessert, along with easy fixes to ensure your dessert turns out perfectly every time.
1. Custard is Too Thin
- Cause: The custard may not have been cooked long enough or the cornstarch wasn’t fully activated.
- Fix: Return the custard to the saucepan and cook it over low heat, stirring constantly, until it thickens. If needed, mix 1 tablespoon of cornstarch with 2 tablespoons of cold milk and whisk it into the custard.
2. Custard is Lumpy
- Cause: The eggs or cornstarch may have curdled due to high heat or uneven mixing.
- Fix: Strain the custard through a fine-mesh sieve to remove lumps. Whisk vigorously while reheating gently to smooth it out.
3. Biscuits are Too Hard
- Cause: The biscuits didn’t absorb enough moisture from the custard.
- Fix: Lightly dip the biscuits in milk before layering, or let the dessert chill longer (overnight is ideal) to soften the biscuits.
4. Whipped Cream Won’t Stiffen
- Cause: The cream may have been too warm, or the bowl wasn’t chilled.
- Fix: Chill the cream, bowl, and whisk in the fridge for 15-20 minutes before whipping. If it still doesn’t stiffen, add 1-2 tablespoons of powdered sugar to stabilize it.
5. Dessert is Too Sweet
- Cause: The condensed milk and biscuits can make the dessert overly sweet for some palates.
- Fix: Balance the sweetness by adding a layer of unsweetened whipped cream or a tangy fruit compote between the custard and biscuits.
6. Layers are Uneven
- Cause: The custard or biscuits may not have been spread evenly.
- Fix: Use a spatula to smooth each layer as you assemble the dessert. Take your time to ensure even distribution.
7. Dessert is Too Runny When Sliced
- Cause: It may not have chilled long enough, or the custard wasn’t thick enough.
- Fix: Let the dessert chill for at least 4 hours, or overnight, to set properly. If the custard is the issue, see the fix for thin custard above.
Pro Tip:
If you’re unsure about the custard’s consistency, do the “spoon test”: Dip a spoon into the custard and run your finger across the back. If the line holds, the custard is thick enough.
Pairing Suggestions
A great dessert deserves equally great companions! Whether you’re serving your Brazilian pave dessert at a dinner party or enjoying it as a sweet treat, here are some delightful pairing ideas to elevate the experience.
1. Beverage Pairings
- Brazilian Coffee: A strong cup of Brazilian coffee or espresso complements the creamy sweetness of the pave perfectly.
- Fruit-Infused Water: For a lighter option, serve with water infused with citrus slices or berries.
2. Fruit Accompaniments
- Fresh Berries: Strawberries, raspberries, or blueberries add a refreshing contrast to the creamy dessert.
- Tropical Fruits: Mango, pineapple, or passion fruit bring a tropical twist that pairs beautifully with the pave.
- Fruit Compote: A tangy fruit compote, like passion fruit or guava, adds a burst of flavor and balances the sweetness.
3. Ice Cream or Sorbet
- Vanilla Ice Cream: A scoop of creamy vanilla ice cream alongside the pave creates a decadent dessert duo.
- Citrus Sorbet: Lemon or lime sorbet adds a zesty, refreshing contrast to the rich custard.
4. Nuts and Crunchy Toppings
- Toasted Nuts: Almonds, pistachios, or hazelnuts add a delightful crunch and nutty flavor.
- Caramelized Coconut: Toasted coconut flakes provide a tropical crunch that pairs wonderfully with the pave.
5. Cheese Platter
- Soft Cheeses: Serve with a small cheese platter featuring creamy options like brie or mascarpone for a sophisticated dessert course.
Conclusion
There’s something truly magical about a dessert that’s both indulgent and easy to make, and the Brazilian pave dessert is exactly that. With its creamy custard, tender biscuit layers, and endless customization options, it’s a treat that’s sure to impress anyone who tries it. Whether you’re making it for a special occasion or simply to satisfy a sweet craving, this dessert is a celebration of flavor, texture, and tradition.
So, gather your ingredients, follow the steps, and don’t forget to add your own personal touch. Whether it’s a sprinkle of chocolate shavings, a drizzle of caramel, or a handful of fresh berries, your pave will be as unique as you are. And remember, the best part of cooking is sharing it with others—so slice, serve, and enjoy the smiles it brings!
FAQs
Got questions about making Brazilian pave dessert? Don’t worry—we’ve got you covered! Here are answers to some of the most common questions:
1. Can I make Brazilian pave ahead of time?
Absolutely! In fact, it’s better when made ahead. Assemble the dessert and let it chill in the fridge for at least 4 hours, or overnight, to allow the flavors to meld and the biscuits to soften.
2. Can I use something other than digestive biscuits?
Yes! Ladyfingers, graham crackers, or even sponge cake slices work well as alternatives. Just make sure they’re sturdy enough to hold the custard layers.
3. How long does Brazilian pave last in the fridge?
It stays fresh for up to 3 days when stored in an airtight container. Keep it refrigerated to maintain its texture and flavor.
4. Can I freeze Brazilian pave?
While it’s best enjoyed fresh, you can freeze it for up to 1 month. Thaw it in the fridge overnight before serving. Note that the texture of the custard may change slightly after freezing.
5. Is Brazilian pave gluten-free?
Not traditionally, but you can make it gluten-free by using gluten-free biscuits or cookies. Double-check that all other ingredients (like cornstarch) are gluten-free as well.
6. Can I make a vegan version of this dessert?
Yes! Use plant-based milk, vegan condensed milk, and egg substitutes like cornstarch or agar-agar for the custard. Opt for vegan biscuits and coconut cream for the topping.
7. Why is my custard lumpy?
Lumps usually form if the custard is cooked too quickly or not stirred enough. To fix it, strain the custard through a fine-mesh sieve and whisk it until smooth.
Brazilian Pavê Dessert
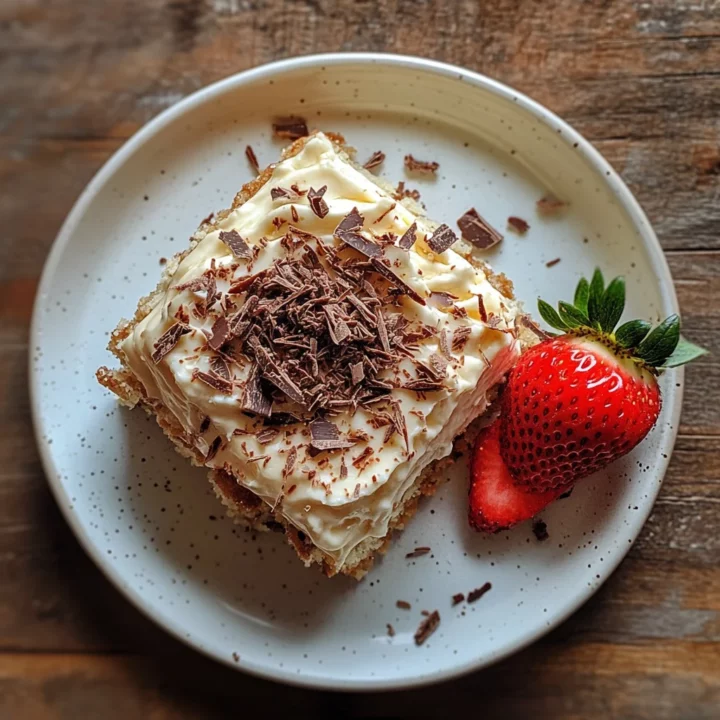
Indulge in this delicious Brazilian pavê, a no-bake layered dessert featuring digestive biscuits, creamy custard, and rich chocolate. Try this easy dessert recipe today!
Ingredients
Custard:
- 1 can (14 oz) sweetened condensed milk
- 2 cups whole milk
- 4 egg yolks
- 2 tablespoons cornstarch
- 1 teaspoon vanilla extract
Layers:
- 1 package (200g) digestive biscuits or ladyfingers
- 1 cup heavy cream or whipping cream
- 2 tablespoons powdered sugar
Optional Garnishes:
- Chocolate shavings, fresh berries, or cocoa powder
Instructions
- Prepare Custard: Whisk condensed milk, milk, egg yolks, and cornstarch in a saucepan. Cook over medium heat, stirring constantly, until thickened. Add vanilla and let cool.
- Assemble Layers: In a baking dish, layer custard and biscuits, repeating until all ingredients are used. Finish with a custard layer.
- Add Topping: Whip heavy cream and powdered sugar until stiff peaks form. Spread over the top layer of custard.
- Chill: Refrigerate for at least 4 hours or overnight.
- Serve: Garnish with chocolate shavings or berries, slice, and enjoy!
Notes
Pro Tips:
- For a firmer texture, chill overnight.
- Customize with chocolate, fruit, or coffee flavors.
- Use a hot knife for clean slices.
Nutrition Information:
Yield: 8 Serving Size: 1Amount Per Serving: Calories: 320Total Fat: 15gSaturated Fat: 8gCholesterol: 120mgSodium: 150mgCarbohydrates: 40gSugar: 30gProtein: 7g