




Hey there, fellow food lover! Have you ever found yourself craving that perfect, gooey caramel that just melts in your mouth? I know I have, and that’s why I’m so excited to share my favorite homemade dulce de leche recipe with you today. You know, the kind that’s perfect for drizzling over ice cream, spreading on toast, or even using as a cake filling.
I remember the first time I made dulce de leche at home. It was a game-changer! Not only is it incredibly easy to make, but it also tastes so much better than anything you can buy in the store. Plus, it’s a great way to save a bit of money while indulging in a sweet treat. And the best part? You can customize it to your heart’s content. Want a hint of vanilla or a touch of cinnamon? No problem!
Whether you’re a seasoned chef or a beginner in the kitchen, this recipe is for you. It’s versatile, delicious, and sure to become a staple in your dessert arsenal. So, let’s dive in and discover how simple it is to create this heavenly caramel at home. Trust me, once you try it, you’ll wonder why you ever bought the store-bought stuff!
Key Benefits of Making Your Own Dulce de Leche
Hey there! I know you’re excited to dive into this delicious dulce de leche recipe, and I’m thrilled to guide you through it. But first, let’s talk about why making your own dulce de leche at home is such a fantastic idea.
-
It’s Surprisingly Easy: You might be thinking, “How complicated can it be to make caramel?” Well, the answer is: not complicated at all! With just a few simple ingredients and some patience, you’ll have a jar of heavenly dulce de leche ready to enjoy.
-
Customizable to Your Taste: One of the best things about making dulce de leche at home is that you can tailor it to your preferences. Want it a bit sweeter? Add a little more sugar. Prefer a hint of spice? Throw in some cinnamon. The possibilities are endless!
-
Versatile and Versatile: Dulce de leche isn’t just for ice cream toppings. It’s perfect for spreading on toast, drizzling over fruit, or even using as a filling in cakes and pastries. The more you experiment, the more you’ll discover how versatile this caramel can be.
-
Healthier Option: Store-bought dulce de leche often contains preservatives and artificial ingredients. By making it at home, you have full control over what goes into your caramel, ensuring it’s as natural and delicious as possible.
-
Cost-Effective: Another great benefit of making your own dulce de leche is that it’s much cheaper than buying it from the store. With just a few basic ingredients, you can create a large batch that will last you for weeks.
So, are you ready to embark on this sweet journey? Let’s get started and turn your kitchen into a caramel-making haven!
Ingredients
Alright, let’s get down to the nitty-gritty of making this delicious dulce de leche. First things first: the ingredients. The beauty of this recipe is that you probably already have everything you need in your pantry. Here’s what you’ll need:
Ingredients:
-
1 can (14 oz) sweetened condensed milk
This is the star of the show! Make sure it’s unopened. -
Optional flavorings:
-
A pinch of cinnamon for a warm, spicy twist.
-
A teaspoon of vanilla extract for a classic, aromatic finish.
-
Why These Ingredients?
-
Sweetened Condensed Milk: This is the base of our dulce de leche. It’s already sweet and thick, making it perfect for caramelizing.
-
Cinnamon and Vanilla: These are optional but highly recommended. They add depth and complexity to the flavor, making your dulce de leche even more irresistible.
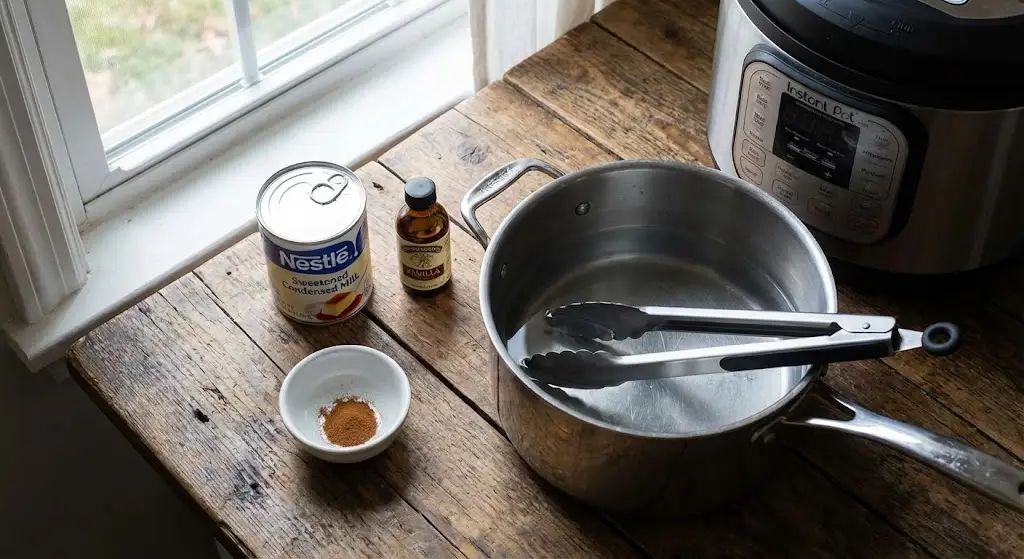
Instructions
Now that you have your ingredients ready, let’s dive into the fun part: making the dulce de leche. I’ll walk you through two methods: the stovetop method and the Instant Pot method. Choose the one that suits you best!
Stovetop Method:
-
Prepare the Can:
-
Place the unopened can of sweetened condensed milk in a large pot.
-
Fill the pot with water, ensuring the can is fully submerged. The water level should be at least 1 inch above the can.
-
-
Simmer:
-
Bring the water to a boil over high heat.
-
Once boiling, reduce the heat to low and let it simmer for 2 to 3 hours.
-
Important: Keep an eye on the water level and add more boiling water as needed to ensure the can remains submerged. This prevents the can from exploding.
-
-
Cool and Open:
-
After 2 to 3 hours, carefully remove the can from the pot using tongs.
-
Let it cool completely.
-
Once cooled, open the can and voilà! Your homemade dulce de leche is ready.
-
Instant Pot Method:
-
Prepare the Can:
-
Place the unopened can of sweetened condensed milk in the Instant Pot.
-
Add enough water to submerge the can completely.
-
-
Pressure Cook:
-
Close the lid and set the valve to the sealing position.
-
Pressure cook on high for 45 minutes.
-
Once done, let the pressure release naturally for 10 minutes, then carefully turn the valve to the venting position to release any remaining pressure.
-
-
Cool and Open:
-
Carefully remove the can using tongs.
-
Let it cool completely before opening.
-
Enjoy your perfectly caramelized dulce de leche!
-
Pro Tips and Variations
-
Safety First: Always handle the can with care, especially when it’s hot. The pressure inside the can can be dangerous if not handled properly.
-
Flavor Boost: For an extra touch, add a pinch of cinnamon or a teaspoon of vanilla extract to the dulce de leche after it’s cooked.
-
Experiment with Thickness: If you prefer a thicker consistency, simmer the dulce de leche for a bit longer. For a thinner consistency, add a splash of milk and heat until it reaches your desired thickness.
Pro Tips and Variations
Hey there! Now that you’ve got the basics down, let’s dive into some pro tips and fun variations to take your dulce de leche game to the next level. These little tweaks can make a big difference, and they’re super easy to implement.
Pro Tips:
-
Safety First: Always handle the can with care, especially when it’s hot. The pressure inside the can can be dangerous if not handled properly. Use tongs to avoid burns.
-
Monitor Water Levels: If you’re using the stovetop method, keep an eye on the water level. Ensure the can remains submerged at all times to prevent it from exploding.
-
Cool Completely: Let the can cool completely before opening. This helps prevent burns and ensures the dulce de leche sets properly.
-
Flavor Boost: For an extra touch, add a pinch of cinnamon or a teaspoon of vanilla extract to the dulce de leche after it’s cooked. This adds depth and complexity to the flavor.
-
Experiment with Thickness: If you prefer a thicker consistency, simmer the dulce de leche for a bit longer. For a thinner consistency, add a splash of milk and heat until it reaches your desired thickness.
Fun Variations:
-
Salted Caramel: Add a pinch of sea salt to the dulce de leche for a delightful balance of sweet and salty flavors.
-
Spiced Dulce de Leche: Add a pinch of ground nutmeg or cardamom for a warm, aromatic twist.
-
Chocolate Dulce de Leche: Stir in a few tablespoons of unsweetened cocoa powder for a rich, chocolatey caramel.
-
Coconut Dulce de Leche: Use coconut milk instead of regular milk for a tropical twist, perfect for summer desserts.
-
Pumpkin Spice Dulce de Leche: Add pumpkin pie spice and a bit of pumpkin puree for a fall-inspired treat.
Serving Suggestions
-
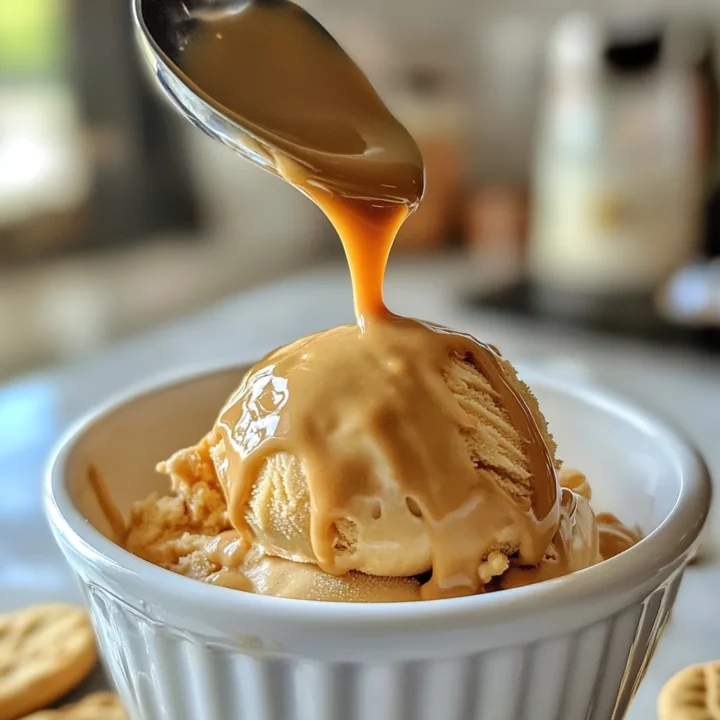
Ice Cream Topping: Drizzle it over vanilla or chocolate ice cream for an instant upgrade.
-
Toast or Biscuits: Spread it on warm toast or biscuits for a sweet breakfast treat.
-
Cake or Pastry Filling: Use it as a filling for cakes, pastries, or even crepes.
-
Hot Chocolate: Stir a spoonful into your hot chocolate for a caramel twist.
-
Fruit: Drizzle it over fresh fruit like apples, pears, or strawberries for a healthy yet indulgent dessert.
-
Yogurt: Mix it into plain yogurt for a sweet and creamy snack.
-
Coffee: Add a spoonful to your morning coffee for a caramel latte without the extra calories.
Tools and Equipment Guide
-
Large Pot: For the stovetop method, you’ll need a large pot to submerge the can of sweetened condensed milk.
-
Instant Pot: If you prefer the Instant Pot method, a pressure cooker is a must-have.
-
Tongs: Use tongs to safely handle the hot can of sweetened condensed milk.
-
Thermometer (Optional): If you’re making dulce de leche from scratch, a thermometer can help you monitor the temperature and ensure it caramelizes perfectly.
-
Mixing Spoon: For stirring in any additional flavors like cinnamon or vanilla extract.
Seasonal Variations
-
Spring: Add a splash of lemon juice and a bit of lemon zest for a bright, citrusy twist.
-
Summer: Use coconut milk instead of regular milk for a tropical, beach-inspired flavor.
-
Fall: Incorporate pumpkin pie spice and a bit of pumpkin puree for a cozy, autumnal treat.
-
Winter: Add a splash of peppermint extract and some crushed peppermint candies for a festive, holiday-inspired flavor.
Troubleshooting Common Issues
-
Can Explodes: Ensure the can is fully submerged in water at all times. Keep an eye on the water level and add more boiling water as needed.
-
Too Thick: If your dulce de leche is too thick, add a bit of milk and simmer until it reaches your desired consistency.
-
Too Thin: If it’s too thin, simmer it for a bit longer to thicken it up.
-
Burnt Caramel: If you notice the caramel starting to burn, reduce the heat and stir more frequently.
Pairing Suggestions
-
Graham Crackers: Pair with graham crackers for a classic s’mores-inspired treat.
-
Cookies: Serve with shortbread or gingersnap cookies for a delightful combination.
-
Fruit: Pair with fresh fruit like apples, pears, or strawberries for a healthy yet indulgent dessert.
-
Cheese: Drizzle over a wedge of aged cheddar or gouda for a sweet and savory pairing.
Conclusion
And there you have it! Making your own dulce de leche at home is not only easy but also incredibly rewarding. Whether you’re using it as a topping, a filling, or a spread, this homemade caramel is sure to become a staple in your kitchen. I hope these tips and variations inspire you to get creative and enjoy the process. Happy cooking, and enjoy every spoonful!
FAQs
-
How long does homemade dulce de leche last?
Homemade dulce de leche can last up to 2 weeks in the refrigerator. Store it in an airtight container to keep it fresh. -
Can I freeze dulce de leche?
Yes, you can freeze dulce de leche. Transfer it to an airtight container and freeze for up to 3 months. Thaw in the refrigerator before using. -
What if I don’t have an Instant Pot?
No problem! The stovetop method works just as well. Just make sure to keep an eye on the water level. -
How do I know when it’s done?
For the stovetop method, 2 to 3 hours should do the trick. For the Instant Pot, 45 minutes is usually perfect. If you’re making it from scratch, use a thermometer to monitor the temperature until it reaches a caramelized consistency.
Feel free to reach out if you have any more questions or need further guidance. Enjoy your cooking journey!
Dulce de Leche
Discover the rich, creamy goodness of homemade dulce de leche! This easy recipe uses just sweetened condensed milk to create a delightful dessert perfect for any occasion.
Ingredients
- 1 can (14 oz) sweetened condensed milk
Optional flavorings:
- A pinch of cinnamon
- A teaspoon of vanilla extract
Instructions
Stovetop Method:
Prepare the Can:
- Place the unopened can of sweetened condensed milk in a large pot.
- Fill the pot with water, ensuring the can is fully submerged. The water level should be at least 1 inch above the can.
Simmer:
- Bring the water to a boil over high heat.
- Once boiling, reduce the heat to low and let it simmer for 2 to 3 hours.
- Important: Keep an eye on the water level and add more boiling water as needed to ensure the can remains submerged. This prevents the can from exploding.
Cool and Open:
- After 2 to 3 hours, carefully remove the can from the pot using tongs.
- Let it cool completely.
- Once cooled, open the can and voilà! Your homemade dulce de leche is ready.
Instant Pot Method:
Prepare the Can:
- Place the unopened can of sweetened condensed milk in the Instant Pot.
- Add enough water to submerge the can completely.
Pressure Cook:
- Close the lid and set the valve to the sealing position.
- Pressure cook on high for 45 minutes.
- Once done, let the pressure release naturally for 10 minutes, then carefully turn the valve to the venting position to release any remaining pressure.
Cool and Open:
- Carefully remove the can using tongs.
- Let it cool completely before opening.
Notes
Pro Tips and Variations:
- Safety First: Always handle the can with care, especially when it’s hot. The pressure inside the can can be dangerous if not handled properly.
- Flavor Boost: For an extra touch, add a pinch of cinnamon or a teaspoon of vanilla extract to the dulce de leche after it’s cooked.
- Experiment with Thickness: If you prefer a thicker consistency, simmer the dulce de leche for a bit longer. For a thinner consistency, add a splash of milk and heat until it reaches your desired thickness.
Nutrition Information:
Yield: 6 Serving Size: 1Amount Per Serving: Calories: 200Total Fat: 5gSodium: 70mgCarbohydrates: 38gSugar: 36gProtein: 4g