




There’s something incredibly satisfying about a creamy frozen dessert that’s both effortless to make and irresistible to serve. If you love the rich flavor of peanuts and the smooth sweetness of ice cream, this Peanutty Ice Cream Pie might just become your new favorite treat. Imagine a crunchy peanut crust filled with a velvety blend of vanilla ice cream and peanut butter, all frozen into a sliceable, melt-in-your-mouth dessert that’s perfect for warm days, celebrations, or whenever you crave something indulgent.
The best part? This is a no-bake ice cream pie, meaning you can create a stunning dessert without turning on the oven. Whether you’re planning a summer gathering, looking for an easy make-ahead dessert, or simply want a fun twist on classic peanut butter treats, this recipe delivers both flavor and convenience. With a balance of sweet, nutty, and creamy textures, every slice feels like a special occasion.
Key Benefits & Why You’ll Love This Peanutty Ice Cream Pie
If you’re searching for a dessert that feels impressive but requires very little effort, this Peanutty Ice Cream Pie checks every box. It combines the comforting flavor of peanut butter desserts with the cool creaminess of a frozen ice cream pie, creating a treat that’s both simple and crowd-pleasing.
Here’s why this recipe deserves a spot in your dessert rotation.
1. A No-Bake Dessert That Saves Time
One of the biggest advantages of this recipe is that it’s a no-bake ice cream pie, meaning you can skip the oven entirely.
That makes it perfect for:
- Warm summer days when you want to keep the kitchen cool
- Busy weeks when you need a quick freezer dessert
- Last-minute gatherings where you want something impressive without the stress
Once the crust is pressed into the pie plate, the rest of the recipe comes together with simple mixing and freezing.
2. Perfect for Peanut Butter Lovers
If you adore peanut butter desserts, this pie delivers a rich and satisfying flavor in every bite.
The recipe layers nutty goodness in several ways:
- A crunchy peanut crust made with chopped peanuts, butter, and sugar
- A creamy filling blended with peanut butter and vanilla ice cream
- Extra peanuts and coconut for texture and depth
The result is a delicious balance of sweet, creamy, and slightly salty flavors that keeps every slice interesting.
3. A Make-Ahead Dessert for Easy Entertaining
This recipe is ideal when you need a make-ahead frozen dessert.
Because it freezes for several hours before serving, you can prepare it:
- The night before a party
- Earlier in the day for a dinner gathering
- Even several days ahead for stress-free entertaining
When it’s time to serve, simply slice and enjoy. No last-minute preparation required.
4. A Texture Lover’s Dream
Great desserts aren’t just about flavor—they’re about texture too. This pie delivers a satisfying contrast in every bite:
- Crunchy peanut crust
- Smooth and creamy ice cream filling
- Optional candy-coated chocolate pieces for a fun, colorful topping
That combination makes each slice both indulgent and exciting.
5. Beginner-Friendly and Foolproof
Even if you rarely make desserts, this recipe is incredibly approachable. There’s no complicated baking technique—just simple steps that anyone can follow.
You’ll mainly be:
- Mixing ingredients in a bowl
- Pressing a crust into a pie plate
- Folding everything together
- Freezing the pie until firm
Because of its simplicity, this easy ice cream pie recipe is also a fantastic option to make with kids or beginner cooks.
6. A Versatile Dessert for Any Occasion
This peanut ice cream pie works for almost any celebration.
It’s perfect for:
- Summer barbecues
- Birthday parties
- Family gatherings
- Casual weekend treats
And since it’s served frozen, it’s refreshing and satisfying—especially after a big meal.
Once you taste the creamy peanut filling paired with the crunchy crust, you’ll understand why this homemade ice cream pie quickly becomes a repeat favorite.
Ingredients
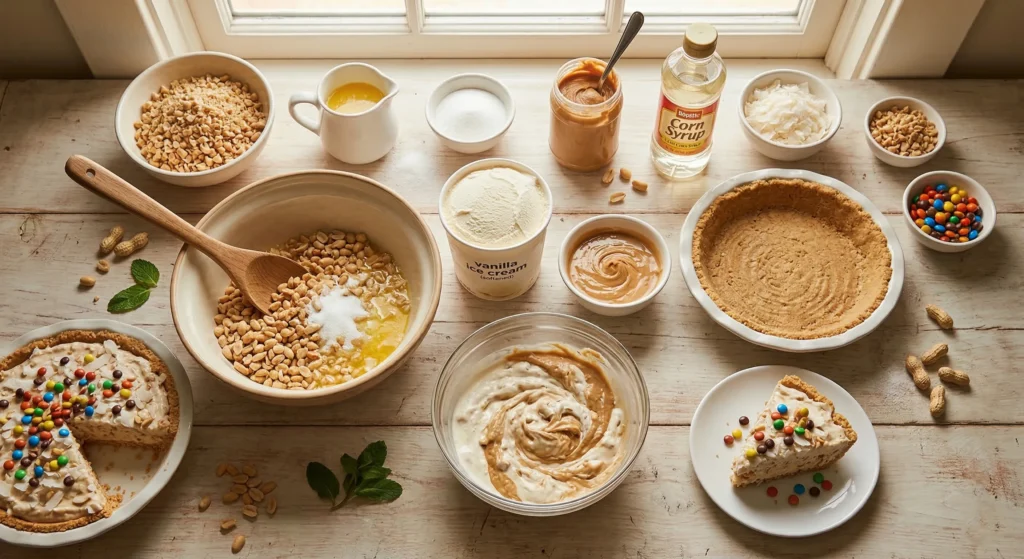
One of the reasons this Peanutty Ice Cream Pie is so easy to make is its short, simple ingredient list. Each component plays an important role in creating the perfect balance of creamy ice cream filling, nutty flavor, and crunchy pie crust texture.
Below is everything you’ll need to build this delicious no-bake frozen dessert.
For the Crunchy Peanut Crust
This crust adds a rich, nutty base that perfectly supports the creamy filling.
- 1⅓ cups finely chopped peanuts – These create the structure and crunch for the crust. Roasted peanuts work best for a deeper flavor.
- 3 tablespoons melted butter – Helps bind the crust together so it holds its shape when sliced.
- 2 tablespoons white sugar – Adds a touch of sweetness and helps the crust set when chilled.
For the Creamy Peanut Ice Cream Filling
This layer is where the magic happens—smooth, rich, and packed with peanut flavor.
- ¼ cup peanut butter – Adds creamy texture and that unmistakable peanut butter taste.
- ¼ cup light corn syrup – Provides sweetness and helps keep the filling smooth when frozen.
- ¼ cup flaked coconut – Adds subtle sweetness and a pleasant chewy texture.
- 3 tablespoons chopped peanuts – Enhances the nutty flavor and adds a bit of crunch inside the filling.
- 1 quart vanilla ice cream, softened – The creamy base of the pie that ties all the flavors together.
Optional Topping for Extra Fun
- ¼ cup mini candy-coated chocolate pieces – A colorful finishing touch that adds a little chocolate crunch and visual appeal.
Instructions
Making this Peanutty Ice Cream Pie is wonderfully simple. With just a few easy steps, you’ll create a creamy frozen dessert with a crunchy peanut crust and a smooth peanut butter ice cream filling. Take your time with each step, and you’ll end up with a perfectly sliceable homemade ice cream pie.
Step 1: Prepare the Pie Plate
Start by lightly greasing a 9-inch pie plate.
This small step helps prevent the crust from sticking and makes it much easier to remove clean slices once the pie is frozen.
Step 2: Make the Crunchy Peanut Crust
In a medium mixing bowl, combine the crust ingredients:
- 1⅓ cups finely chopped peanuts
- 3 tablespoons melted butter
- 2 tablespoons white sugar
Stir everything together until the mixture is evenly coated and slightly sticky.
Next:
- Transfer the mixture into the prepared pie plate.
- Press it firmly across the bottom and up the sides of the plate.
- Use the back of a spoon or the bottom of a measuring cup to compact the crust.
Once the crust is shaped, cover the pie plate and refrigerate for about 15 minutes so it can firm up before adding the filling.
Step 3: Prepare the Peanut Butter Filling
In a large mixing bowl, combine:
- ¼ cup peanut butter
- ¼ cup light corn syrup
Stir until the mixture becomes smooth and fully blended.
Then add:
- ¼ cup flaked coconut
- 3 tablespoons chopped peanuts
Mix again until everything is evenly distributed. This creates a rich base for the peanut ice cream filling.
Step 4: Fold in the Ice Cream
Add the softened vanilla ice cream to the bowl.
Gently stir the ice cream into the peanut mixture until just combined. Be careful not to overmix—you want the filling to stay thick and creamy.
Once combined, spoon the mixture into the chilled peanut crust and smooth the top evenly with a spatula.
Step 5: Freeze Until Firm
Cover the pie with plastic wrap or foil and place it in the freezer.
Allow the pie to freeze for at least 8 hours or overnight so it becomes fully firm and easy to slice.
This freezing step is what transforms the mixture into a perfectly structured frozen peanut butter dessert.
Step 6: Add the Final Topping
Just before serving, sprinkle the top with mini candy-coated chocolate pieces if you’d like an extra touch of color and crunch.
Then slice, serve, and enjoy your refreshing Peanutty Ice Cream Pie.
Pro Tips and Variations
Once you’ve mastered the basics of this Peanutty Ice Cream Pie, a few small tweaks can make it even better. These helpful tips will ensure your no-bake ice cream pie turns out perfectly every time, while the variations allow you to customize the flavor to suit your taste or occasion.
Pro Tips for the Best Results
- Soften the Ice Cream Just Right
For a smooth creamy ice cream filling, let the vanilla ice cream sit at room temperature for about 5–10 minutes before mixing. It should be soft enough to stir easily but not melted. This keeps the filling thick and prevents ice crystals from forming. - Press the Crust Firmly
A well-packed crust makes slicing much easier later. When forming the crunchy peanut crust, press the mixture tightly into the pie plate using the bottom of a glass or measuring cup. This helps the crust hold together after freezing. - Chill the Crust Before Filling
Refrigerating the crust for about 15 minutes allows the butter to firm up, helping the base stay stable when you add the filling. - Freeze the Pie Completely
For clean slices and the best texture, allow the pie to freeze at least 8 hours or overnight. A fully frozen ice cream pie dessert holds its shape beautifully when served. - Warm the Knife for Perfect Slices
Run a sharp knife under warm water and wipe it dry before cutting. This simple trick helps you slice through the frozen peanut dessert smoothly.
Easy Flavor Variations
This recipe is flexible, so feel free to experiment with new flavors while keeping the same simple method.
Chocolate Peanut Ice Cream Pie
- Use chocolate ice cream instead of vanilla for a deeper, richer flavor.
- Add a drizzle of chocolate syrup before freezing.
Peanut Butter Cup Version
- Mix chopped peanut butter cups into the filling.
- Sprinkle extra pieces on top before serving.
Crunchy Candy Variation
- Replace the mini candy-coated chocolate pieces with:
- crushed chocolate cookies
- toffee bits
- chopped chocolate bars
Tropical Twist
- Increase the coconut slightly and add a handful of toasted coconut flakes on top for a subtle tropical flavor.
Nut Mix Crust
- For a more complex nutty base, combine peanuts with:
- almonds
- cashews
- pecans
This adds extra depth to the crust while keeping the same homemade ice cream pie structure.
Serving & Pairing Suggestions
Once your Peanutty Ice Cream Pie is perfectly frozen and ready to serve, the fun really begins. This creamy frozen dessert pie is already rich and satisfying on its own, but a few thoughtful serving touches can make it feel even more special—whether you’re hosting guests or enjoying a simple family treat.
How to Serve the Pie Perfectly
Because this is a frozen ice cream pie, a little preparation before slicing will give you the best texture and presentation.
Follow these quick steps:
- Let the pie sit at room temperature for 3–5 minutes before slicing. This softens it slightly and makes cutting easier.
- Use a sharp knife dipped in warm water, wiping it clean between slices for neat cuts.
- Serve each slice immediately to keep the creamy ice cream filling firm and smooth.
For gatherings, you can pre-slice the pie and return it to the freezer so guests can grab a piece whenever they like.
Delicious Topping Ideas
A few toppings can enhance the peanut butter ice cream pie while adding extra texture and visual appeal.
Try adding:
- Warm chocolate drizzle for a classic peanut-and-chocolate pairing
- Whipped cream for an airy contrast to the dense frozen filling
- Crushed peanuts for extra crunch and nutty flavor
- Caramel sauce to add rich sweetness
- Chocolate shavings or curls for an elegant finish
These simple additions can transform a slice into a beautiful party dessert.
Perfect Pairings for This Dessert
Since this pie is rich and creamy, pairing it with lighter flavors helps balance the overall experience.
Great pairings include:
Hot beverages
- Fresh coffee
- Espresso
- Cappuccino
Cold drinks
- Iced coffee
- Cold brew
- Milk or chocolate milk
The slight bitterness of coffee pairs especially well with the sweet, nutty flavors of this peanut dessert recipe.
Occasions Where This Pie Shines
This make-ahead frozen dessert fits beautifully into many different occasions:
- Summer barbecues
- Birthday parties
- Family dinners
- Holiday dessert tables
- Casual weekend treats
Because it’s prepared in advance and served straight from the freezer, it’s one of the easiest desserts to include when entertaining.
With its creamy texture, crunchy peanut crust, and refreshing cold filling, this homemade ice cream pie always feels like a celebration on a plate.
Tools and Equipment Guide
One of the best things about making this Peanutty Ice Cream Pie is that you don’t need any complicated kitchen gear. This easy no-bake dessert relies on simple tools most home cooks already have, making the process smooth and beginner-friendly.
Below are the essential tools that will help you prepare your homemade ice cream pie with ease.
Essential Tools You’ll Need
9-inch Pie Plate:
This is the foundation of the recipe. A standard pie plate gives the crust its shape and helps the pie freeze evenly. Glass or ceramic pie plates work particularly well because they hold the cold temperature nicely.
Mixing Bowls:
You’ll need:
- One medium bowl for the peanut crust mixture
- One large bowl for mixing the peanut butter ice cream filling
Using separate bowls keeps the preparation organized and easy to manage.
Measuring Cups and Spoons:
Accurate measurements help ensure the peanut crust holds together and the filling stays perfectly balanced in sweetness and texture.
Rubber Spatula or Mixing Spoon:
A spatula works best when folding the softened vanilla ice cream into the peanut mixture. It allows you to combine everything gently without melting the ice cream too quickly.
Measuring Cup or Flat Glass:
This is a helpful trick many home bakers use. Pressing the crust mixture with the bottom of a measuring cup helps create a firm, even base that slices neatly after freezing.
Helpful Optional Tools
These aren’t required, but they can make the process even easier.
Food Processor:
If your peanuts aren’t already finely chopped, a quick pulse in a food processor creates a consistent texture for the crust.
Plastic Wrap or Foil:
Used to cover the pie while it freezes, protecting the frozen dessert pie from absorbing freezer odors.
Sharp Chef’s Knife:
A sturdy knife makes cutting through the frozen pie much easier.
Troubleshooting Common Issues
Even though this Peanutty Ice Cream Pie is a simple no-bake frozen dessert, a few small challenges can occasionally pop up. Don’t worry—most of them are easy to fix with a few practical tips. Here’s how to solve the most common issues so your homemade ice cream pie turns out perfectly every time.
The Pie Is Too Hard to Slice
Because this is a frozen ice cream pie, it can sometimes freeze very firm.
How to fix it:
- Let the pie sit at room temperature for 3–5 minutes before slicing.
- Run a sharp knife under warm water, dry it, and then cut.
- Clean the knife between slices for neat presentation.
This small step makes serving much easier while keeping the creamy peanut ice cream filling intact.
The Peanut Crust Is Crumbling
If your crunchy peanut crust breaks apart when slicing, it usually means it wasn’t pressed firmly enough or didn’t chill long enough.
Solutions:
- Press the crust firmly into the pie plate using the bottom of a measuring cup.
- Make sure the crust refrigerates for at least 15 minutes before adding the filling.
- Finely chop the peanuts so the crust binds together more easily.
A well-compacted crust will hold together beautifully when frozen.
The Filling Looks Too Soft
If the filling seems loose when assembling the pie, the ice cream may have melted too much.
How to fix it:
- Use softened ice cream, not melted ice cream.
- Work quickly when mixing the filling ingredients.
- Place the pie in the freezer immediately after assembling.
This helps maintain the structure of the peanut butter ice cream pie filling.
The Pie Sticks to the Plate
Sometimes frozen desserts cling to the pie plate when serving.
Easy solution:
- Lightly grease the pie plate before pressing in the crust.
- If needed, run a thin knife gently around the edge before removing slices.
This ensures clean slices and easy serving.
Ice Crystals Form on the Pie
Ice crystals can develop if the pie isn’t stored properly in the freezer.
Prevention tips:
- Always cover the pie tightly with plastic wrap or foil.
- Store it toward the back of the freezer, where temperatures stay more stable.
- Avoid repeatedly thawing and refreezing the pie.
Proper storage keeps the frozen peanut dessert creamy and smooth.
FAQs
When making a Peanutty Ice Cream Pie, a few common questions often come up—especially if this is your first time preparing a no-bake ice cream pie. Here are helpful answers to make the process even easier and ensure your frozen peanut butter dessert turns out perfectly.
Peanutty Ice Cream Pie
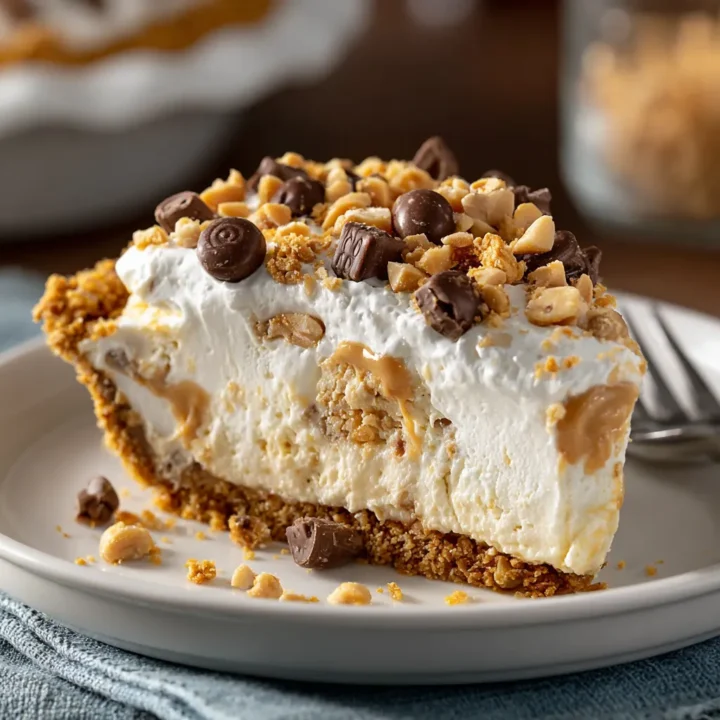
This Peanutty Ice Cream Pie is a delightful no-bake frozen dessert that combines crunchy peanuts, creamy peanut butter, and smooth vanilla ice cream into one irresistible treat. It’s a simple make-ahead dessert that’s perfect for warm days, family gatherings, or whenever you want a cool and satisfying peanut butter dessert.
Ingredients
For the Peanut Crust:
- 1⅓ cups finely chopped peanuts
- 3 tablespoons butter, melted
- 2 tablespoons white sugar
For the Peanut Ice Cream Filling:
- ¼ cup peanut butter
- ¼ cup light corn syrup
- ¼ cup flaked coconut
- 3 tablespoons chopped peanuts
- 1 quart vanilla ice cream, softened
Optional Topping:
- ¼ cup mini candy-coated chocolate pieces
Instructions
1. Prepare the Pie Plate
Lightly grease a 9-inch pie plate to prevent sticking and ensure easy slicing later.
2. Make the Peanut Crust
In a mixing bowl, combine:
- finely chopped peanuts
- melted butter
- sugar
Mix until well combined. Press the mixture firmly into the bottom and sides of the prepared pie plate to form a crust.
Place the crust in the refrigerator and chill for 15 minutes.
3. Prepare the Peanut Filling
In a large bowl, stir together:
- peanut butter
- light corn syrup
Mix until smooth.
Add:
- flaked coconut
- chopped peanuts
Stir until evenly combined.
4. Add the Ice Cream
Fold the softened vanilla ice cream into the peanut mixture. Stir gently until everything is just combined and creamy.
5. Assemble the Pie
Spoon the ice cream mixture into the chilled peanut crust. Spread evenly with a spatula to smooth the top.
6. Freeze the Pie
Cover the pie with plastic wrap or foil and freeze for at least 8 hours or overnight, until fully firm.
7. Add Topping and Serve
Before serving, sprinkle the top with mini candy-coated chocolate pieces if desired.
Slice and enjoy your refreshing Peanutty Ice Cream Pie.
Notes
Soften Ice Cream Properly: Allow the ice cream to soften for about 5–10 minutes before mixing. It should be soft enough to stir but not melted.
Press the Crust Firmly: Compact the crust well using the bottom of a measuring cup. This helps the crust hold together when slicing.
Slice Like a Pro: Run a knife under warm water and dry it before cutting. This makes slicing the frozen pie much easier.
Make It Ahead: This dessert is perfect for preparing a day in advance, making it ideal for parties or gatherings.
Flavor Variations: You can experiment by using chocolate ice cream, peanut butter ice cream, or adding chopped peanut butter cups for extra richness.
Nutrition Information:
Yield: 8 Serving Size: 1Amount Per Serving: Calories: 420Total Fat: 27gSaturated Fat: 11gCholesterol: 35mgSodium: 140mgCarbohydrates: 37gFiber: 2gSugar: 27gProtein: 9g