




There’s something magical about a warm, velvety homemade hot fudge sauce—the kind that instantly transforms a simple scoop of ice cream into a decadent dessert. If you’ve ever wondered how to make a rich, smooth, from-scratch chocolate topping that tastes better than anything in a jar, you’re in the right place. This recipe brings together simple pantry staples and turns them into a glossy, spoon-worthy sauce you’ll want to drizzle over everything.
What I love most about this hot fudge sauce is its versatility. Pour it over sundaes, swirl it into brownies, or warm it up for a last-minute dessert everyone will rave about. And the best part? You control every ingredient—no preservatives, just real chocolate flavor that feels comforting and indulgent.
If you’re craving a dessert topping that’s easy, reliable, and absolutely irresistible, this recipe is about to become your go-to. Let’s dive in.
Why You’ll Love This Hot Fudge Sauce
If you’ve ever dreamed of having a rich, homemade hot fudge sauce ready to pour over your favorite desserts, this recipe is going to feel like a little kitchen superpower. It’s incredibly simple to make, yet the flavor is deep, chocolatey, and far more satisfying than anything store-bought. What makes it even better is how consistently smooth and velvety it turns out—no gritty texture, no complicated steps, just pure chocolate bliss.
Here’s why you’ll love it:
- Made with real ingredients: Unsweetened chocolate, cream, butter—nothing artificial, just classic flavors that melt beautifully together.
- Foolproof texture: This sauce stays thick, glossy, and spoon-worthy without turning grainy or stiff.
- Versatile and crowd-pleasing: Drizzle it over ice cream, swirl it into brownies, dip fruit into it, or warm it for a quick, comforting dessert topping.
- Quick and beginner-friendly: Even if you’ve never made a dessert sauce from scratch, this recipe walks you through each step with ease.
- Make-ahead convenience: It stores well in the refrigerator and reheats effortlessly, making it perfect for parties, weekend treats, or late-night chocolate cravings.
Whether you’re building an irresistible ice cream sundae or looking for a dependable hot fudge sauce recipe to keep on hand, this one delivers the rich, decadent flavor you’ve been craving—every single time.
Ingredients
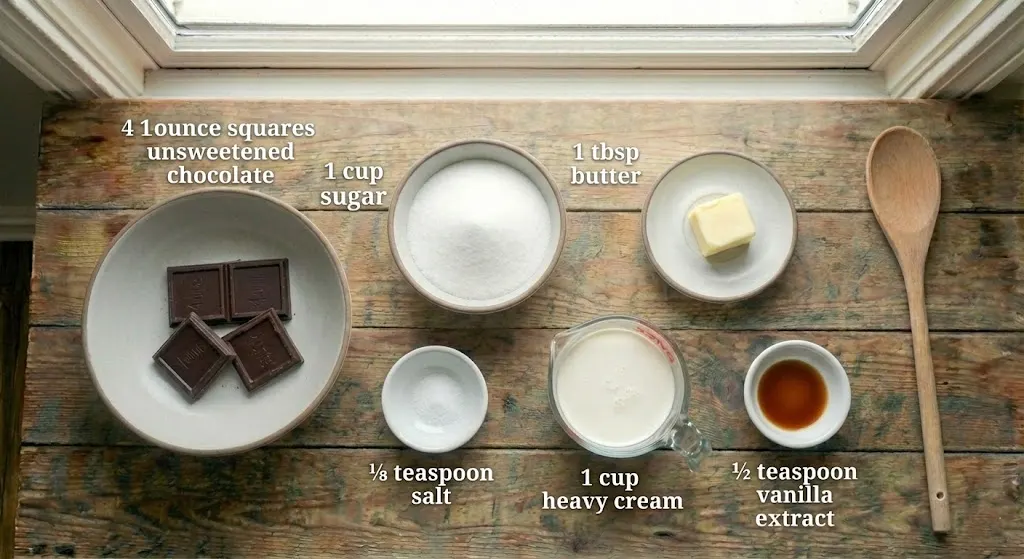
Here’s everything you’ll need to create this smooth and decadent homemade hot fudge sauce. Each ingredient plays a role in building that deep chocolate flavor and creamy, pourable texture:
- 4 (1-ounce) squares unsweetened chocolate – the foundation of the sauce, giving it a bold, rich chocolate base.
- 1 cup white sugar – sweetens the mixture and helps create that classic fudge-like consistency.
- 1 tablespoon butter – adds silkiness and enhances the overall flavor.
- ⅛ teaspoon salt – just enough to balance the sweetness and deepen the chocolate taste.
- 1 cup heavy cream – creates that thick, velvety texture that sets hot fudge apart from ordinary chocolate syrup.
- ½ teaspoon vanilla extract – brings warmth and rounds out the flavors at the end.
Instructions
Making your own hot fudge sauce is surprisingly simple, and these steps will guide you to a smooth, glossy finish every time:
- Melt the chocolate:
Place the unsweetened chocolate squares in a microwave-safe bowl. Heat on high for 1–2 minutes, stopping to stir every 20–30 seconds. You want the chocolate mostly melted but not scorched. - Combine in a saucepan:
Transfer the melted chocolate to a heavy-bottomed saucepan over low heat. Add the sugar, butter, and salt, stirring gently until everything comes together into a thick, chocolatey paste. - Add the cream slowly:
Pour in the heavy cream a little at a time, whisking continuously. This gradual addition helps the sauce stay smooth and prevents lumps. Keep stirring until the mixture looks glossy and cohesive. - Heat without boiling:
Let the sauce warm through over low heat. Avoid letting it boil—boiling can cause the fats to separate or the texture to tighten too much. You’re looking for steam, not bubbles. - Finish with vanilla:
Once the sauce is fully heated and silky, remove it from the heat and stir in the vanilla extract. This adds warmth and rounds out the flavor beautifully. - Store and reheat:
Transfer the hot fudge to a jar or airtight container and refrigerate once cooled. Reheat gently in the microwave or in a warm-water bath when ready to serve.
Pro Tips and Variations
Creating the perfect homemade hot fudge sauce is all about technique and personalization. Here are some helpful tips and fun variations to make your sauce even better:
Pro Tips
- Add cream gradually:
Pouring the cream in slowly helps maintain a silky texture and prevents the sauce from turning grainy. - Use low heat only:
Chocolate burns easily. Keeping the heat low ensures the sauce stays smooth, rich, and glossy. - Stir consistently:
Continuous stirring keeps the mixture from sticking to the bottom of the pan and helps the ingredients blend evenly. - Avoid boiling:
Boiling can cause separation or make the sauce too thick. Warm it just until it’s steaming. - Enhance the flavor:
A tiny pinch of extra salt or a splash of espresso can deepen the chocolate flavor without overwhelming it.
Variations
- Extra Rich:
Add 1–2 additional tablespoons of butter for an even more luxurious finish. - Mocha Fudge Sauce:
Stir in 1 teaspoon of instant espresso powder while heating the mixture to create a subtle mocha twist. - Mint Chocolate:
Replace the vanilla with ½ teaspoon of peppermint extract for a refreshing variation perfect for holiday desserts. - Orange Chocolate:
Add a touch of orange zest while warming the sauce for a bright, citrusy note. - Dark Chocolate Depth:
Use part unsweetened chocolate and part dark chocolate to create a deeper, slightly bittersweet profile.
Serving & Pairing Suggestions
A warm, glossy hot fudge sauce can turn even the simplest dessert into something unforgettable. Here are some delicious ways to enjoy it and elevate your sweet creations:
Perfect Pairings
- Classic Ice Cream Sundaes:
Drizzle it generously over vanilla, chocolate, or coffee ice cream. Add nuts, whipped cream, or cherries for a true sundae experience. - Brownies & Bars:
Pour warm fudge sauce over freshly baked brownies for a gooey, melt-in-your-mouth treat. - Cakes & Cupcakes:
Use it as a topping for chocolate cake, pound cake, or even cupcakes for extra decadence. - Waffles & Pancakes:
Replace syrup with hot fudge for a dessert-style brunch. - Fresh Fruit:
Pair it with strawberries, bananas, or pineapple for a quick, indulgent dipping sauce.
Creative Serving Ideas
- Make a Dessert Board:
Include small bowls of hot fudge alongside cookies, fruit, and mini pastries for dipping. - Layered Parfaits:
Alternate layers of ice cream, fudge sauce, whipped cream, and cookie crumbs for a visually stunning dessert. - Swirl into Batters:
Stir a few spoonfuls into brownie or cheesecake batter to create ribbons of rich chocolate throughout.
Tools and Equipment Guide
You don’t need fancy equipment to make a silky, homemade hot fudge sauce, but choosing the right tools will make the process smoother and more enjoyable.
Essential Tools
- Microwave-Safe Bowl:
Perfect for melting the chocolate quickly and evenly without scorching. - Heavy-Bottomed Saucepan:
This helps distribute heat gently and prevents the chocolate from burning or sticking. - Whisk or Silicone Spatula:
A whisk keeps the sauce smooth and lump-free, while a spatula is great for stirring and scraping the sides of the pan. - Measuring Cups & Spoons:
Precision matters—especially when working with chocolate—so accurate measurements ensure consistent results. - Heatproof Jar or Airtight Container:
Ideal for storing the finished sauce in the refrigerator and reheating later.
Optional but Helpful
- Kitchen Thermometer:
Not required, but useful if you want to avoid overheating the sauce (keep it below boiling). - Small Ladle:
Makes serving warm fudge cleaner and easier.
Troubleshooting Common Issues
Even the simplest hot fudge sauce recipe can run into hiccups, especially when chocolate and cream are involved. Here’s how to identify and fix the most common problems so your sauce always turns out smooth, rich, and restaurant-quality.
Grainy or Gritty Texture
- Cause: The chocolate may have overheated, or the sugar didn’t dissolve fully.
- Fix: Warm the sauce gently over low heat and whisk in 1–2 tablespoons of warm cream until smooth. Avoid high heat during melting.
Sauce Too Thick
- Cause: Too much evaporation or slightly overheated chocolate.
- Fix: Add warm cream a tablespoon at a time until you reach your ideal consistency. Keep stirring to maintain smoothness.
Sauce Too Thin
- Cause: Too much cream added too quickly or not heated long enough.
- Fix: Let it simmer on very low heat for a few extra minutes, stirring constantly. It will thicken as it cools.
Chocolate Seized or Clumped
- Cause: Chocolate came into contact with liquid too quickly, or heat was too high.
- Fix: Remove from heat and whisk in a splash of warm cream. Keep adding small amounts until the mixture loosens and becomes smooth.
Oily or Separated Sauce
- Cause: Overheating, especially after adding butter or cream.
- Fix: Take the pan off the heat and whisk vigorously. A teaspoon of corn syrup or warm water can help bring it back together.
Burnt or Bitter Taste
- Cause: Chocolate was melted at too high a temperature or left unattended.
- Fix: Unfortunately, burnt chocolate can’t be fully rescued. Start fresh and keep the heat low to prevent scorching.
FAQs
Hot Fudge Sauce
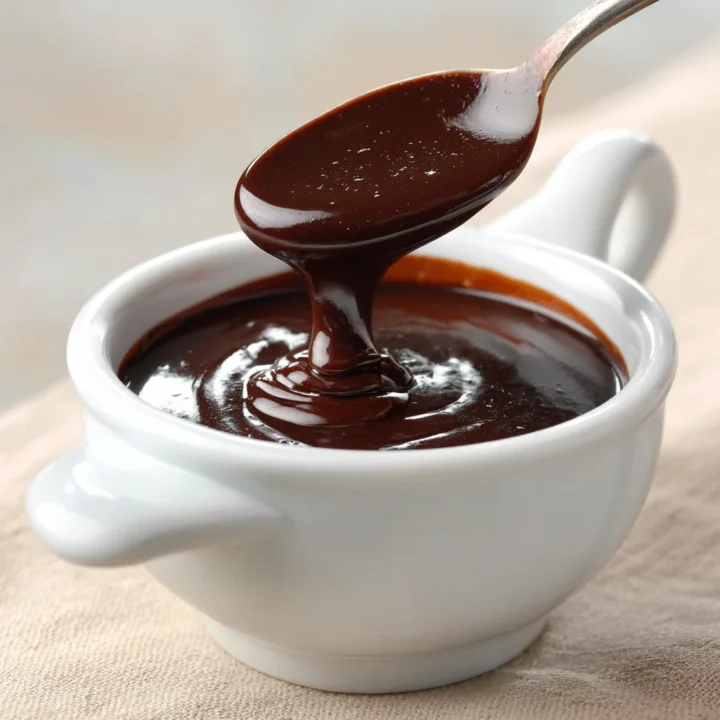
If you’ve ever dreamed of having a rich, homemade hot fudge sauce ready to pour over your favorite desserts, this recipe is going to feel like a little kitchen superpower.
Ingredients
- 4 (1-ounce) squares unsweetened chocolate
- 1 cup white sugar
- 1 tablespoon butter
- ⅛ teaspoon salt
- 1 cup heavy cream
- ½ teaspoon vanilla extract
Instructions
- Melt the chocolate: Place the unsweetened chocolate in a microwave-safe bowl and heat for 1–2 minutes, stirring every 20–30 seconds until mostly melted.
- Combine ingredients: Transfer the melted chocolate to a heavy-bottomed saucepan over low heat. Add sugar, butter, and salt. Stir until smooth and well combined.
- Add the cream gradually: Pour in the heavy cream little by little, whisking continuously to maintain a smooth texture.
- Heat gently: Warm the mixture through without allowing it to boil. Keep stirring until the sauce becomes glossy and thick.
- Finish with vanilla: Remove from heat and stir in vanilla extract. Let cool slightly, then serve warm or refrigerate for later use.
Notes
- Don’t boil the sauce: This can lead to separation or graininess. Low and slow is best.
- Adjust thickness: Add a splash of cream if it becomes too thick after chilling.
- Flavor boosts: A pinch of espresso powder or a touch of peppermint extract can elevate the sauce.
- Storage: Refrigerate in an airtight container for up to 2 weeks. Reheat gently before serving.
Nutrition Information:
Yield: 10 Serving Size: 1Amount Per Serving: Calories: 160Total Fat: 10gSaturated Fat: 6gSodium: 35mgCarbohydrates: 18gFiber: 1gSugar: 16gProtein: 1g