




There’s something deeply comforting about the smell of cinnamon raisin bread baking in the oven—it instantly turns a kitchen into a place of warmth and anticipation. If you’ve ever sliced into a soft, fluffy loaf and spotted that beautiful cinnamon sugar swirl running through the center, you already know why this classic bread has stood the test of time. This homemade version brings together tender yeast dough, plump raisins, and a rich cinnamon filling to create a loaf that feels both nostalgic and special.
Have you ever wondered why bakery-style cinnamon raisin bread tastes so much better fresh? Making it from scratch allows you to control the texture, sweetness, and spice, resulting in a soft raisin bread that’s perfect for breakfast, toast, or even a cozy afternoon snack. Whether you’re new to baking yeast bread or looking to perfect a classic cinnamon swirl bread, this recipe is designed to guide you gently, step by step, toward a loaf that’s as rewarding to make as it is to eat.
Key Benefits & Why You’ll Love This Recipe
If you enjoy baking bread that feels both comforting and rewarding, this homemade cinnamon raisin bread is one you’ll come back to again and again. It’s the kind of recipe that fills your kitchen with warmth and makes the effort feel worthwhile from the very first rise to the final slice.
Here’s what makes this recipe special:
- Soft, bakery-style texture
Thanks to a well-balanced yeast dough and proper rising time, this loaf bakes up tender and fluffy, never dry or dense. - A generous cinnamon sugar swirl
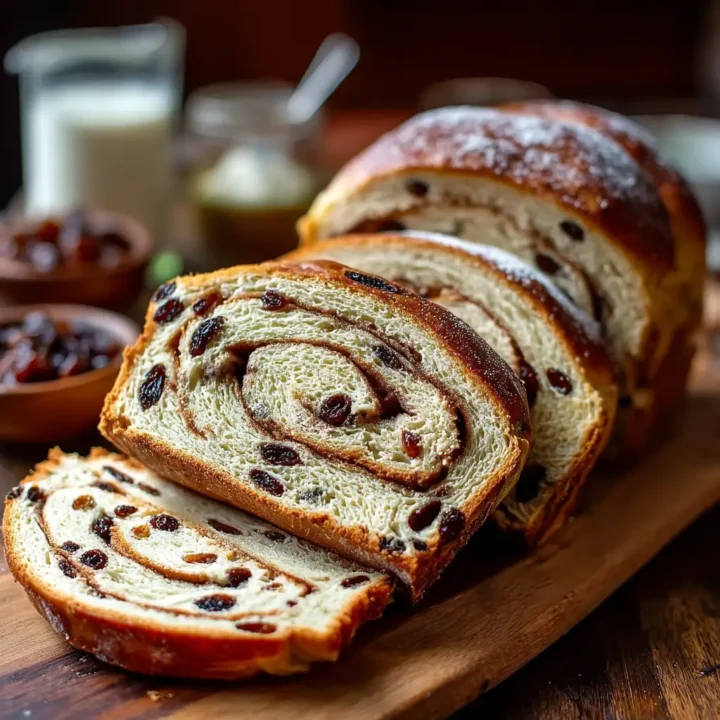
Every slice delivers that classic cinnamon swirl bread experience—sweet, fragrant, and evenly layered without overpowering the dough. - Perfectly plump raisins
Mixed directly into the dough, the raisins soften as they bake, adding natural sweetness and little bursts of texture throughout the loaf. - Versatile for any time of day
This sweet yeast bread works beautifully for breakfast toast, afternoon snacks, or even lightly toasted with butter for dessert. - Approachable for home bakers
Whether you’re new to baking yeast bread or already comfortable working with dough, the steps are straightforward and forgiving, with plenty of room for success. - Made from simple pantry staples
No specialty ingredients required—just classic components that come together into a timeless loaf of cinnamon raisin bread from scratch.
Think of this recipe as your go-to comfort bake: familiar, reliable, and deeply satisfying. Once you taste a slice fresh from the oven, it’s hard to go back to store-bought.
Ingredients
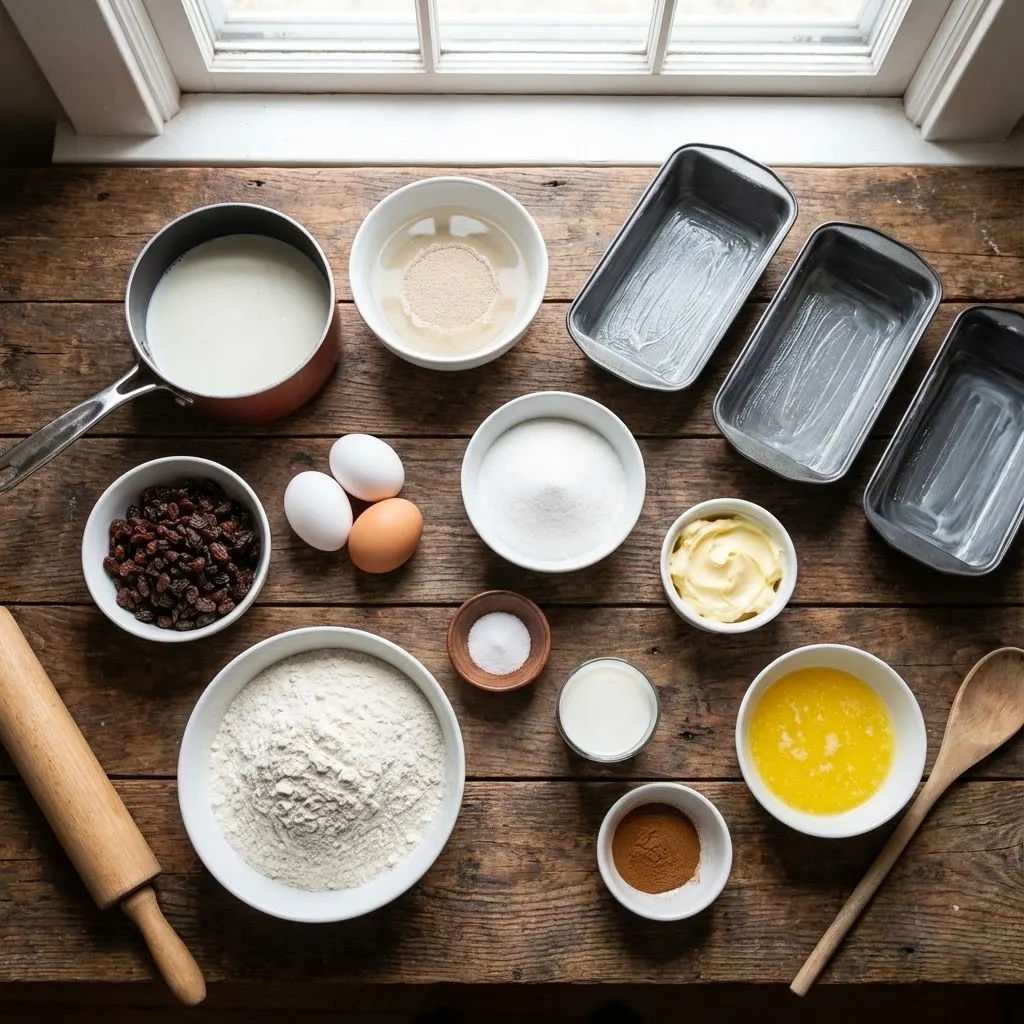
Before you begin, take a moment to gather and prepare your ingredients. Having everything measured and ready makes the bread-making process smoother and more enjoyable—especially when working with yeast dough. This recipe relies on simple, familiar ingredients that come together to create a soft, flavorful cinnamon raisin bread with a beautifully balanced sweetness.
For the dough:
- Milk (1 ½ cups) – Gently warmed to create a tender crumb and enrich the dough
- Warm water (1 cup, about 110°F / 45°C) – Activates the yeast without damaging it
- Active dry yeast (2 packets) – The key to a light, fluffy homemade bread
- Raisins (1 cup) – Add natural sweetness and texture throughout the loaf
- Large eggs (3) – Provide structure, richness, and color
- White sugar (1 ¼ cups, divided) – Sweetens both the dough and the cinnamon swirl
- Margarine, softened (½ cup) – Keeps the bread soft and moist
- Salt (1 teaspoon) – Enhances flavor and balances sweetness
- All-purpose flour (8 cups) – Forms the foundation of this classic yeast bread
For the cinnamon swirl and finishing:
- Milk (2 tablespoons) – Lightly moistens the dough so the cinnamon sugar adheres evenly
- Ground cinnamon (2 tablespoons) – Brings warm spice and aroma to every slice
- Butter, melted (2 tablespoons) – Brushed on after baking for a glossy finish and extra flavor
Tip: Make sure your milk and water are warm—not hot—to ensure proper yeast activation. Too much heat can prevent the dough from rising properly.
Instructions
Making cinnamon raisin bread from scratch is a satisfying, hands-on process, and each step builds flavor, structure, and that signature swirl. Take your time, enjoy the rhythm of working with the dough, and trust the process—it’s more forgiving than it looks.
1. Warm the milk
Heat the milk in a small saucepan over medium heat until small bubbles form around the edges. Remove from heat and let it cool until lukewarm. This step helps create a softer, richer dough without overheating the yeast later.
2. Activate the yeast
In a large mixing bowl, combine the warm water and yeast. Let it sit for about 5 minutes, until the mixture becomes frothy. This tells you the yeast is active and ready to work.
3. Mix the dough
Add the raisins, eggs, ½ cup of the sugar, softened margarine, and salt to the yeast mixture. Stir until well combined. Slowly pour in the cooled milk, then begin adding the flour a little at a time. Continue mixing until a stiff but workable dough forms.
4. Knead and first rise
Turn the dough out onto a lightly floured surface and knead for several minutes, until smooth and elastic. Place the dough in a greased bowl, turning it once to coat all sides. Cover with a damp cloth and let it rise in a warm spot for about 1 hour, or until doubled in size.
5. Prepare the pans
Grease three 9×5-inch loaf pans and set them aside. This ensures the loaves release easily after baking.
6. Shape the cinnamon swirl
Punch down the dough and transfer it back to a floured surface. Roll it into a large rectangle about ½-inch thick. Lightly brush the surface with 2 tablespoons of milk. In a small bowl, mix the remaining sugar with the cinnamon, then sprinkle it evenly over the dough.
Roll the dough tightly into a log, keeping the swirl snug to avoid gaps. Cut the log into three equal pieces, tuck the ends underneath, and place each loaf into a prepared pan.
7. Second rise
Lightly grease the tops of the loaves, cover, and let them rise again for about 1 hour, until puffy and nearly doubled.
8. Bake to perfection
Preheat the oven to 350°F (175°C). Bake the loaves for about 45 minutes, until lightly golden and hollow-sounding when tapped.
9. Finish and cool
Remove the loaves from the pans and brush the tops with melted butter. Let them cool on a wire rack before slicing—this helps set the crumb and preserves the beautiful cinnamon swirl.
With these steps, you’ll end up with a soft, fragrant cinnamon swirl bread that’s worth every minute of effort.
Pro Tips and Variations
Once you’ve mastered the basics, a few thoughtful tweaks can take your cinnamon raisin bread from great to truly exceptional. These tips and variations are designed to help you avoid common pitfalls, boost flavor, and adapt the recipe to your preferences.
Pro tips for best results:
- Soak the raisins first
For extra-soft raisins, soak them in warm water for 10 minutes, then drain and pat dry before mixing into the dough. This prevents them from drawing moisture out of the bread while baking. - Keep the swirl tight
Roll the dough firmly when shaping to avoid air pockets. A snug roll helps the cinnamon sugar swirl stay beautifully layered in every slice. - Don’t rush the rise
Allowing the dough to fully double during both rises is key to a light, fluffy texture. If your kitchen is cool, give it a little extra time. - Check doneness correctly
The loaves should sound hollow when tapped and feel light for their size. If the tops brown too quickly, tent loosely with foil.
Easy flavor variations:
- Brown sugar swap – Replace white sugar in the swirl with brown sugar for a deeper, caramel-like flavor.
- Spiced loaf – Add a pinch of nutmeg or allspice to the cinnamon sugar mixture for extra warmth.
- Citrus twist – Mix a little orange or lemon zest into the dough to brighten the sweetness.
- Butter-based version – Substitute margarine with softened butter for a richer, more traditional taste.
These small adjustments make it easy to personalize your homemade cinnamon raisin bread, so every loaf feels just right for you and your kitchen.
Serving & Pairing Suggestions
Freshly baked cinnamon raisin bread is wonderfully versatile, making it easy to enjoy in both simple and creative ways. Whether served warm from the oven or lightly toasted the next day, this loaf fits effortlessly into breakfast, snacks, or even dessert.
Delicious ways to serve it:
- Classic and simple – Slice and enjoy warm with butter as it melts into the soft crumb.
- Toasted perfection – Toast until golden and spread with cream cheese, honey, or fruit preserves.
- Breakfast upgrade – Use thick slices for French toast, letting the cinnamon swirl add extra flavor without needing much syrup.
- Sweet snack or dessert – Pair with a drizzle of glaze or a light dusting of powdered sugar.
Perfect pairings:
- Hot drinks – Coffee, cappuccino, or spiced tea complement the warm cinnamon notes beautifully.
- Cold options – Serve alongside milk or a vanilla-flavored latte for a comforting treat.
- Savory balance – Add scrambled eggs or a mild cheese on the side for a sweet-and-savory contrast.
This homemade cinnamon swirl bread adapts to the moment, whether you’re enjoying a quiet morning or sharing slices with family and friends.
Tools and Equipment Guide
Having the right tools on hand makes baking cinnamon raisin bread from scratch more enjoyable and helps ensure consistent results. You don’t need anything fancy—just a few reliable kitchen basics that support each step of the process.
Essential tools:
- Large mixing bowl – Gives the dough plenty of room to rise and mix evenly.
- Measuring cups and spoons – Accurate measurements are key for balanced flavor and proper dough texture.
- Small saucepan – Used to gently warm the milk without overheating.
- Wooden spoon or dough whisk – Helpful for combining ingredients before kneading.
- Clean work surface – A lightly floured countertop works perfectly for kneading and shaping.
Baking equipment:
- Three 9×5-inch loaf pans – The ideal size for evenly baked, well-shaped loaves.
- Pastry brush – Makes it easy to apply milk and melted butter smoothly.
- Damp kitchen towel or plastic wrap – Keeps the dough covered and prevents it from drying out during rising.
- Wire cooling rack – Allows air to circulate so the bread cools evenly without becoming soggy.
Optional but helpful:
- Stand mixer with dough hook – Saves time and effort if you prefer less hands-on kneading.
- Kitchen thermometer – Ensures liquids are at the right temperature for yeast activation.
With these tools ready, you’ll be fully equipped to bake a soft, flavorful homemade cinnamon raisin bread with confidence and ease.
Troubleshooting Common Issues
Even a well-tested cinnamon raisin bread recipe can raise a few questions along the way—especially if you’re working with yeast dough. These common issues and simple fixes will help you troubleshoot with confidence and keep your loaf on track.
Why is my bread dense instead of fluffy?
This usually means the dough didn’t rise long enough or the yeast wasn’t fully activated. Make sure your liquids are warm—not hot—and allow the dough to double in size during both rises.
Why did the cinnamon swirl separate or create gaps?
Loose rolling is the most common cause. Roll the dough tightly when shaping and avoid using too much flour on the surface, which can prevent the layers from sticking together.
Why is the crust too dark but the inside isn’t done?
Ovens can vary in temperature. If the top is browning too quickly, loosely tent the loaf with foil during the last part of baking to protect the crust while the center finishes.
Why is my bread dry?
Overbaking or adding too much flour can dry out the loaf. Measure flour carefully and remove the bread as soon as it sounds hollow when tapped.
Why didn’t my bread rise properly the second time?
If the kitchen is cool, the dough may need extra time. Place it in a warm, draft-free area and be patient—yeast works best when it’s not rushed.
FAQs
Cinnamon Raisin Bread
If you enjoy baking bread that feels both comforting and rewarding, this homemade cinnamon raisin bread is one you’ll come back to again and again.
Ingredients
Dough:
- 1 ½ cups milk
- 1 cup warm water (110°F / 45°C)
- 2 packets (0.25 oz each) active dry yeast
- 1 cup raisins
- 3 large eggs
- 1 ¼ cups white sugar, divided
- ½ cup margarine, softened
- 1 teaspoon salt
- 8 cups all-purpose flour
Cinnamon Swirl & Finish:
- 2 tablespoons milk
- 2 tablespoons ground cinnamon
- 2 tablespoons butter, melted
Instructions
- Warm the milk until small bubbles appear; remove from heat and cool to lukewarm.
- In a large bowl, combine warm water and yeast. Let sit until frothy (about 5 minutes).
- Mix in raisins, eggs, ½ cup sugar, margarine, and salt. Stir in cooled milk.
- Gradually add flour to form a stiff dough.
- Knead on a floured surface until smooth. Place in a greased bowl, cover, and let rise until doubled (about 1 hour).
- Grease three 9×5-inch loaf pans.
- Punch down dough and roll into a large rectangle (½-inch thick). Brush with 2 tablespoons milk.
- Mix remaining sugar with cinnamon and sprinkle evenly over the dough.
- Roll tightly into a log, cut into three equal portions, tuck ends under, and place into pans.
- Cover and let rise again until puffy (about 1 hour).
- Preheat oven to 350°F (175°C).
- Bake for 45 minutes, until lightly golden and hollow-sounding when tapped.
- Remove from pans, brush with melted butter, and cool on a wire rack before slicing.
Notes
- For extra-soft raisins, soak them in warm water for 10 minutes and pat dry before adding.
- Roll the dough tightly to prevent gaps in the cinnamon swirl.
- If loaves brown too quickly, tent loosely with foil during the last 10 minutes of baking.
- Bread slices cleanly once fully cooled—patience pays off.
Nutrition Information:
Yield: 36 Serving Size: 1Amount Per Serving: Calories: 220Total Fat: 6gSaturated Fat: 2.5gSodium: 170mgCarbohydrates: 38gFiber: 2gSugar: 14gProtein: 5g