




If you’re anything like me, you’re always searching for a quick, homemade granola snack that’s easy to make, delicious to munch on, and perfect for busy days. That’s exactly why I love this Gobble Up Granola Snacks Recipe. It brings together the simple goodness of crispy rice cereal, quick-cooking oats, and a comforting touch of peanut butter to create a wholesome, no-bake treat you can enjoy anytime.
Whether you need an energy-boosting bite between meals, a kid-friendly snack to tuck into lunchboxes, or a portable option for work or travel, these chewy-crunchy granola bars fit the moment perfectly. And the best part? You control what goes into them — no preservatives, no mystery ingredients, just real, satisfying flavor.
As you make your way through this recipe, you’ll see how effortlessly everything comes together. Let’s dive in and create a snack you’ll find yourself reaching for again and again.
Key Benefits & Why You Will Love This Recipe
If you’re craving a homemade granola snack that’s fast, flavorful, and genuinely satisfying, these Gobble Up Granola Snacks will quickly become a favorite. They offer the perfect balance of chewy oats, crunchy rice cereal, and the rich comfort of peanut butter—all without turning on the oven. Here’s why you’ll love making (and eating!) them:
What Makes This Recipe a Keeper
- Quick & No-Bake
Perfect for busy days when you want a wholesome treat without spending much time in the kitchen. A saucepan, a bowl, and a single baking dish are all you need. - Made With Simple, Real Ingredients
You’re working with pantry staples like crispy rice cereal, quick-cooking oats, and crunchy peanut butter. No preservatives, no artificial flavors—just honest, delicious ingredients. - Kid-Friendly & Lunchbox Approved
These bars hold up beautifully, making them ideal for school snacks, after-school bites, or on-the-go munching. - Energy-Boosting Snack
Thanks to the natural sweetness of brown sugar, the fiber from oats, and the protein from peanut butter, these bars make a great high-energy snack for work, travel, or mid-day cravings. - Endlessly Customizable
Prefer chocolate chips? Want to add nuts or dried fruit? You can easily adapt this snack bar recipe to match your taste or ingredients you already have on hand.
A Snack That Fits Any Lifestyle
Whether you’re trying to simplify your weekly prep, pack smarter snacks, or just enjoy something homemade and comforting, this recipe checks all the boxes. With its blend of convenience and feel-good ingredients, every bite brings a little boost—exactly when you need it.
Ingredients
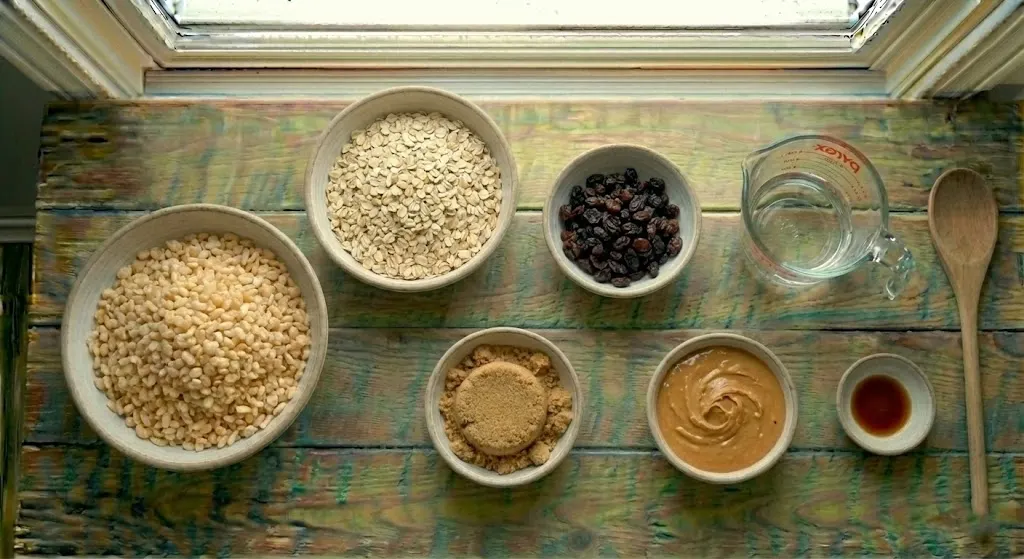
Before you start mixing, take a moment to gather everything you need. One of the best parts about this homemade granola snack is that it uses simple pantry staples—nothing complicated, nothing fancy, just wholesome ingredients that come together beautifully.
What You’ll Need
- 2 ½ cups crispy rice cereal
Adds that light, airy crunch that makes each bite irresistible. - 2 cups quick-cooking oats
The base of any good granola bar recipe, giving structure and chewiness. - ½ cup raisins
A touch of natural sweetness and a soft, chewy contrast. - ½ cup packed brown sugar
Helps bind the bars and adds a warm, caramel-like flavor. - ½ cup light corn syrup
Essential for creating that classic chewy texture. - ½ cup crunchy peanut butter
Adds richness, protein, and the perfect nutty flavor. (Smooth works too!) - 1 teaspoon vanilla extract
A simple addition that brings all the flavors together.
Why These Ingredients Work So Well
Every component plays a role—oats for body, cereal for crispness, peanut butter for flavor, and syrup for binding. Together, they create a balanced, portable snack that’s both delicious and dependable.
Once everything is measured and ready, you’ll breeze through the next steps. Ready to start bringing your mixture together? Let’s move into the instructions.
Instructions
Making these Gobble Up Granola Snacks is wonderfully simple, and the process comes together faster than most traditional granola bar recipes. Just follow these easy steps, and you’ll have a batch ready to enjoy in no time.
Step-by-Step Guide
- Prepare Your Base
In a large mixing bowl, combine the crispy rice cereal, quick-cooking oats, and raisins. Give everything a quick toss so the ingredients are evenly distributed. Set the bowl aside—you’ll come back to it shortly. - Grease Your Pan
Lightly coat a 9×13-inch baking dish with cooking spray. This small step makes it much easier to remove and cut the bars later. - Make the Binding Syrup
In a small saucepan over medium heat, stir together the brown sugar and light corn syrup.- Heat just until the mixture begins to boil.
- As soon as it reaches a gentle bubble, remove it from the heat to avoid burning.
- Add the Flavor Boosters
Quickly stir in the crunchy peanut butter and vanilla extract while the syrup is still warm. The heat will help everything blend smoothly into a creamy, glossy mixture. - Combine Everything
Pour the warm peanut butter mixture over the cereal and oat blend.- Use a sturdy spoon or spatula to mix thoroughly.
- Make sure all the oats and cereal are coated—this helps the bars stick together later.
- Press Into the Pan
Transfer the mixture into your greased baking dish.- Press firmly using the back of a large spoon or a piece of parchment paper.
- The tighter you press, the better your bars will hold their shape.
- Let Them Cool
Allow the bars to cool completely at room temperature. This is when they firm up and develop that perfect chewy-crunchy texture. - Cut Into Squares
Once cooled, slice them into squares or bars—whatever snack size fits your needs.
Pro Tips & Variations
One of the reasons this homemade granola snack is such a winner is how easily you can customize it to fit your taste, your pantry, and even your mood. These simple tips and creative twists will help you get the perfect texture every time—and inspire you to make the recipe your own.
Pro Tips for Perfect Granola Snacks
- Press Firmly for Better Binding
The tighter you press the mixture into the pan, the better your bars will hold together. Use the back of a spoon or a piece of parchment paper to really compact it—this single step makes a big difference. - Work Quickly With the Syrup
The warm mixture of corn syrup, brown sugar, and peanut butter thickens as it cools. Stir and pour promptly to ensure everything combines smoothly. - Don’t Overheat the Syrup
As soon as it starts to boil, remove it from the heat. Overheating can lead to crumbly bars rather than chewy ones. - Line Your Pan for Easy Removal
If you prefer clean edges, line the baking dish with parchment paper. Lift the whole block out, then cut into perfect squares. - Adjust for Chewy or Crunchy Texture
- Want chewier bars? Press firmly and add an extra tablespoon of peanut butter.
- Prefer more crunch? Add an extra handful of crispy rice cereal.
Tasty Variations to Try
- Chocolate Chip Boost
Sprinkle mini chocolate chips over the top right after pressing the mixture into the pan. They’ll soften just enough to stick without melting completely. - Nutty Upgrade
Add chopped almonds, walnuts, or pecans for a richer, heartier snack bar. - Dried Fruit Mix
Swap the raisins for dried cranberries, cherries, apricots, or a mix for a colorful, tangy twist. - Seed-Packed Snack
Stir in sunflower seeds, chia seeds, or pumpkin seeds for an extra nutrient boost. - Peanut-Free Version
Use almond butter, cashew butter, or sunflower seed butter—perfect for nut-free lunchboxes. - Cinnamon Breakfast Bars
Add ½ teaspoon of cinnamon to the oat mixture for a warm, morning-friendly flavor.
Serving & Pairing Suggestions
One of the things I love most about these Gobble Up Granola Snacks is how effortlessly they fit into everyday life. Whether you need a portable snack for a busy morning or a quick energy boost in the afternoon, these bars are always ready to go. Here are some fun and practical ways to enjoy them:
Perfect Anytime Snacks
- On-the-Go Fuel
Slip a bar into your bag for work, school, or travel. They hold together beautifully and make a dependable high-energy snack. - Lunchbox Friendly
Kids (and adults!) love these chewy-crunchy bars, and they pair well with anything from fruit cups to yogurt tubes. - Pre- or Post-Workout Bite
The mix of oats, peanut butter, and cereal offers quick carbs and a bit of protein—ideal for a fast energy lift.
Pairing Ideas
- With Yogurt or Greek Yogurt
Enjoy a bar alongside a creamy bowl of yogurt for a balanced, satisfying breakfast or snack. - With Fresh Fruit
Sliced apples, bananas, or berries complement the sweetness of the granola perfectly. - With Coffee or Tea
These bars make a great companion to your morning latte or afternoon tea break. - Crumble Over Smoothie Bowls
For a fun twist, break a bar into chunky pieces and sprinkle it over smoothie bowls for added crunch.
Fun Ways to Serve
- Cut into Bite-Size Squares
Perfect for parties, gatherings, or snack platters. - Drizzle With Melted Chocolate
Add a decorative drizzle for a dessert-style treat without much extra effort. - Layer Into Parfaits
Alternate chunks of granola snack with yogurt and fruit for a beautiful, layered treat.
Tools and Equipment Guide
One of the best parts about making these Gobble Up Granola Snacks is that you don’t need any fancy gadgets or special equipment. Everything comes together with simple kitchen tools you likely already own. Having these items ready will make the process smooth, quick, and enjoyable.
Essential Tools You’ll Need
- Large Mixing Bowl
This is where you’ll toss together the crispy rice cereal, quick-cooking oats, and raisins. A spacious bowl makes mixing easier and keeps ingredients from spilling over. - Small Saucepan
Perfect for gently heating the brown sugar and corn syrup. Choose one with a sturdy handle for good control as you stir. - Sturdy Spoon or Rubber Spatula
Ideal for mixing the warm peanut butter mixture into the dry ingredients. A strong utensil helps ensure everything gets evenly coated. - 9×13-Inch Baking Dish
This pan gives your granola snacks their classic bar shape. Glass, ceramic, or metal all work well—just be sure to grease it lightly or line it with parchment paper for easy removal. - Cooking Spray or Parchment Paper
Prevents sticking and makes cleanup a breeze. Parchment also helps you lift the slab out for cleaner cuts. - Large Spoon or Flat Tool for Pressing
The key to firm, well-shaped bars is pressing the mixture tightly into the pan. A large spoon, measuring cup bottom, or even a flat spatula works wonders.
Optional, But Helpful
- Silicone Spatula
Great for scraping every bit of the warm peanut butter mixture from the saucepan. - Chef’s Knife or Bench Scraper
For slicing the cooled mixture into neat squares or bars.
Troubleshooting Common Issues
Even though these Gobble Up Granola Snacks are simple to make, a few small missteps can affect the final texture. Don’t worry—I’ve gathered the most common issues and how to fix them so your bars turn out perfectly chewy, crunchy, and delicious every time.
My Granola Bars Are Falling Apart
This is the most common issue with any granola bar recipe. Here’s what usually causes it:
- Not pressing firmly enough
The mixture needs to be compact. Use the back of a spoon, a flat spatula, or parchment paper to press down tightly. - Syrup cooled too quickly
If the peanut butter mixture thickens before fully mixing, it won’t coat the oats and cereal as well. - Too much dry mix
Adding extra cereal or oats can disrupt the balance. Stick to the exact measurements for best results.
Fix: Gently warm the mixture for a few seconds in the microwave, then re-press into the pan.
The Bars Are Too Soft or Sticky
Soft bars usually mean the syrup didn’t heat long enough.
- The mixture must reach a light boil—this helps it firm up once cooled.
- Too much peanut butter can also make the bars extra soft.
Fix: Allow them to chill longer, or reduce peanut butter slightly next time.
The Bars Turned Out Too Hard
Overheating the syrup can make your bars tough instead of chewy.
- Remove the mixture from the heat as soon as it begins to bubble.
- Stir in the peanut butter and vanilla immediately to stop it from cooking further.
Fix: Warm the cut bars for 5–10 seconds in the microwave before eating to soften them.
The Mixture Didn’t Stick Together Evenly
This happens when the syrup isn’t mixed thoroughly into the oats and cereal.
- Work quickly while the mixture is warm.
- Use a wide spatula or large spoon to fold everything together until evenly coated.
Fix: Add a drizzle of warm corn syrup and mix again, then re-press.
FAQs
Have questions about making these Gobble Up Granola Snacks? You’re not alone! Here are the answers to the most common things people wonder about when making homemade granola bars at home.
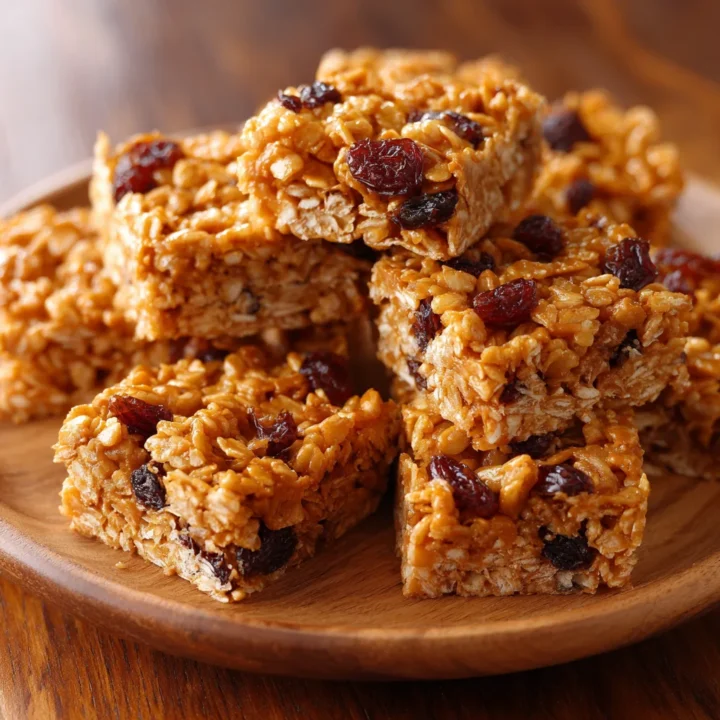
Gobble Up Granola Snacks
If you’re craving a homemade granola snack that’s fast, flavorful, and genuinely satisfying, these Gobble Up Granola Snacks will quickly become a favorite.
Ingredients
- 2 ½ cups crispy rice cereal
- 2 cups quick-cooking oats
- ½ cup raisins
- ½ cup packed brown sugar
- ½ cup light corn syrup
- ½ cup crunchy peanut butter
- 1 teaspoon vanilla extract
Instructions
Mix the Dry Base:
- In a large bowl, combine the crispy rice cereal, oats, and raisins. Toss lightly and set aside.
Prepare the Pan:
- Grease a 9×13-inch baking dish with cooking spray or line with parchment paper.
Heat the Syrup:
- In a small saucepan over medium heat, stir together the brown sugar and corn syrup. Heat just until boiling.
Add Peanut Butter & Vanilla:
- Remove from heat and quickly stir in the peanut butter and vanilla until smooth and fully combined.
Combine Mixtures:
- Pour the warm peanut butter mixture over the cereal mixture. Stir until all ingredients are evenly coated.
Press Into the Pan:
- Transfer the mixture to the prepared baking dish. Use the back of a spoon or parchment paper to press the mixture firmly and evenly.
Cool & Cut:
- Allow the mixture to cool completely before cutting into squares or bars.
Notes
- Press firmly for bars that hold together well—this step is essential for solid, chewy results.
- If the mixture starts to firm up while mixing, warm it slightly in the microwave for easier combining.
- Add mini chocolate chips, nuts, or dried fruit for personalized variations.
- For cleaner cuts, chill the bars for 10–15 minutes before slicing.
- Store in an airtight container at room temperature for up to 5 days, or refrigerate for a firmer bite.
Nutrition Information:
Yield: 16 Serving Size: 1Amount Per Serving: Calories: 180Total Fat: 5gSaturated Fat: 1gSodium: 90mgCarbohydrates: 30gFiber: 2gSugar: 15gProtein: 4g