




There’s something undeniably comforting about a raspberry trifle—those beautiful layers of tender cake, silky cream cheese filling, and vibrant raspberries all coming together in one chilled, crowd-pleasing dessert. If you’ve ever needed an easy layered dessert that looks impressive without requiring hours in the kitchen, this is the kind of recipe you’ll come back to again and again. I love how this trifle balances light sweetness with a hint of tang, making every spoonful feel indulgent yet refreshing.
What makes this cream cheese trifle especially appealing is its versatility. It works just as well for a casual family dinner as it does for holidays, potlucks, or summer gatherings. You can prepare it ahead of time, let the flavors mingle in the fridge, and serve it straight from a glass bowl that shows off all those irresistible layers. If you’re a fan of no-bake desserts, fruity treats, or recipes that deliver maximum impact with minimal effort, this raspberry trifle is about to earn a permanent spot in your dessert rotation.
Key Benefits & Why You’ll Love This Raspberry Trifle
This raspberry trifle is the kind of dessert that feels special without asking much from you—and that’s exactly why it works so well. If you enjoy recipes that look elegant but are genuinely easy to pull off, this one checks all the right boxes.
Here’s what makes it a favorite:
- Effortless, no-bake comfort: There’s no oven time involved, making this an ideal no-bake dessert for warm days or busy schedules. Most of the magic happens with simple mixing and layering.
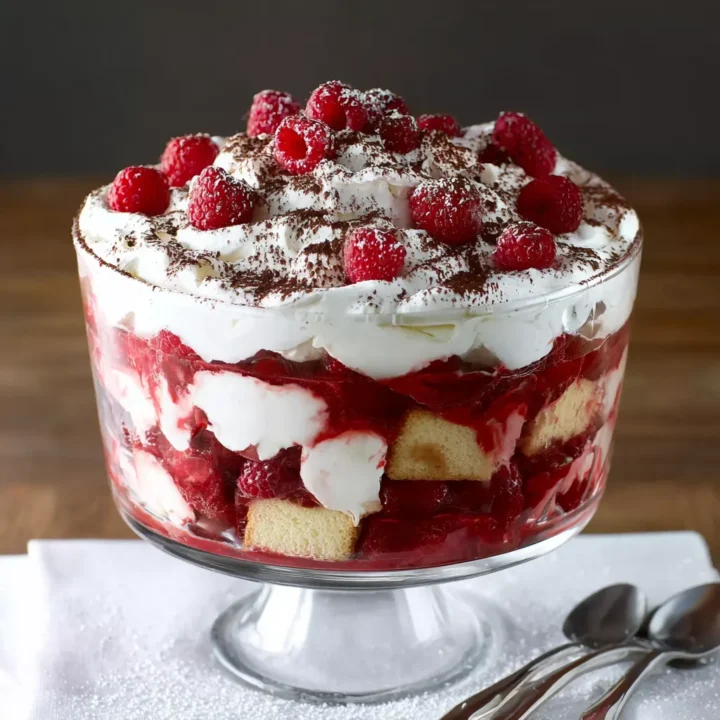
- Beautiful layered presentation: With visible layers of pound cake, creamy filling, and juicy raspberries, this layered dessert looks stunning in a glass bowl—perfect for entertaining.
- Make-ahead friendly: This is a true make-ahead dessert. A few hours in the fridge allows the flavors to meld and the texture to set, so you can focus on hosting instead of last-minute prep.
- Balanced flavors and textures: The richness of the cream cheese filling is lifted by bright raspberries and softened cake, creating a dessert that’s creamy, light, and never overwhelming.
- Crowd-pleasing versatility: Whether you’re serving family, guests, or bringing dessert to a gathering, this easy raspberry trifle adapts beautifully to any occasion—from casual dinners to festive celebrations.
Think of this recipe as a reliable go-to: simple ingredients, clear steps, and a result that always feels a little impressive. It’s the kind of dessert you’ll make once—and then keep in your back pocket for whenever you need something dependable and delicious.
Ingredients
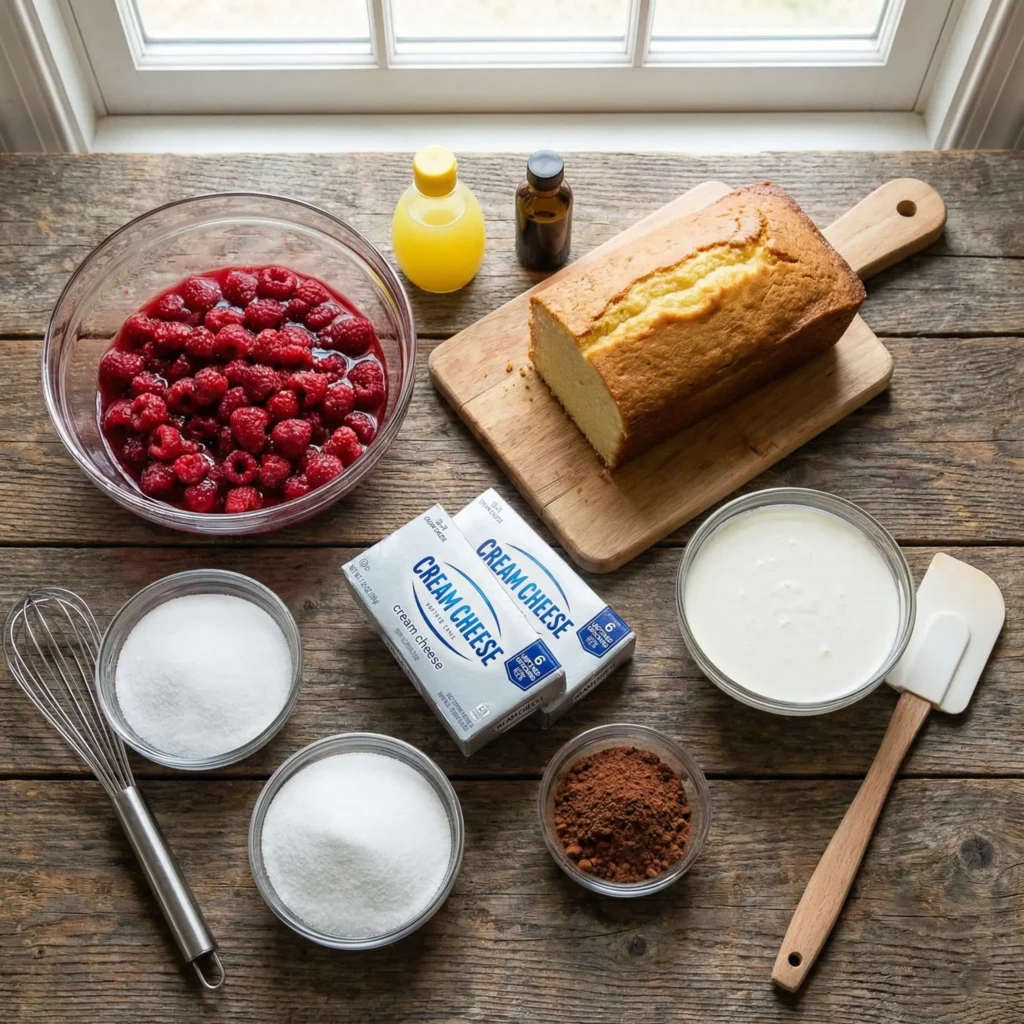
One of the best things about this raspberry trifle is how it transforms simple, familiar ingredients into an elegant layered dessert. Each component plays a clear role, so using good-quality basics will make a noticeable difference in the final result.
Here’s what you’ll need and why it matters:
- Heavy cream (1½ cups): This creates a light, airy base for the filling. Whipping it to stiff peaks gives the trifle its signature fluffy texture.
- White sugar (¾ cup, divided): Used in stages to sweeten both the whipped cream and the cream cheese mixture without overpowering the raspberries.
- Cream cheese (2 packages, softened): The heart of this cream cheese trifle, adding richness and structure while keeping the dessert smooth and creamy.
- Lemon juice (2 teaspoons): A small amount brightens the filling and balances the sweetness, enhancing the raspberry flavor.
- Vanilla extract (1½ teaspoons): Adds warmth and depth, tying together the creamy and fruity layers.
- Prepared pound cake (1 package): Soft, buttery pound cake forms the foundation of each layer and absorbs the raspberry juice beautifully.
- Frozen raspberries (2 packages, thawed): Juicy and vibrant, these provide the fresh, fruity contrast that defines a classic raspberry dessert.
- Unsweetened cocoa powder (2 tablespoons): Lightly dusted between layers and on top, it adds a subtle chocolate note and a polished finish.
Tip:
Let the cream cheese soften fully before mixing. This small step ensures a silky filling with no lumps, making your easy raspberry trifle look and taste bakery-smooth.
Instructions
Putting this raspberry trifle together is all about relaxed, thoughtful layering. Take your time, enjoy the process, and think of it as assembling something beautiful rather than rushing through steps. I’ll walk you through it just like I would if we were making it together in the kitchen.
- Whip the cream
In a medium bowl, beat the heavy cream with ¼ cup sugar until stiff peaks form. You’re looking for a fluffy, stable texture that holds its shape. Set this aside—this will give the trifle its light, airy finish. - Prepare the cream cheese filling
In a separate bowl, beat the softened cream cheese with the remaining ½ cup sugar, lemon juice, and vanilla extract until smooth and creamy. Gently fold in 2 cups of the whipped cream, keeping the mixture light and silky. Reserve the remaining whipped cream for the final topping. - Prep the cake and raspberries
Slice the pound cake into even pieces, about ½ inch thick. Drain the thawed raspberries, but don’t discard the juice—you’ll use it to moisten the cake layers and infuse extra flavor. - Start layering
Line the bottom of a trifle bowl or glass serving dish with one-third of the pound cake slices. Lightly drizzle with some raspberry juice to soften the cake without soaking it. - Build the layers
- Spread one-quarter of the cream cheese mixture over the cake
- Sift a light dusting of cocoa powder on top
- Sprinkle one-third of the raspberries evenly over the layer
- Repeat this layering process two more times, keeping the layers neat and evenly distributed.
- Finish and chill
Top the trifle with the remaining cream cheese mixture, followed by the reserved whipped cream. Finish with a final dusting of cocoa powder for a clean, elegant look. Cover and refrigerate for at least 4 hours, allowing the layers to set and flavors to blend.
Helpful note:
Chilling is essential for a well-structured layered dessert. This resting time helps the cake absorb just enough moisture while keeping the trifle creamy, balanced, and easy to serve.
Pro Tips and Variations
Once you’ve mastered the basic raspberry trifle, a few thoughtful tweaks can take it from great to unforgettable. These tips will help you refine the texture, enhance the flavor, and adapt the recipe to suit different occasions or preferences.
Pro tips for the best results:
- Don’t oversoak the cake: A light drizzle of raspberry juice is enough. Too much liquid can turn the layers soggy instead of tender.
- Fold gently, not fast: When combining the whipped cream with the cream cheese mixture, use slow, gentle motions to keep the filling airy and smooth.
- Chill longer if possible: While 4 hours works well, an overnight rest deepens flavor and gives this make-ahead dessert an even better structure.
- Use a clear dish: A glass trifle bowl highlights the layers and makes the dessert feel instantly more polished.
Easy variations to try:
- Fresh raspberry version: Swap frozen raspberries for fresh when they’re in season for a brighter, slightly firmer texture.
- Chocolate raspberry trifle: Add chocolate shavings or mini chocolate chips between layers to complement the cocoa dusting.
- Lighter filling: Replace part of the cream cheese with mascarpone or Greek yogurt for a softer, lighter finish.
- Different cake base: Vanilla sponge cake or ladyfingers work beautifully if pound cake isn’t available.
These small adjustments let you customize your cream cheese trifle while keeping its signature layered look and comforting flavor. It’s a flexible dessert that rewards creativity without complicating the process.
Serving & Pairing Suggestions
Serving this raspberry trifle is where all your effort truly shines. Thanks to its striking layers and creamy texture, it needs very little extra to make a statement on the table. A chilled presentation and a few thoughtful pairings can elevate it from simple dessert to memorable finale.
Serving ideas:
- Serve well chilled: This chilled dessert tastes best straight from the refrigerator, when the layers are fully set and the flavors are balanced.
- Use individual glasses: For a more refined presentation, spoon the trifle into small glass cups or jars—perfect for parties and portion control.
- Clean slices every time: If serving from a large bowl, wipe the spoon between servings to keep the layers defined and visually appealing.
- Garnish lightly: A few fresh raspberries, a mint sprig, or a gentle cocoa dusting add a fresh, elegant touch without overpowering the dessert.
Perfect pairings:
- Coffee or espresso: The richness of this cream cheese trifle pairs beautifully with a strong, slightly bitter coffee.
- Light teas: Earl Grey, chamomile, or berry-infused teas complement the fruity notes without competing.
- Dessert wine: A lightly sweet sparkling wine or rosé enhances the raspberry flavor while keeping the dessert feeling light.
Whether served casually or dressed up for guests, this easy raspberry trifle fits seamlessly into any setting and leaves a lasting impression with every spoonful.
Tools and Equipment Guide
You don’t need anything fancy to make this raspberry trifle, but having the right tools on hand will make the process smoother and help you achieve clean, beautiful layers. Think of this as setting yourself up for stress-free assembly and a polished final result.
Essential tools:
- Trifle bowl or clear glass serving bowl: A transparent dish showcases the layers and turns this layered dessert into a visual centerpiece.
- Electric mixer or hand mixer: Helpful for whipping the cream to stiff peaks and ensuring a smooth cream cheese filling.
- Mixing bowls: At least two medium bowls—one for the whipped cream and one for the cream cheese mixture.
- Rubber spatula: Ideal for gently folding whipped cream into the filling without deflating it.
- Sharp knife: Ensures even slices of pound cake for consistent layering.
- Fine mesh sieve: Makes it easy to dust cocoa powder evenly between layers and on top.
Optional but helpful:
- Offset spatula: Useful for spreading layers neatly along the edges of the bowl.
- Measuring cups and spoons: Keep sweetness and texture balanced throughout the recipe.
With these tools ready, assembling your easy raspberry trifle becomes straightforward and enjoyable, letting you focus on flavor, texture, and presentation instead of last-minute scrambling.
Troubleshooting Common Issues
Even a simple raspberry trifle can raise a few questions along the way. The good news is that most issues are easy to fix with small adjustments. Here’s how to troubleshoot common problems and keep your layered dessert looking and tasting its best.
Problem: The trifle tastes soggy
- Cause: Too much raspberry juice or overly soft cake.
- Solution: Drizzle the juice lightly instead of pouring it on. If needed, use slightly thicker slices of pound cake for better structure.
Problem: The cream cheese filling is lumpy
- Cause: Cream cheese wasn’t fully softened.
- Solution: Let the cream cheese sit at room temperature before mixing, and beat it thoroughly before adding any whipped cream.
Problem: Layers don’t look defined
- Cause: Rushing the layering process or uneven spreading.
- Solution: Take a moment to spread each layer evenly, especially along the edges of the bowl, before adding the next component.
Problem: The trifle won’t hold its shape when served
- Cause: Not enough chilling time.
- Solution: Refrigerate for at least 4 hours, or overnight for a firmer, more stable make-ahead dessert.
Problem: The flavor feels too sweet
- Cause: Natural sweetness from raspberries plus added sugar.
- Solution: Add a touch more lemon juice or serve with unsweetened coffee or tea to balance the flavors.
With these fixes in mind, your cream cheese trifle will turn out consistently smooth, balanced, and presentation-ready every time.
FAQs
Raspberry Trifle
This raspberry trifle is the kind of dessert that feels special without asking much from you—and that’s exactly why it works so well.
Ingredients
- 1½ cups heavy cream
- ¾ cup white sugar, divided
- 2 (8-oz) packages cream cheese, softened
- 2 teaspoons lemon juice
- 1½ teaspoons vanilla extract
- 1 (10.75-oz) prepared pound cake
- 2 (10-oz) packages frozen raspberries, thawed
- 2 tablespoons unsweetened cocoa powder (for dusting)
Instructions
- In a medium bowl, beat the heavy cream with ¼ cup sugar until stiff peaks form. Set aside.
- In a separate bowl, beat the softened cream cheese with the remaining ½ cup sugar, lemon juice, and vanilla until smooth.
- Gently fold 2 cups of whipped cream into the cream cheese mixture. Reserve the remaining whipped cream.
- Slice the pound cake into even ½-inch slices.
- Drain the raspberries, reserving the juice.
- Line the bottom of a 3-quart trifle bowl or glass dish with one-third of the cake slices. Lightly drizzle with raspberry juice.
- Spread one-quarter of the cream cheese mixture over the cake. Dust lightly with cocoa powder and sprinkle with one-third of the raspberries.
- Repeat the layers two more times.
- Finish with the remaining cream cheese mixture, reserved whipped cream, and a final cocoa dusting.
- Cover and refrigerate for at least 4 hours before serving.
Notes
- Softened cream cheese is key: This ensures a smooth, lump-free filling.
- Go light on the juice: Too much liquid can cause soggy layers.
- Best made ahead: Overnight chilling improves structure and flavor.
- For cleaner layers: Spread fillings evenly along the edges of the bowl.
- Serving tip: Use a clear bowl or individual glasses for the best visual impact.
Nutrition Information:
Yield: 1 Serving Size: 1Amount Per Serving: Calories: 380Total Fat: 24gSaturated Fat: 14gSodium: 210mgCarbohydrates: 36gFiber: 3gSugar: 24gProtein: 6g