




Have you ever tried a dish that’s both simple and incredibly satisfying? Let me introduce you to Brazilian Farofa with Eggs—a beloved staple of Brazilian cuisine that’s as versatile as it is delicious. Imagine toasted cassava flour and fluffy scrambled eggs coming together in a harmony of textures and flavors. Whether you’re pairing it with feijoada, serving it alongside picanha, or enjoying it as a hearty breakfast, this farofa recipe is a game-changer.
But what makes farofa so special? It’s not just a side dish; it’s a cultural experience. With its crunchy texture and golden-brown finish, farofa adds a delightful contrast to any meal. Plus, it’s incredibly easy to make! Whether you’re new to Brazilian cuisine or a seasoned fan, this recipe will quickly become a favorite in your kitchen. Ready to bring a taste of Brazil to your table? Let’s get started!
Key Benefits of Brazilian Farofa with Eggs
If you’re looking for a dish that’s both comforting and versatile, Brazilian Farofa with Eggs is your answer. This traditional side dish is a staple in Brazilian households, loved for its crunchy texture, rich flavors, and ability to complement almost any meal. Here’s why you’ll fall in love with it:
- A Taste of Brazil: Farofa is deeply rooted in Brazilian cuisine, often served alongside iconic dishes like feijoada (black bean stew) or picanha (Brazilian steak). It’s a delicious way to bring a piece of Brazil to your table.
- Perfect Texture: The toasted cassava flour gives farofa its signature crunch, while the scrambled eggs add a soft, savory contrast. Every bite is a delightful mix of textures.
- Quick and Easy: With just a handful of ingredients and minimal prep time, this recipe is perfect for busy weeknights or lazy weekend brunches.
- Endlessly Customizable: Add your favorite ingredients—like sausage, onions, or even raisins—to make it your own. It’s a dish that adapts to your taste and creativity.
- Great for Leftovers: Farofa stores well in an airtight container, making it a convenient side dish you can reheat and enjoy throughout the week.
Whether you’re new to Brazilian cuisine or a seasoned fan, this Brazilian Farofa with Eggs recipe is sure to become a go-to in your kitchen. It’s not just a side dish—it’s a flavorful experience that brings people together. Ready to get started? Let’s dive into the ingredients!
Ingredients of Brazilian Farofa with Eggs Recipe
Main Ingredients
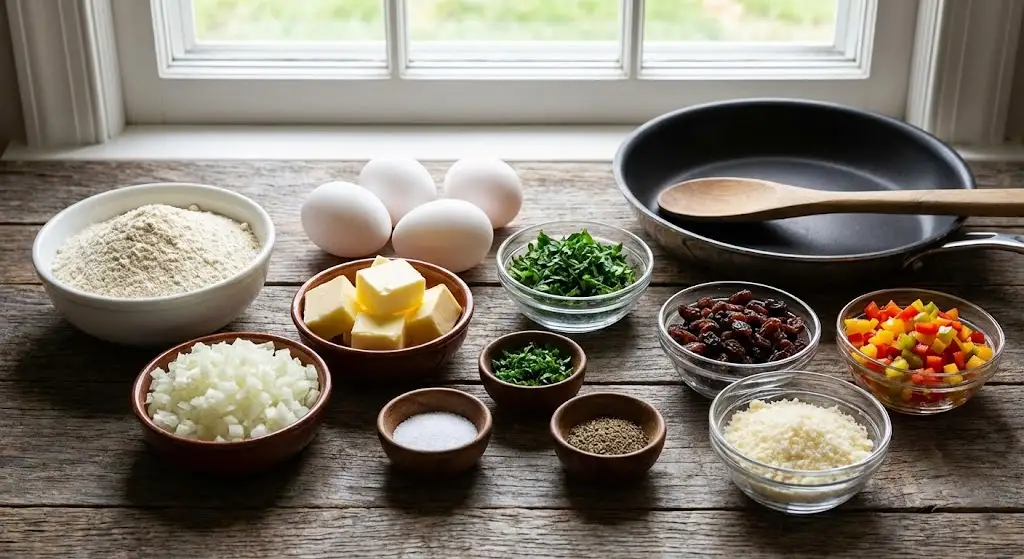
- 2 cups cassava flour (farinha de mandioca): The star of the dish, providing that signature crunch.
- 4 large eggs: Scrambled to perfection for a soft, fluffy texture.
- 3 tablespoons butter: Adds richness and helps toast the flour evenly.
- 1 small onion: Finely diced for a subtle sweetness.
- 2 tablespoons fresh parsley: Chopped, for a fresh, herby finish.
Optional Add-Ins
- 1/4 cup raisins: For a touch of sweetness.
- 1/2 cup diced bell peppers: Adds color and a slight crunch.
- 1/4 cup grated Parmesan cheese: For a savory, cheesy twist.
Seasoning
- Salt and pepper: To taste.
Instructions for Making Brazilian Farofa with Eggs
- Sauté the Onion:
- In a large nonstick skillet, melt 1 tablespoon of butter over medium heat. Add the diced onion and sauté until soft and translucent, about 3-4 minutes.
- Scramble the Eggs:
- Push the onions to one side of the skillet and crack the eggs into the empty space. Scramble the eggs gently, stirring occasionally, until fully cooked. Mix the eggs with the onions.
- Toast the Cassava Flour:
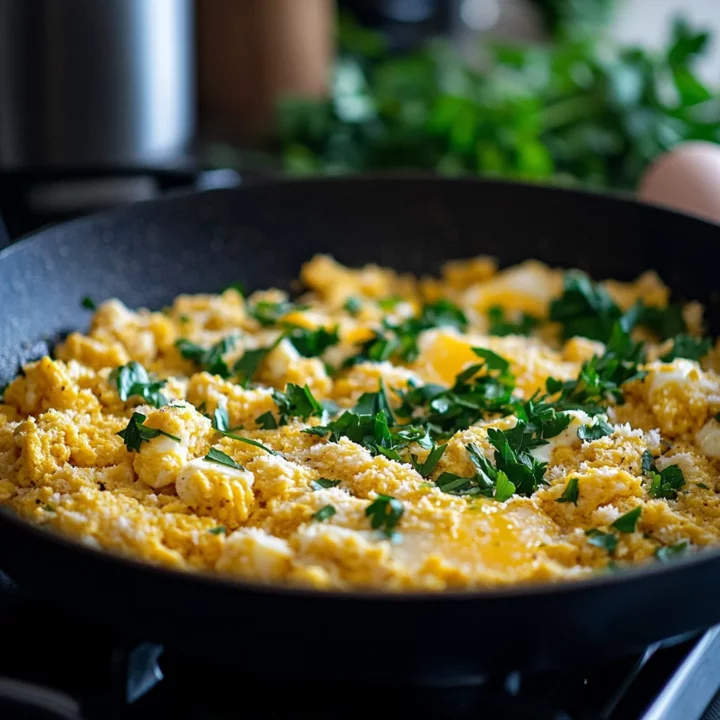
- Reduce the heat to low and add the remaining 2 tablespoons of butter to the skillet. Once melted, add the cassava flour. Stir constantly to toast the flour evenly, ensuring it absorbs the flavors of the onions and eggs. This should take about 5-7 minutes, or until the flour turns golden brown.
- Combine Everything:
- Stir in the parsley and any optional add-ins (like raisins or bell peppers). Season with salt and pepper to taste.
- Serve Warm:
- Transfer the farofa to a serving dish and enjoy immediately while it’s warm and crunchy.
Pro Tips and Variations
- For Extra Flavor: Add a pinch of smoked paprika or cumin for a smoky, earthy note.
- Cheesy Farofa: Stir in grated Parmesan or another hard cheese for a savory twist.
- Sweet and Savory: Include raisins and diced apples for a unique flavor combination.
- Storage Tips: Store leftovers in an airtight container at room temperature for up to 2 days. Reheat in a skillet over low heat to restore the crunch.
Serving Suggestions
- With Feijoada: Pair it with Brazilian black bean stew for a classic combination.
- As a Breakfast Side: Serve it with fresh fruit and a cup of coffee for a hearty morning meal.
- With Grilled Vegetables: Sprinkle farofa over roasted veggies for added texture.
- As a Topping: Use it as a crunchy garnish for soups or salads.
Why You’ll Love This Version
This Brazilian Farofa with Eggs is packed with flavor and texture. The buttery, toasted cassava flour and fluffy scrambled eggs create a comforting dish that’s both versatile and easy to make. Plus, it’s vegetarian-friendly and customizable to suit your taste!
Tools and Equipment Guide
To make this Brazilian Farofa with Eggs, you’ll need a few essential tools:
- Large Nonstick Skillet: Ensures even toasting of the cassava flour and prevents sticking.
- Wooden Spoon: Ideal for stirring the farofa without scratching your skillet.
- Cutting Board and Knife: For chopping onions, parsley, and any optional add-ins.
- Measuring Cups and Spoons: To accurately measure ingredients like cassava flour and butter.
- Mixing Bowl: For whisking the eggs before scrambling.
Having the right tools on hand makes the cooking process smoother and more enjoyable.
Seasonal Variations
This recipe is incredibly adaptable to the seasons. Here are some ideas to keep it fresh and exciting year-round:
- Spring: Add fresh peas and diced carrots for a pop of color and sweetness.
- Summer: Incorporate diced tomatoes, corn, or zucchini for a light, summery flavor.
- Fall: Mix in roasted butternut squash or sweet potatoes for a cozy, autumnal touch.
- Winter: Add sautéed kale or spinach for a hearty, nutritious boost.
These variations keep the dish exciting and aligned with the flavors of each season.
Troubleshooting Common Issues
Even the best cooks run into challenges. Here’s how to fix common farofa mishaps:
- Soggy Farofa: If your farofa loses its crunch, toast it in a dry skillet over low heat for a few minutes, stirring constantly.
- Overcooked Eggs: Be gentle when scrambling the eggs, and remove them from the heat as soon as they’re set.
- Bland Flavor: Adjust the seasoning with a pinch of salt, pepper, or a dash of smoked paprika for extra depth.
- Burnt Flour: Keep the heat low and stir frequently to prevent the cassava flour from burning.
With these tips, you’ll master the art of making perfect farofa every time.
History of the Recipe
Farofa has a rich history in Brazilian cuisine, dating back to indigenous traditions. Cassava flour, the main ingredient, was a staple for native tribes and later adopted by Portuguese colonizers. Over time, farofa evolved into a beloved side dish, often served at family gatherings, barbecues, and festive occasions. Its versatility and simplicity have made it a symbol of Brazilian comfort food, enjoyed by generations.
Conclusion
This Brazilian Farofa with Eggs is a testament to the beauty of simplicity. With its golden, crunchy texture and fluffy scrambled eggs, it’s a dish that’s both comforting and versatile. Whether you’re serving it as a side dish, a breakfast staple, or a topping for your favorite meals, this recipe is sure to become a go-to in your kitchen. So grab your skillet, toast that cassava flour, and enjoy a taste of Brazil right at home!
FAQs
1. Can I make this recipe vegan?
Yes! Replace the eggs with scrambled tofu and use plant-based butter or olive oil instead of regular butter.
2. What can I use instead of cassava flour?
While cassava flour is traditional, you can use coarse cornmeal or breadcrumbs for a similar texture. Note that the flavor will differ slightly.
3. How do I store leftovers?
Store farofa in an airtight container at room temperature for up to 2 days. Reheat in a skillet over low heat to restore its crunch.
4. Can I add other vegetables?
Absolutely! Diced bell peppers, zucchini, or even grated carrots work well in this recipe.
Brazilian Farofa with Eggs
Savor the taste of Brazilian farofa with eggs! This delightful side dish combines crispy bacon and flour for a perfect addition to everyday meals. Try it today!
Ingredients
- 2 cups cassava flour (farinha de mandioca)
- 4 large eggs
- 3 tablespoons butter
- 1 small onion, finely diced
- 2 tablespoons fresh parsley, chopped
- Salt and pepper to taste
- Optional: 1/4 cup raisins, 1/2 cup diced bell peppers, or 1/4 cup grated Parmesan cheese
Instructions
- Sauté diced onion in 1 tablespoon of butter until soft.
- Push onions to one side, scramble eggs in the same skillet, and mix with onions.
- Add remaining butter and cassava flour, toasting over low heat for 5-7 minutes until golden brown.
- Stir in parsley and optional add-ins. Season with salt and pepper.
- Serve warm and enjoy!
Notes
Why You’ll Love This Recipe:
- Quick and Easy: Ready in under 30 minutes!
- Versatile: Perfect as a side dish, breakfast, or topping.
- Customizable: Add your favorite ingredients to make it your own.
- Crunchy and Flavorful: A delightful mix of textures and tastes.
Nutritional values are approximate and may vary based on specific ingredients used.
Nutrition Information:
Yield: 4 Serving Size: 1Amount Per Serving: Calories: 250Total Fat: 12gSaturated Fat: 6gSodium: 150mgCarbohydrates: 28gFiber: 2gSugar: 3gProtein: 8g