




If you’ve ever strolled past a Hawaiian bakery and caught a whiff of warm, sugar-dusted dough, you already know the magic of malasadas — those irresistibly fluffy Hawaiian-Portuguese donuts that feel like a warm hug in pastry form. These golden, pillow-soft treats have roots in Portuguese tradition but found their true fame in Hawaii, where they became a beloved everyday indulgence and a must-have on Fat Tuesday.
I love making malasadas at home because they’re one of those rare recipes that feel both nostalgic and exciting. The dough is rich, airy, and gently sweet, thanks to ingredients like evaporated milk and a classic yeast-raised base, and once they hit the hot oil and get tossed in sugar, it’s impossible not to reach for “just one more.” Whether you’re craving a simple, sugar-coated bite or dreaming of custard-filled variations from famous spots like Leonard’s Bakery, this recipe brings all that bakery-style comfort straight to your kitchen.
So, if you’re ready to create a batch of warm, melt-in-your-mouth malasadas that taste like a tropical getaway, let’s dive in — these are the kind of donuts that make every day feel a little more special.
Key Benefits & Why You’ll Love This Malasadas Recipe
If you’ve been craving that iconic pillow-soft texture of authentic Hawaiian-Portuguese malasadas, this recipe brings everything you love straight to your kitchen no bakery trip required. Whether you’ve tasted them in Hawaii or are discovering them for the first time, this version is designed to be approachable, foolproof, and incredibly rewarding.
Here’s why this recipe is worth every minute:
- Fluffy, bakery-style results at home:
The rich, yeast-raised dough—made with evaporated milk, eggs, and melted butter—creates that signature soft, cloud-like bite malasadas are famous for. - Simple ingredients, big payoff:
Everything you need is pantry-friendly. No special equipment or fancy fillings required (unless you want to add some delicious variations later!). - Beginner-friendly method:
Even if you’re new to deep-frying, I guide you through each step with practical tips on dough texture, proofing, and oil temperature to ensure perfect golden-brown donuts every time. - Customizable for any craving:
Enjoy them classic and sugar-coated, or get creative with cinnamon sugar, vanilla sugar, or popular Hawaiian fillings like custard or haupia. - Perfect for celebrations—or any cozy morning:
Malasadas are a beloved treat for Fat Tuesday, but they’re just as perfect for weekend brunch, holiday gatherings, or those “I deserve something special” days.
In short:
This recipe delivers everything you love about malasadas—warm, airy, sugar-dusted goodness—along with the comfort of making them fresh in your own kitchen. If you’re ready to master one of Hawaii’s most cherished pastries, you’re in the right place.
Ingredients
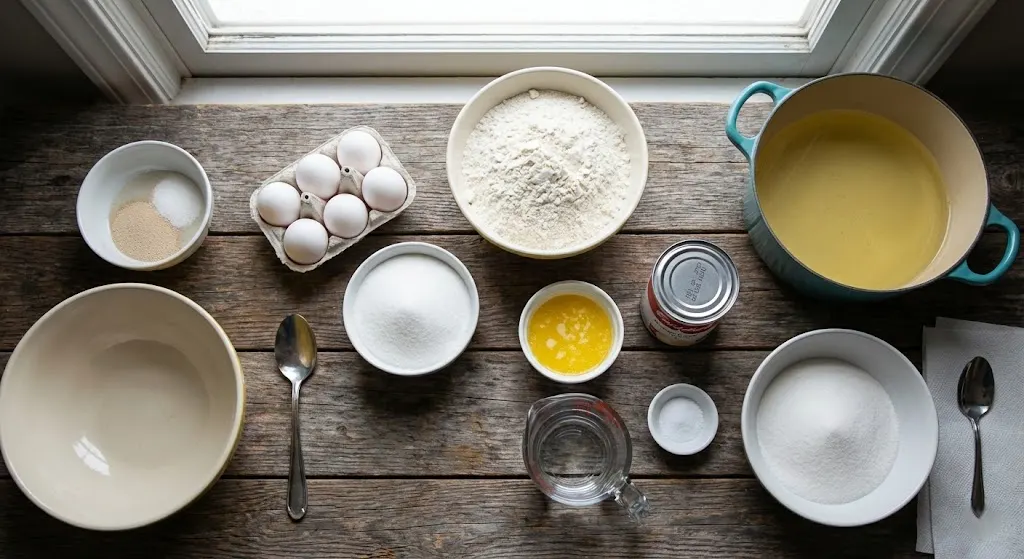
Before you get started, take a moment to gather everything you’ll need. Having your ingredients prepped and ready makes the process smoother and helps your dough come together beautifully. This recipe uses simple, familiar staples to create that classic light, fluffy malasada texture.
Yeast Mixture
- 1 (0.25 ounce) package active dry yeast
- 1 teaspoon white sugar
- ¼ cup warm water (110°F / 45°C)
Dough
- 6 eggs
- 6 cups all-purpose flour
- ½ cup white sugar
- ¼ cup melted butter
- 1 cup evaporated milk
- 1 cup water
- 1 teaspoon salt
For Frying & Coating
- 2 quarts vegetable oil
- 2 cups white sugar (for coating)
These ingredients come together to form a rich, tender dough that fries into perfectly golden malasadas. Once coated in sugar, they deliver that iconic Hawaiian-Portuguese bakery-style experience—warm, sweet, and impossible to resist.
Instructions
Making malasadas at home is a joyful, hands-on process, and once you understand the flow—mix, rise, fry—it becomes surprisingly simple. Follow these steps, and you’ll have warm, sugar-coated Hawaiian-Portuguese donuts ready to enjoy in no time.
1. Prepare the Yeast
- In a small bowl, combine the active dry yeast, 1 teaspoon of sugar, and warm water.
- Stir gently and let the mixture sit for a few minutes until it becomes foamy.
- Tip: If the mixture doesn’t bubble, your water may have been too hot or too cold—try again with fresh yeast.
2. Beat the Eggs
- In a separate bowl, beat the eggs until they become thick and slightly frothy.
- This helps create a lighter, fluffier dough.
3. Make the Dough
- In a large mixing bowl, create a well in the center of the flour.
- Pour the yeast mixture, beaten eggs, sugar, melted butter, evaporated milk, water, and salt into the well.
- Mix everything together, beating until the dough becomes smooth, soft, and slightly sticky.
- Tip: If the dough feels too stiff, add 1–2 tablespoons of water; if overly sticky, sprinkle in a little flour.
- Cover the bowl with a clean towel or plastic wrap and let the dough rise in a warm place until it has doubled in size.
- This usually takes about 1–2 hours depending on room temperature.
4. Fry the Malasadas
- Heat the vegetable oil in a deep pot or fryer to 375°F (190°C).
- Using a large teaspoon or small scoop, drop spoonfuls of dough into the hot oil.
- Fry until the malasadas turn a beautiful golden brown, flipping as needed for even cooking.
- Tip: Work in small batches so the oil temperature stays consistent.
- Transfer the fried malasadas to paper towels to drain excess oil.
5. Coat & Serve
- While still warm, place the malasadas into a large bag or bowl filled with sugar.
- Shake or toss gently until each donut is thoroughly coated.
- Serve immediately for the best texture—soft, warm, and melt-in-your-mouth delicious.
Pro Tips & Variations
Making malasadas is a simple joy, but a few small techniques can elevate your results from good to truly bakery-worthy. These tips will help you master the dough, maintain perfect texture, and explore delicious variations inspired by Hawaiian favorites.
Pro Tips for Perfect Malasadas
- Let the dough fully rise:
A proper rise gives your malasadas that signature airy, pillow-soft interior. If your kitchen is cool, place the bowl near a warm stove or inside an oven with the light on. - Mind the oil temperature:
Keep the oil steady at 375°F (190°C). Too hot, and they’ll brown before cooking through; too cool, and they’ll absorb excess oil. - Use a scoop for even frying:
Dropping the dough with a cookie scoop or large spoon ensures consistent sizes and even cooking. - Drain well before coating:
Slightly draining the malasadas helps the sugar cling without melting into a paste. - Serve immediately:
Malasadas taste their best when warm and freshly coated. Their texture changes as they cool, so enjoy them right away if possible.
Delicious Variations to Try
- Cinnamon Sugar Malasadas:
Mix granulated sugar with cinnamon for a warm, bakery-style twist. - Vanilla Sugar Coating:
Toss sugar with scraped vanilla bean seeds or a touch of vanilla powder for a fragrant finish. - Custard-Filled Malasadas:
Use a piping bag to fill each donut with pastry cream—popular in many Hawaiian bakeries. - Haupia-Filled (Coconut Custard):
For a tropical, creamy upgrade, pipe in chilled coconut haupia pudding. - Chocolate-Filled:
Fill cooled malasadas with smooth chocolate ganache for a rich dessert-style treat. - Lemon or Passionfruit Sugar:
Toss warm donuts in citrus-infused sugar for a bright, fruity variation.
Serving & Pairing Suggestions
One of the best things about malasadas is how effortlessly they fit into any moment—whether you’re recreating a Hawaiian bakery experience at home or sharing a warm batch with family on a slow weekend morning. Here’s how to make the most of every bite:
How to Serve Malasadas
- Serve warm and fresh:
Malasadas are at their absolute best right after frying, when they’re soft, airy, and coated in sparkling sugar. - Add a flavor twist:
Roll them in cinnamon sugar, coconut sugar, or vanilla sugar for an extra layer of richness and aroma. - Create a DIY filling bar:
Set out small bowls of custard, chocolate ganache, jam, or haupia to let everyone fill their own donuts—fun for brunch and gatherings. - Enjoy them plain:
Honestly, a warm, sugar-coated malasada doesn’t need anything else. Simple is sometimes perfect.
What to Pair Them With
- Coffee or espresso:
The light sweetness of malasadas pairs beautifully with bold, bitter notes from coffee or Hawaiian Kona brew. - Hot tea:
Earl grey, chai, or herbal blends complement the rich dough without overpowering it. - Fresh fruit:
Pineapple, strawberries, and mango bring a refreshing contrast to the warm, fried dough. - Cold milk:
A nostalgic, comforting pairing—especially for kids (and adults who love a classic combo).
When to Serve Them
- Weekend brunch
- Fat Tuesday / Malasada Day traditions
- Family celebrations and birthdays
- Holiday breakfast spreads
- Anytime you’re craving a warm, sweet treat
Tools & Equipment Guide
Malasadas don’t require fancy bakery tools, but having the right equipment on hand makes the process smoother, safer, and more enjoyable. Here’s everything you’ll need to create perfectly golden, fluffy Hawaiian-Portuguese donuts at home.
Essential Tools
- Large mixing bowl:
For combining and kneading the dough. - Small bowl for yeast activation:
Helps you clearly see when the yeast becomes foamy. - Wooden spoon or dough whisk:
Ideal for mixing a soft, enriched dough. - Kitchen towel or plastic wrap:
To cover the dough during proofing and prevent it from drying out. - Deep, heavy-bottomed pot or Dutch oven:
Ensures even heating and maintains steady frying temperature. - Deep-fry thermometer:
Crucial for keeping the oil at 375°F (190°C) for consistent frying. - Slotted spoon or spider strainer:
Makes it easy and safe to lift malasadas from the hot oil while draining excess grease. - Paper towels or cooling rack:
For draining the malasadas before coating them in sugar.
Helpful Extras (Optional but Recommended)
- Cookie scoop or small ice cream scoop:
Creates evenly sized malasadas that fry uniformly. - Piping bag with a filling tip:
Perfect for adding custard, chocolate, or haupia fillings. - Large paper bag or wide mixing bowl:
Makes sugar-coating quick and mess-free.
Troubleshooting Common Issues
Even though malasadas are simple and forgiving, a few common hiccups can affect the final result. Don’t worry—these tips will help you fix problems quickly and understand what went wrong so your next batch turns out perfectly fluffy and golden every time.
My dough didn’t rise
- Possible causes:
- Yeast was expired or inactive
- Water used to activate the yeast was too hot or too cold
- Dough was left in a cool environment
- How to fix it:
- Always check yeast freshness.
- Use warm water at 110°F (45°C).
- Proof the dough in a warm spot—inside the oven with the light on works great.
My malasadas turned out dense
- Possible causes:
- Dough was under-proofed
- Too much flour was added
- Eggs weren’t beaten enough
- How to fix it:
- Allow the dough to rise fully until doubled.
- Add flour gradually to avoid a heavy dough.
- Beat the eggs well to help create lift and structure.
They absorbed too much oil
- Possible causes:
- Oil temperature was too low
- Overcrowding the pot
- How to fix it:
- Keep the oil at 375°F (190°C).
- Fry in small batches to maintain temperature.
- Let malasadas drain briefly before coating.
The centers are raw or doughy
- Possible causes:
- Dough scoops were too large
- Oil was too hot, browning the outside too quickly
- How to fix it:
- Use a consistent scoop size.
- Reduce heat slightly and maintain a steady temperature.
My sugar coating melted
- Possible causes:
- Malasadas were too hot or too oily
- How to fix it:
- Drain excess oil on paper towels.
- Let them cool for 30–60 seconds before tossing in sugar.
The dough was too sticky to handle
- Possible causes:
- Humidity or slight measurement differences
- How to fix it:
- Lightly dust hands with flour.
- Add just a tablespoon of flour at a time—soft dough creates better malasadas.
FAQs
Here are some of the most common questions home cooks have when making malasadas. These quick answers will help you feel confident from start to finish.
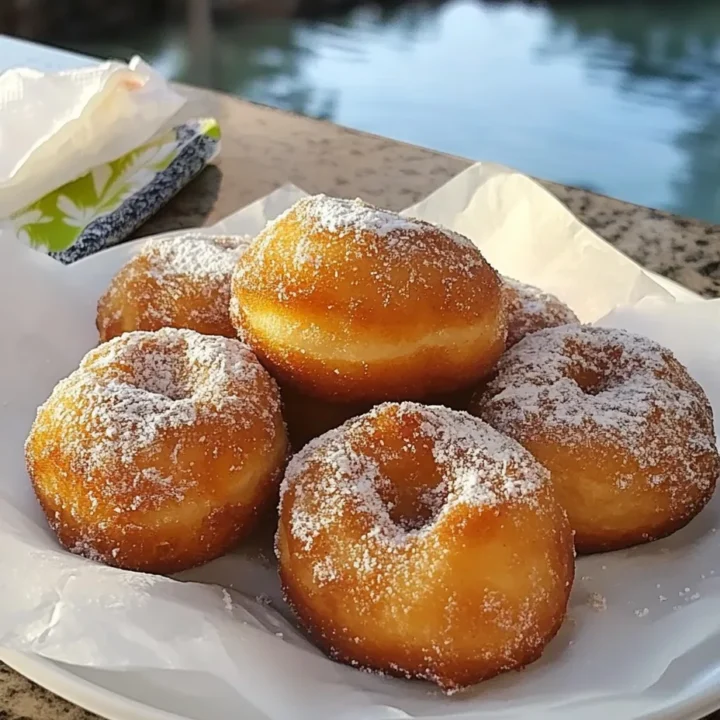
Malasadas (Hawaiian-Portuguese Donuts)
If you’ve been craving that iconic pillow-soft texture of authentic Hawaiian-Portuguese malasadas, this recipe brings everything you love straight to your kitchen—no bakery trip required.
Ingredients
Yeast Mixture:
- 1 (0.25 oz) package active dry yeast
- 1 tsp white sugar
- ¼ cup warm water (110°F / 45°C)
Dough:
- 6 eggs
- 6 cups all-purpose flour
- ½ cup white sugar
- ¼ cup melted butter
- 1 cup evaporated milk
- 1 cup water
- 1 tsp salt
For Frying & Coating:
- 2 quarts vegetable oil
- 2 cups white sugar (for coating)
Instructions
1. Activate the Yeast
- In a small bowl, mix the yeast, 1 teaspoon sugar, and warm water.
- Let it sit for a few minutes until foamy and active.
2. Prepare the Eggs
- Beat eggs in a separate bowl until they’re thick and slightly frothy.
3. Make the Dough
- Add flour to a large mixing bowl and create a well in the center.
- Add the yeast mixture, eggs, sugar, melted butter, evaporated milk, water, and salt.
- Mix until the dough becomes smooth, soft, and slightly sticky.
- Cover the bowl and let the dough rise in a warm place until doubled (about 1–2 hours).
4. Fry the Malasadas
- Heat vegetable oil to 375°F (190°C) in a deep pot.
- Drop spoonfuls of dough into the hot oil.
- Fry until golden brown, turning for even cooking.
5. Coat & Serve
- Remove malasadas to paper towels to drain.
- Toss warm donuts in sugar until evenly coated.
- Serve immediately for the best texture and flavor.
Notes
- Soft dough makes fluffy malasadas: Don’t over-flour the dough; it should feel slightly sticky.
- Keep the oil temperature steady: Consistent heat ensures golden, evenly cooked donuts without excess oil absorption.
- Work in small batches: Overcrowding lowers the oil temperature and causes greasy malasadas.
- Coat while warm: Sugar sticks best when the donuts are hot and freshly fried.
- Add variations if you like: Try cinnamon sugar, vanilla sugar, custard filling, haupia, or chocolate ganache for bakery-style twists.
Nutrition Information:
Yield: 24 Serving Size: 1Amount Per Serving: Calories: 210Total Fat: 8gSaturated Fat: 2gSodium: 90mgCarbohydrates: 30gFiber: 0.9gSugar: 14gProtein: 4g