




There’s something undeniably comforting about peppermint holiday cookies—that cool, refreshing crunch paired with a buttery, melt-in-your-mouth bite instantly brings back memories of festive kitchens, twinkling lights, and trays of cookies cooling on the counter. Have you ever noticed how the scent of peppermint alone can make a space feel more cheerful and inviting? These cookies do exactly that, filling your home with a holiday aroma that signals something special is about to come out of the oven.
This recipe is perfect for anyone who loves festive cookies that look beautiful, taste nostalgic, and fit seamlessly into busy holiday baking plans. Whether you’re baking for a cookie exchange, gifting homemade treats, or simply craving a classic Christmas cookie with a playful peppermint twist, these cookies strike the ideal balance between simple preparation and seasonal charm. Easy to make, fun to decorate, and even easier to enjoy, they set the stage for a holiday tradition you’ll want to repeat year after year.
Why You’ll Love These Peppermint Holiday Cookies
These peppermint holiday cookies are the kind of recipe you’ll find yourself coming back to every December—and for good reason. They strike that sweet spot between nostalgic flavor and effortless preparation, making them perfect for both seasoned bakers and first-time holiday cookie makers.
Here’s what makes this recipe truly special:
- Classic holiday flavor, no fuss
The buttery sugar-cookie base lets the crushed candy canes shine without overpowering each bite. You get a refreshing peppermint crunch balanced by a soft, tender texture—exactly what festive cookies should taste like. - Simple ingredients you already know
No specialty items or complicated techniques here. This recipe relies on everyday pantry staples, making it ideal for last-minute holiday baking or spontaneous cookie cravings. - Perfect for sharing and gifting
These cookies hold their shape beautifully, making them a standout addition to cookie platters, exchanges, and edible holiday gifts. The peppermint icing adds a polished look without requiring advanced decorating skills. - Beginner-friendly, yet impressive
If you’ve ever felt intimidated by Christmas cookies, this is a great place to start. The dough is easy to work with, forgiving, and fun—especially if you’re baking with kids or friends. - Flexible and easy to customize
Whether you prefer a lighter peppermint flavor or extra crunch on top, this recipe adapts effortlessly to your taste. It’s a dependable base you can personalize year after year.
Think of this recipe as your reliable go-to when you want festive cookies that feel homemade, look inviting, and taste like the holidays—without spending hours in the kitchen.
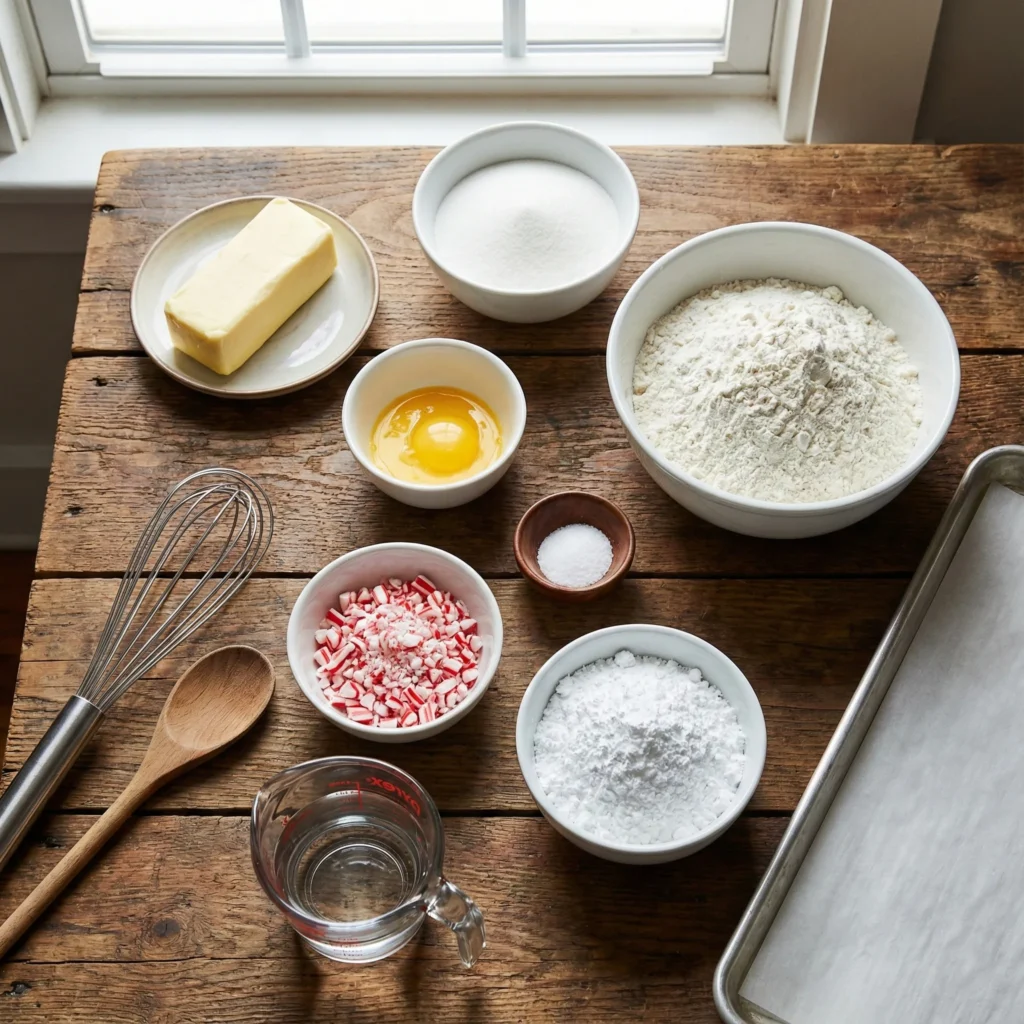
Ingredients for Peppermint Holiday Cookies
One of the best things about these peppermint holiday cookies is how approachable the ingredient list is. Everything here is simple, familiar, and easy to find—yet each ingredient plays an important role in creating that classic holiday flavor and texture we all love.
Here’s what you’ll need and why it matters:
- Butter (softened)
This is the foundation of the cookies. Softened butter creams smoothly with sugar, giving the cookies their rich flavor and tender crumb. For best results, let it sit at room temperature until just pliable. - White sugar
Sugar sweetens the dough and helps create lightly crisp edges while keeping the centers soft—ideal for festive sugar-style cookies. - Egg
The egg binds everything together and adds structure, ensuring the cookies bake evenly without becoming dry. - All-purpose flour
This provides the body of the cookie. Measuring accurately is key here—too much flour can make the cookies dense instead of tender. - Salt
A small amount goes a long way. It balances the sweetness and enhances the buttery, peppermint flavors. - Crushed peppermint candy canes
The star ingredient. These add a refreshing crunch and unmistakable holiday character, transforming a simple cookie dough into a true peppermint Christmas cookie.
For the Peppermint Icing
- Confectioners’ sugar – Creates a smooth, lightly sweet glaze
- Warm water – Helps control icing consistency
- Crushed candy canes (optional) – Adds sparkle, texture, and extra peppermint flair
💡 Tip: Crush candy canes finely for even distribution, or leave slightly chunky pieces if you love bold peppermint crunch in your festive cookies.
Instructions: How to Make Peppermint Holiday Cookies
Let’s walk through this recipe step by step, just like we would if we were baking together in the kitchen. These peppermint holiday cookies come together easily, and a calm, steady pace is all you need for great results.
- Prepare your oven and baking sheets
Start by preheating your oven to 350°F (175°C). Lightly grease your baking sheets or line them with parchment paper to prevent sticking and encourage even browning. - Cream the butter and sugar
In a large bowl, beat the softened butter and white sugar until the mixture looks pale and fluffy. This step is key for creating tender, light cookies, so take a moment to let the mixer do its work. - Incorporate the egg
Add the beaten egg and mix until fully combined. The dough should look smooth and cohesive at this stage, with no streaks of butter remaining. - Form the cookie dough
Gradually mix in the flour and salt just until a soft dough forms. Avoid overmixing—this helps keep the cookies from becoming tough. Gently fold in the crushed candy canes, making sure they’re evenly distributed. - Shape and space the cookies
Roll the dough into walnut-sized balls and place them about 1 inch apart on the prepared baking sheets. This spacing allows the cookies to spread just enough without touching. - Bake to golden perfection
Bake for 8–10 minutes, or until the edges are lightly golden. The centers may look slightly soft, which is exactly what you want for tender Christmas cookies. - Cool completely
Let the cookies rest on the baking sheet for a few minutes before transferring them to a wire rack. Allow them to cool fully before icing so the glaze sets nicely. - Make and apply the icing
Whisk the confectioners’ sugar with warm water until smooth and pourable. Dip the tops of the cooled cookies into the icing, then sprinkle with crushed candy canes for a festive finish.
✨ Pro tip: If your icing feels too thick, add warm water a few drops at a time. Too thin? A spoonful of confectioners’ sugar will bring it right back.
Pro Tips and Variations
These peppermint holiday cookies are wonderfully forgiving, which makes them perfect for experimenting while still delivering reliable results. A few small adjustments can elevate both flavor and presentation without complicating the process.
Pro Tips for Best Results
- Start with properly softened butter
Butter that’s too cold won’t cream well, and butter that’s too soft can cause excess spreading. Aim for butter that gives slightly when pressed but still holds its shape. - Don’t overmix the dough
Once the flour is added, mix just until combined. Overworking the dough can lead to dense cookies instead of soft, tender centers. - Crush candy canes strategically
Finely crushed peppermint blends smoothly into the dough, while slightly larger pieces add crunch and visual appeal. A mix of both creates the best texture. - Ice only after cooling
Even slightly warm cookies can cause the icing to melt and slide. Letting them cool completely ensures clean, glossy tops.
Easy Variations to Try
- Extra peppermint flavor
Add a tiny splash of peppermint extract to the dough or icing for a bolder minty bite—just a little goes a long way. - Chocolate twist
Dip the bottoms of the cookies in melted chocolate for a rich contrast that pairs beautifully with peppermint. - Softer sugar-style cookies
Slightly underbake the cookies by a minute if you prefer extra-soft centers, especially for cookie platters. - Decorative finish
Swap crushed candy canes on top for festive sprinkles or sanding sugar to match your holiday theme.
These small tweaks let you tailor your festive cookies to your taste while keeping the recipe simple, approachable, and perfect for stress-free holiday baking.
Serving & Pairing Suggestions
Once your peppermint holiday cookies are iced and set, it’s time to enjoy them—and this is where they truly shine. Their festive look and refreshing flavor make them incredibly versatile, whether you’re hosting or simply treating yourself.
Here are a few delicious ways to serve and enjoy them:
- Classic holiday cookie platters
Arrange these cookies alongside other Christmas cookies for a colorful, eye-catching dessert spread. The peppermint topping adds contrast and instantly signals a festive theme. - Perfect with warm drinks
These cookies pair beautifully with hot cocoa, coffee, or tea. The cool peppermint balances rich, warm beverages, making them ideal for cozy winter evenings. - Edible holiday gifts
Stack a few cookies in clear bags or decorative tins for a thoughtful homemade gift. They travel well and hold their shape, which is perfect for sharing. - Cookie exchanges and parties
Their recognizable flavor and cheerful appearance make them a standout at cookie swaps and holiday gatherings. - After-dinner sweet treat
Serve one or two as a light dessert after a festive meal—they’re sweet without feeling heavy.
✨ Serving tip: For the freshest texture, enjoy these festive cookies within a few days of baking, or store them properly to maintain their soft centers and crisp edges.
Tools and Equipment Guide
Having the right tools on hand makes baking these peppermint holiday cookies smoother, faster, and far more enjoyable. Nothing fancy is required—just a few reliable basics that help ensure consistent, bakery-worthy results.
Here’s what you’ll need and why each tool matters:
- Mixing bowls
A large bowl for the dough and a smaller one for the icing keep everything organized and easy to manage. - Electric mixer or sturdy whisk
Creaming the butter and sugar properly is essential for soft, tender cookies. An electric mixer makes this step effortless, but a whisk and a bit of patience work too. - Measuring cups and spoons
Accurate measurements are key to achieving the right cookie texture, especially when working with flour and sugar. - Baking sheets
Flat, sturdy baking sheets promote even baking and prevent uneven browning. - Parchment paper or nonstick spray
This helps the cookies release easily and simplifies cleanup—always a win during busy holiday baking days. - Wire cooling rack
Allows air to circulate around the cookies so they cool evenly and stay crisp at the edges. - Small whisk or spoon
Ideal for mixing the peppermint icing until smooth and lump-free. - Shallow bowl for icing
Makes dipping the cookies clean and controlled, helping you achieve a neat finish.
🧰 Helpful tip: If you’re baking multiple batches of festive cookies, rotate baking sheets between oven racks to ensure consistent results every time.
Troubleshooting Common Issues
Even the simplest peppermint holiday cookies can run into small hiccups, especially during busy holiday baking sessions. The good news? Most issues are easy to fix with a few quick adjustments.
Here’s how to solve the most common problems:
- Cookies spread too much while baking
This usually means the butter was too soft or warm. Chill the dough for 15–20 minutes before baking to help the cookies hold their shape. - Cookies turn out dry or crumbly
Overbaking or adding too much flour is often the culprit. Measure flour carefully and remove the cookies when the edges are lightly golden and the centers still look soft. - Peppermint flavor is too strong
Candy canes vary in intensity. If the flavor feels overpowering, reduce the amount slightly next time or balance it with a thicker icing layer. - Icing is too runny
Add more confectioners’ sugar, one spoonful at a time, until the icing thickens to a smooth, dip-able consistency. - Icing sets unevenly or slides off
Make sure the cookies are completely cool before dipping. Warm cookies can cause the icing to melt and spread. - Cookies stick to the baking sheet
Always line baking sheets with parchment paper or lightly grease them to ensure easy release.
FAQs

Peppermint Holiday Cookies
These peppermint holiday cookies are the kind of recipe you’ll find yourself coming back to every December—and for good reason.
Ingredients
Cookies:
- 1 cup butter, softened
- ¾ cup white sugar
- 1 large egg, beaten
- 3 cups all-purpose flour
- ¼ teaspoon salt
- ½ cup crushed peppermint candy canes
Icing:
- ¾ cup confectioners’ sugar
- 5 teaspoons warm water
- 2 tablespoons crushed peppermint candy canes (optional)
Instructions
- Preheat oven to 350°F (175°C). Lightly grease baking sheets or line with parchment paper.
- Cream butter and sugar together until light and fluffy.
- Beat in the egg until fully incorporated.
- Mix in flour and salt to form a soft dough. Fold in crushed candy canes.
- Roll dough into walnut-sized balls and place 1 inch apart on prepared baking sheets.
- Bake for 8–10 minutes, until edges are lightly golden.
- Cool briefly on the baking sheet, then transfer to a wire rack to cool completely.
- Whisk confectioners’ sugar and warm water until smooth.
- Dip cookie tops into icing and sprinkle with crushed candy canes if desired.
- Let icing set for at least 5 minutes before serving.
Notes
- For best texture, avoid overmixing once the flour is added.
- Finely crushed candy canes blend evenly; larger pieces add crunch and sparkle.
- Always ice cookies after they’ve completely cooled to prevent melting.
- These cookies store well in an airtight container for several days, making them ideal for holiday planning.
Nutrition Information:
Yield: 24 Serving Size: 1Amount Per Serving: Calories: 165Total Fat: 8gSaturated Fat: 5gSodium: 60mgCarbohydrates: 22gFiber: 0.5gSugar: 13gProtein: 2g