




There’s something magical about a perfect pan pizza recipe—that irresistible mix of a crispy bottom, chewy interior, and golden edges that taste like your favorite pizza parlor, all made right at home. If you’ve ever wished for a homemade pan pizza that delivers a thick, airy crust without complicated steps or fancy equipment, you’re in the right place. This method relies on a simple, no-knead dough and a long, hands-off rise that builds incredible flavor with almost no effort.
I love how this recipe turns a humble cast iron skillet into your secret pizza weapon, creating that deep-dish vibe with edge-to-edge cheese and a beautifully caramelized crust. Whether you’re planning a cozy family pizza night or want a foolproof way to impress guests, this skillet-baked beauty never disappoints. And the best part? You can customize it endlessly—switch up toppings, play with sauces, or keep it classic with pepperoni and mozzarella.
So, are you ready to master your new favorite homemade pizza night staple? Let’s dive into the delicious world of pan-style perfection.
When you’re craving a crust that’s thick, airy, and irresistibly golden, this perfect pan pizza recipe delivers every time. One of the things I love most about pan-style pizza is how forgiving and beginner-friendly it is. There’s no need for fancy stretching techniques or tossing dough into the air—your cast iron skillet does most of the work for you. With a simple, no-knead dough and slow rise, you get that classic pizzeria flavor and texture without the stress.
Before you dive in, here’s what makes this recipe such a standout:
- Hands-off dough method: The overnight rise develops deep flavor and that signature chewy interior with almost zero effort.
- Crispy, golden crust: Thanks to a generous layer of olive oil, the bottom and edges brown beautifully, giving you that restaurant-quality crunch.
- Perfect cheese melt: Using low-moisture mozzarella ensures the cheese bubbles and browns without watering down the crust.
- Skillet-baked convenience: A 12-inch skillet creates even heat distribution, making this a foolproof option for beginners and seasoned home cooks alike.
As you work through the recipe, think of the dough as your canvas. Whether you’re keeping it classic with pepperoni or adding your own creative toppings, this method gives you the perfect foundation every time. And remember—great pizza doesn’t have to be complicated. With the right ingredients, a little patience, and a well-oiled pan, you’re already halfway to pizza night perfection.
Key Benefits & Why You’ll Love This Recipe
If you’ve ever wanted to recreate that irresistible pan-style pizza you get from your favorite pizzeria—crispy on the outside, tender on the inside, and loaded with melted cheese—this recipe checks every box. It’s designed to be simple, reliable, and downright delicious, even if you’re new to making homemade pizza.
Here’s why this perfect pan pizza recipe will quickly become a go-to in your kitchen:
- Effortless, No-Knead Dough: Forget complicated techniques—this dough requires minimal handling but delivers maximum flavor thanks to a slow overnight rise.
- Crispy, Golden-Brown Crust: The olive oil in the cast iron skillet creates that signature crunchy bottom you normally only get from a restaurant.
- Thick, Airy Texture: The long fermentation creates a beautifully bubbly, chewy interior that makes every bite satisfying.
- Customizable Toppings: Whether you love classic pepperoni, prefer veggie-loaded pies, or crave a simple cheese pizza, this base pairs perfectly with any flavor combo.
- Beginner-Friendly Method: Clear steps, simple ingredients, and reliable results make this ideal for cooks of all skill levels.
- Perfect for Pizza Night: It’s hearty, comforting, and guaranteed to impress both family and guests.
If you’ve been searching for a foolproof, flavor-packed pizza that feels special without requiring hours of hands-on work, this skillet-baked beauty is exactly what you need. Ready to gather your ingredients and get started?
Ingredients
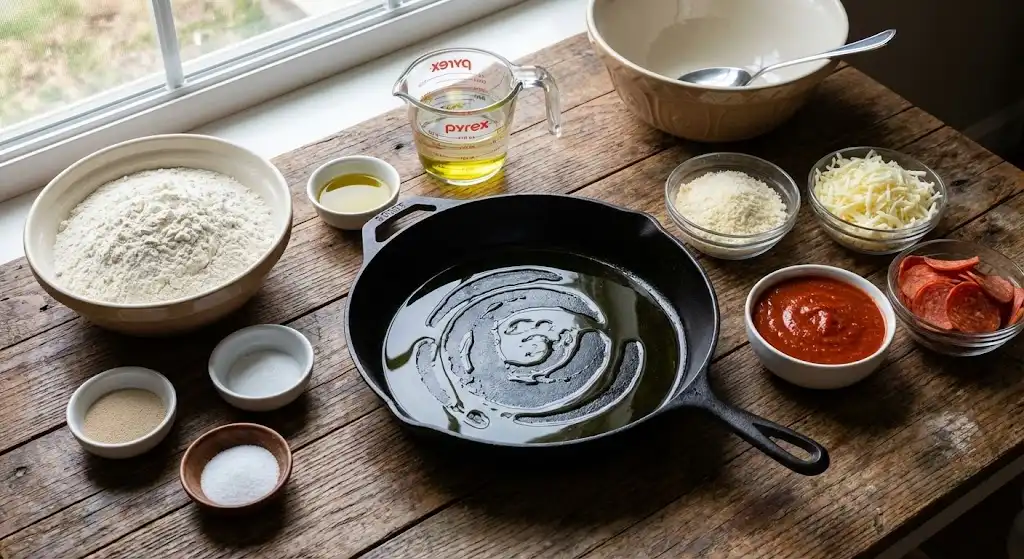
Here’s everything you’ll need to make this irresistible perfect pan pizza. Each ingredient plays an important role in creating that golden, crispy crust and tender, chewy interior, so try to use the freshest, highest-quality options available.
For the Dough & Crust
- 2 1/2 cups all-purpose flour – Gives the dough its structure and soft, chewy bite.
- 1 1/4 teaspoons active dry yeast – Helps the dough rise slowly and develop rich flavor.
- 1 1/4 teaspoons salt – Balances flavor and strengthens the dough.
- 1 cup lukewarm water – Activates the yeast and hydrates the dough.
- 4 tablespoons olive oil, divided – Ensures a crispy, golden crust and prevents sticking.
For the Toppings
- 2 tablespoons freshly grated Parmesan cheese – Adds a savory, nutty edge and helps crisp the crust.
- 6 ounces low-moisture mozzarella cheese, shredded – Melts beautifully without making the crust soggy.
- 3/4 cup no-cook pizza sauce – A bright, flavorful base that keeps the recipe simple.
- 1/3 cup sliced pepperoni – Classic, crisped edges and rich flavor.
Feel free to prep toppings ahead of time so assembling your skillet pizza feels effortless and fun. Ready to bring it all together? Let’s move on to the step-by-step instructions.
Instructions
Making this perfect pan pizza is easier than you might think—just follow these steps and let the dough do most of the work. Take your time, enjoy the process, and you’ll be rewarded with a crust that’s crispy, chewy, and irresistibly golden.
1. Mix the Dough
- In a large bowl, combine the flour, yeast, and salt.
- In a separate measuring cup, stir together the lukewarm water and 1 tablespoon olive oil.
- Pour the wet mixture into the dry ingredients and stir until everything comes together into a shaggy dough. No kneading needed!
2. Let It Rise
- Cover the bowl tightly with plastic wrap.
- Leave the dough at room temperature for 8 to 12 hours, or until it triples in size.
- This slow rise creates incredible flavor and that signature airy, pan-style texture.
3. Shape the Dough
- Lightly flour your work surface and gently turn out the dough.
- Stretch and fold it a few times until the surface becomes smoother.
- Shape it into a ball using your hands—don’t worry about perfection.
4. Prep the Skillet
- Pour the remaining olive oil into a 12-inch cast iron skillet.
- Coat the bottom and sides completely; this is the secret to achieving a crisp, golden crust.
- With oiled hands, place the dough into the skillet and gently flatten it into a thick disc.
5. Spread the Dough to the Edges
- Preheat your oven to 400°F (200°C).
- Using your fingertips, press the dough outward until it reaches the edges and climbs about 1/2 inch up the sides of the pan.
- This forms that classic pan pizza shape.
6. Add Cheese, Sauce & Toppings
- Sprinkle the Parmesan around the edges and across the dough surface.
- Add 1/3 cup mozzarella, then spread the pizza sauce evenly on top.
- Finish with the remaining mozzarella and your pepperoni slices.
7. Bake the Pizza
- Place the skillet in the oven and bake for 20–25 minutes, or until the crust is golden and the cheese is bubbling and lightly browned.
8. Crisp the Bottom
- Move the skillet to the stovetop over medium heat.
- Cook for 3–5 minutes to toast the bottom of the crust for that perfect pan-style crunch.
9. Cool & Serve
- Carefully slide the pizza onto a wire rack and let it rest for 10 minutes.
- Transfer to a cutting board, slice, and enjoy every delicious bite.
This method gives you a pizza that’s beautifully browned from edge to center with a crispy undercarriage and melty, irresistible cheese—just like your favorite pizzeria, but made right in your own kitchen.
Pro Tips and Variations
Mastering a perfect pan pizza is all about small details that make a big impact. These simple tips and creative variations will help you customize your pizza and achieve the best possible flavor and texture every time.
Pro Tips for Success
- Use a well-seasoned cast iron skillet: This ensures even heat distribution and prevents sticking while helping the crust crisp beautifully.
- Don’t rush the rise: The 8–12 hour fermentation is what gives the dough its airy structure and deep, developed flavor.
- Oil generously: Olive oil creates that signature crispy bottom and golden edges, so don’t be shy with it.
- Press gently, not forcefully: When shaping the dough in the pan, use your fingertips to encourage it outward. Let it relax for a few minutes if it springs back.
- Toast the bottom: The final stovetop step is key for that true pizzeria-style crunch—don’t skip it!
- Let it rest before slicing: Cooling the pizza on a wire rack prevents steam from softening the crust.
Easy Variations to Try
- Margherita Style: Swap the pepperoni for fresh basil, sliced tomatoes, and a sprinkle of sea salt.
- Veggie Supreme: Add bell peppers, mushrooms, olives, and red onions for a hearty, colorful option.
- Three-Cheese Delight: Combine mozzarella, provolone, and parmesan for ultra-melty goodness.
- Spicy Pepperoni: Add sliced jalapeños or crushed red pepper flakes for a fiery kick.
- BBQ Chicken: Replace the sauce with BBQ, add cooked chicken, and top with red onions and cilantro.
- White Pizza: Skip the sauce and spread a thin layer of ricotta, garlic, and Italian herbs before adding cheese.
Whether you keep it classic or experiment with new combinations, this pan pizza method gives you a solid foundation for unlimited delicious possibilities.
Serving & Pairing Suggestions
A pizza this good deserves to be served in a way that elevates every bite. Whether you’re planning a cozy movie night or hosting friends, these serving and pairing ideas will help you round out the perfect meal.
How to Serve Your Pan Pizza
- Let it rest before slicing: Giving the pizza about 10 minutes on a wire rack keeps the crust crisp and makes slicing cleaner and easier.
- Cut into generous squares or wedges: Pan pizza is hearty, so bold slices feel just right.
- Finish with a touch of freshness: A sprinkle of fresh basil, cracked black pepper, or a drizzle of extra-virgin olive oil adds a lovely finishing touch.
What to Serve With It
- Fresh Green Salad: A simple mix of greens, cherry tomatoes, and a tangy vinaigrette balances the richness of the pizza.
- Garlic Bread or Breadsticks: Ideal for dipping into any leftover sauce.
- Roasted Vegetables: Broccoli, zucchini, or asparagus add a nutritious side with great flavor contrast.
- Soup Pairings: Tomato basil or minestrone makes a warm, comforting duo on cooler days.
Drink Pairings
- Sparkling water or lemonade: Light, refreshing options that complement the richness without overpowering it.
- Iced tea: A balanced, versatile choice that pairs well with savory flavors.
- Beer: Crisp lagers or light ales match beautifully with the cheesy, golden crust.
- Red wine: Chianti, Pinot Noir, or a medium-bodied blend enhances the pizza’s savory notes.
Whether you’re enjoying a relaxed dinner at home or sharing slices with friends, pairing this perfect pan pizza with simple, fresh sides and the right drinks turns an ordinary meal into something memorable.
Tools and Equipment Guide
Making a truly perfect pan pizza starts with using the right tools. You don’t need anything fancy, but a few key pieces of equipment can make all the difference in creating that crispy bottom, golden edges, and beautifully melted cheese. Here’s a quick guide to what you’ll need—and why each item matters.
Essential Tools
- 12-inch Cast Iron Skillet:
The star of the recipe. Cast iron delivers unbeatable heat retention, helping the crust brown evenly and develop that signature pan-style crunch. A well-seasoned skillet also prevents sticking and adds subtle flavor. - Mixing Bowls:
One large bowl for mixing and rising the dough, plus a small bowl or measuring cup for combining the wet ingredients. - Plastic Wrap or Dough Cover:
Keeping the dough covered during the long rise prevents it from drying out and allows it to ferment properly. - Measuring Cups & Spoons:
Accurate measurements ensure consistent results, especially for the flour, yeast, and salt. - Wooden Spoon or Dough Spatula:
Helpful for stirring the shaggy dough together without kneading.
Helpful Extras
- Wire Rack:
Cooling the pizza on a rack keeps the crust crisp by letting steam escape instead of softening the bottom. - Cutting Board:
Perfect for slicing and serving once the pizza has rested. - Sharp Pizza Cutter or Chef’s Knife:
Clean, effortless slicing—especially important with a thick, airy crust. - Silicone Spatula:
Useful for gently lifting the pizza from the skillet when transferring it to the rack.
Optional But Nice-to-Have
- Kitchen Scale:
For precise measurements, particularly if you want to replicate bakery-style consistency. - Heat-Resistant Gloves:
Cast iron gets extremely hot—good gloves make handling it safer and easier.
With just a cast iron skillet and a few kitchen basics, you’re fully equipped to make a restaurant-quality pan pizza at home. Now that your tools are ready, let’s look at how to tackle any bumps along the way.
Troubleshooting Common Issues
Even with a reliable recipe, a few hiccups can pop up when making pan pizza at home. Don’t worry—most problems have quick, simple fixes. Here’s how to handle the most common challenges so your pizza turns out golden, crisp, and delicious every time.
Dough Won’t Stretch to the Edges
If the dough keeps springing back:
- Let it rest for 5–10 minutes to relax the gluten.
- Lightly oil your fingers and gently press again.
- Avoid forcing it; patience creates a more even, airy crust.
Dough Didn’t Rise Enough
If your dough looks dense:
- Make sure your room temperature is warm enough (ideally 70–75°F / 21–24°C).
- Check that your yeast is fresh and not expired.
- Allow a bit more time—sometimes fermentation just needs an extra hour.
Soggy Center
A soft middle usually means too much moisture:
- Use low-moisture mozzarella to avoid excess liquid.
- Don’t overload the sauce. A thin, even layer is best.
- Make sure the pizza cooks the full 20–25 minutes, and finish with the stovetop step for a crisp underside.
Crust Too Pale or Soft
If the bottom lacks color:
- Increase the stovetop browning time by a minute or two.
- Make sure the skillet has enough olive oil—it helps develop that deep golden crust.
- Confirm the oven is fully preheated before baking.
Cheese Browning Too Quickly
If the top browns before the crust is done:
- Move the skillet one rack lower in the oven.
- Tent loosely with foil during the last few minutes of baking if needed.
Pizza Sticking to the Pan
If you can’t lift it easily:
- The skillet likely needed more oil. Next time, be generous.
- Use a silicone spatula to gently loosen the edges before sliding it out.
With these quick fixes in your back pocket, you’ll be able to troubleshoot any pizza-night surprises and keep your perfect pan pizza consistently crisp, melty, and flavorful from edge to center.
FAQs
Here are the most common questions home cooks ask when making a perfect pan pizza, along with clear, helpful answers to guide you through the process.
Perfect Pan Pizza
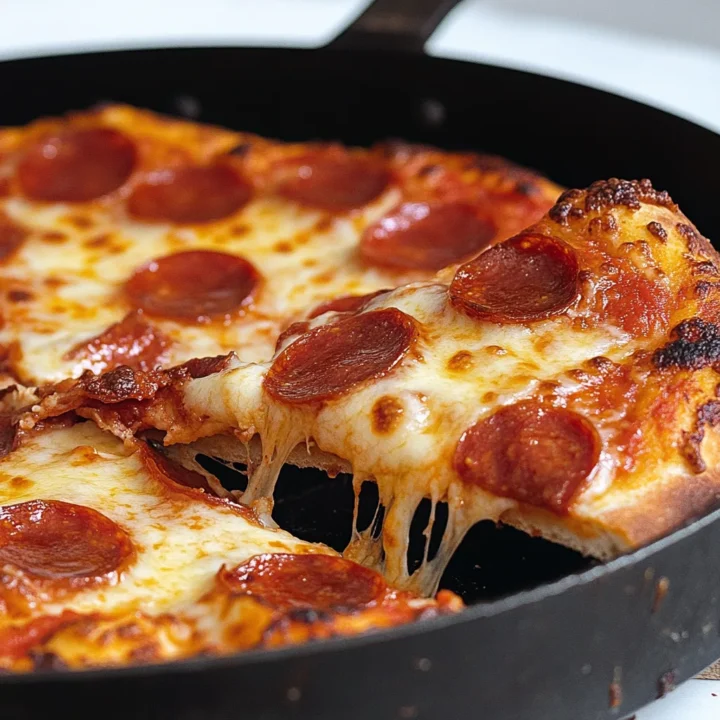
If you’ve ever wanted to recreate that irresistible pan-style pizza you get from your favorite pizzeria—crispy on the outside, tender on the inside, and loaded with melted cheese—this recipe checks every box.
Ingredients
For the Dough:
- 2 1/2 cups all-purpose flour
- 1 1/4 teaspoons active dry yeast
- 1 1/4 teaspoons salt
- 1 cup lukewarm water
- 1 tablespoon olive oil (mixed into dough)
For the Pan & Toppings:
- 3 tablespoons olive oil (for skillet)
- 2 tablespoons freshly grated Parmesan cheese
- 6 ounces low-moisture mozzarella cheese, shredded
- 3/4 cup no-cook pizza sauce
- 1/3 cup sliced pepperoni
Instructions
- Mix the Dough: Combine flour, yeast, and salt in a large bowl. Mix the water and 1 tablespoon olive oil separately, then stir into the dry ingredients until a shaggy dough forms.
- Rise the Dough: Cover with plastic wrap and let rise at room temperature for 8–12 hours until tripled in size.
- Shape the Dough: Transfer to a floured surface, gently stretch and fold a few times, then shape into a smooth ball.
- Prep the Skillet: Add 3 tablespoons olive oil to a 12-inch cast iron skillet and coat the bottom and sides thoroughly.
- Pan the Dough: Place the dough in the skillet, flatten into a disc, and let it rest while the oven preheats to 400°F (200°C).
- Shape the Crust: Use your fingers to press the dough to the edges and slightly up the sides.
- Top the Pizza: Sprinkle Parmesan over the dough, add 1/3 of the mozzarella, spread the sauce, then top with remaining cheese and pepperoni.
- Bake: Bake for 20–25 minutes until the crust is golden and the cheese is bubbly.
- Crisp the Bottom: Transfer skillet to the stovetop and cook over medium heat for 3–5 minutes to brown the bottom.
- Cool & Serve: Slide onto a wire rack, rest 10 minutes, slice, and enjoy.
Notes
- Overnight Rise = Best Texture: A long fermentation gives the dough an airy, chewy interior with minimal effort.
- Use Low-Moisture Mozzarella: Prevents soggy spots and ensures even melting.
- Toast the Bottom: The stovetop finishing step is essential for that iconic pan pizza crunch.
- Let It Rest: Cooling on a wire rack keeps the crust crisp instead of steaming.
Nutrition Information:
Yield: 4 Serving Size: 1Amount Per Serving: Calories: 360Total Fat: 18gSodium: 640mgCarbohydrates: 36gFiber: 2gSugar: 3gProtein: 14g