




There’s something undeniably comforting about wraps that are warm, cheesy, and bursting with flavor—and these Cheesy Garlic Chicken Wraps check every box. If you’ve ever needed a quick dinner that feels indulgent yet effortless, this recipe is about to become your new go-to. I love how tender, seasoned chicken meets melty cheese and a creamy garlic sauce, all wrapped up in a soft tortilla that’s easy to customize for any craving.
What makes these garlic chicken wraps truly special is their versatility. Whether you’re rushing through a busy weeknight, planning a casual family meal, or looking for an easy chicken wrap recipe that everyone will enjoy, this dish delivers bold flavor without complicated steps. Each bite is savory, creamy, and satisfying—proof that simple ingredients can create something truly crave-worthy. Let’s dive in and turn a handful of pantry staples into a wrap you’ll want to make again and again.
Key Benefits & Why You’ll Love This Recipe
These Cheesy Garlic Chicken Wraps are the kind of meal that instantly earns a spot in your regular rotation—and for good reason. They’re comforting, flavorful, and incredibly easy to pull together, even on your busiest days. If you enjoy recipes that feel homemade and satisfying without demanding hours in the kitchen, this one truly delivers.
Here’s why this recipe works so well:
- Quick and stress-free: With simple prep and a fast stovetop cook, these garlic chicken wraps are perfect for weeknight dinners when time is tight but expectations are high.
- Big flavor from simple ingredients: Garlic-seasoned chicken, creamy sauce, and melty cheese come together to create bold, savory flavor without complicated techniques.
- Family-friendly and customizable: These cheesy chicken wraps are easy to adapt—add veggies, spice them up, or keep them mild for picky eaters.
- Perfect balance of textures: Juicy chicken, gooey cheese, and soft tortillas create a satisfying bite every time.
- Great for meal planning: The chicken filling reheats beautifully, making this an excellent option for quick lunches or make-ahead dinners.
What I love most about this easy chicken wrap recipe is how effortlessly it turns everyday ingredients into something crave-worthy. It’s comfort food you can feel good about making—reliable, flavorful, and flexible enough to suit whatever your day (or fridge) throws at you.
Ingredients
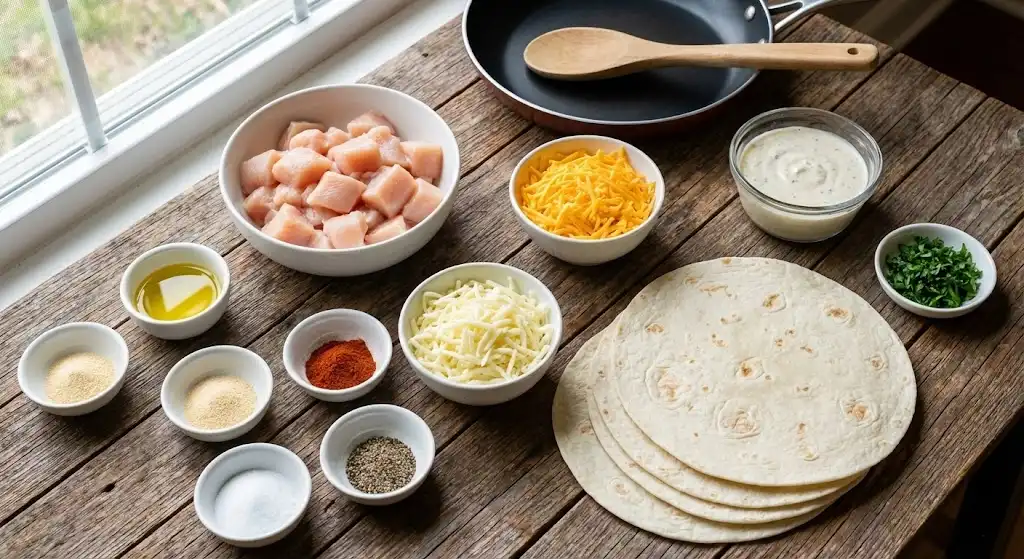
One of the best things about these Cheesy Garlic Chicken Wraps is how approachable the ingredient list is. Everything here is easy to find, budget-friendly, and works together to build layers of flavor without overcomplicating the recipe. Before you start cooking, take a moment to prep and measure—this makes the process smooth and stress-free.
Here’s what you’ll need:
- Chicken breasts: Lean, tender, and perfect for soaking up garlic seasoning. Dicing the chicken ensures quick, even cooking and juicy bites in every wrap.
- Olive oil: Helps the seasonings cling to the chicken while keeping it moist as it cooks.
- Garlic powder: The star flavor that gives these garlic chicken wraps their bold, savory character.
- Onion powder: Adds depth and balance without overpowering the garlic.
- Paprika: Brings gentle warmth and a subtle smoky note to the chicken.
- Salt and black pepper: Essential for enhancing all the flavors.
- Shredded cheddar cheese: Provides sharp, rich flavor and that classic cheesy pull.
- Shredded mozzarella cheese: Melts beautifully, creating a creamy, gooey texture inside the wraps.
- Flour tortillas: Soft, flexible, and sturdy enough to hold the filling without tearing.
- Creamy garlic sauce: Ties everything together with a smooth, indulgent finish.
- Fresh parsley: Optional, but highly recommended for a fresh pop of color and flavor at the end.
💡 Ingredient Tip:
Using freshly shredded cheese instead of pre-shredded helps these cheesy chicken wraps melt more smoothly and evenly, giving you that irresistible, restaurant-style texture.
Instructions
Making these Cheesy Garlic Chicken Wraps is straightforward and rewarding—no complicated techniques, just simple steps that build incredible flavor. Follow along, and I’ll walk you through it as if we’re cooking side by side in the kitchen.
- Season the chicken
In a mixing bowl, add the diced chicken breasts, olive oil, garlic powder, onion powder, paprika, salt, and black pepper. Toss everything together until each piece is evenly coated. This step is key to ensuring every bite of chicken is flavorful and well-seasoned. - Cook the chicken
Heat a non-stick skillet over medium heat. Once warm, add the seasoned chicken in a single layer. Cook for 6–8 minutes, stirring occasionally, until the chicken is golden on the outside and fully cooked through. Remove from the heat and let it rest for a minute—this helps keep the chicken juicy. - Prepare the tortillas
Lay the flour tortillas flat on a clean surface. Spread a generous layer of creamy garlic sauce over each one, making sure to cover most of the surface for maximum flavor. - Assemble the wraps
Evenly distribute the cooked garlic chicken over the tortillas. Sprinkle the shredded cheddar and mozzarella cheese on top while the chicken is still warm so it starts melting right away. - Wrap and finish
Fold in the sides of each tortilla, then roll them up tightly into wraps. If you prefer a lightly crisped exterior, place the wraps back into the warm skillet for 1–2 minutes per side until golden and the cheese is fully melted. - Garnish and serve
Remove from the pan, slice in half if desired, and finish with a sprinkle of fresh parsley. Serve immediately while the wraps are warm, cheesy, and irresistible.
✨ Cooking Tip:
Avoid overcrowding the pan when cooking the chicken—giving it space helps it brown properly instead of steaming, which makes a big difference in flavor.
Pro Tips and Variations
Once you’ve mastered the basics of these Cheesy Garlic Chicken Wraps, there are plenty of easy ways to customize them to match your taste, mood, or what you have on hand. These tips and variations will help you get consistently delicious results while keeping the recipe exciting every time you make it.
Pro Tips for Best Results
- Cut chicken evenly: Uniform pieces cook at the same rate, keeping the chicken juicy and preventing dry bites.
- Season generously: Chicken loves seasoning—don’t be afraid to taste and adjust before cooking.
- Warm the tortillas slightly: A quick warm-up makes them more flexible and less likely to tear when rolling.
- Add cheese while the chicken is hot: This helps the cheese melt smoothly and evenly for that perfect cheesy texture.
- Don’t overfill the wraps: It’s tempting, but balanced filling makes rolling easier and keeps everything neatly inside.
Easy Variations to Try
- Spicy garlic chicken wraps: Add chili flakes, hot sauce, or a pinch of cayenne to the chicken seasoning.
- Veggie-loaded option: Toss in sautéed bell peppers, onions, or mushrooms for extra texture and color.
- Low-carb alternative: Swap flour tortillas for low-carb wraps or serve the cheesy garlic chicken in lettuce cups.
- Extra creamy version: Mix a little shredded cheese directly into the chicken while it’s still in the pan.
- Kid-friendly twist: Skip spicy additions and add a touch more cheese for a mild, comforting flavor kids love.
Serving & Pairing Suggestions
These Cheesy Garlic Chicken Wraps are satisfying on their own, but the right sides and pairings can turn them into a complete, well-rounded meal. Whether you’re serving them for a casual lunch or a cozy dinner, these ideas help you round out the plate without extra effort.
Simple Side Dish Ideas
- Crispy oven fries or potato wedges: A classic pairing that complements the creamy, cheesy filling.
- Fresh green salad: A light salad with a tangy vinaigrette balances the richness of the wraps.
- Coleslaw or cabbage salad: Adds crunch and a refreshing contrast to the warm chicken wraps.
- Roasted vegetables: Think broccoli, zucchini, or carrots for a wholesome, colorful side.
Dipping & Sauce Options
- Extra creamy garlic sauce for drizzling or dipping
- Ranch or yogurt-based sauce for a cool, creamy contrast
- Spicy sauce or chili mayo for heat lovers
Serving Tips
- Slice the wraps in half for easier handling and a more polished presentation.
- Serve immediately while the cheese is melty and the tortillas are warm.
- For gatherings, cut each wrap into smaller portions and secure with toothpicks for easy sharing.
Tools and Equipment Guide
You don’t need anything fancy to make these Cheesy Garlic Chicken Wraps, which is part of their appeal. A few reliable kitchen tools are all it takes to keep the process smooth and enjoyable from start to finish.
Essential Tools
- Non-stick skillet or frying pan: Ensures the chicken cooks evenly without sticking and helps achieve that light golden color.
- Cutting board: Provides a safe, stable surface for dicing the chicken.
- Sharp knife: Makes clean, even cuts, which helps the chicken cook consistently.
- Mixing bowl: Perfect for seasoning and coating the chicken evenly before cooking.
- Wooden spoon or spatula: Ideal for stirring the chicken without damaging your pan.
- Measuring spoons: Help keep seasoning balanced and flavors consistent.
Helpful Extras (Optional)
- Tongs: Great for turning the chicken quickly and safely while it cooks.
- Pan lid: Useful if you want to trap heat briefly to help melt the cheese when crisping the wraps.
- Paper towels: Handy for quick cleanup and managing excess moisture.
Troubleshooting Common Issues
Even simple recipes can raise a few questions the first time around. If something doesn’t go exactly as planned, these quick fixes will help you get your Cheesy Garlic Chicken Wraps back on track without stress.
- Chicken turned out dry:
This usually means it cooked a bit too long or at too high a heat. Next time, keep the pan at medium heat and remove the chicken as soon as it’s cooked through. Letting it rest briefly also helps lock in moisture. - Chicken isn’t browning well:
Overcrowding the pan can cause steaming instead of browning. Cook the chicken in a single layer and give it space so it can develop that golden color and deeper flavor. - Wraps are tearing when rolling:
Cold tortillas tend to crack. Warm them slightly in a pan or microwave to make them soft and flexible before assembling. - Cheese isn’t melting properly:
Make sure the chicken is still warm when you add the cheese. You can also cover the pan briefly when crisping the wraps to trap heat and help the cheese melt evenly. - Wraps feel too heavy or greasy:
Use just enough sauce to coat the tortilla without overdoing it, and balance the filling so the wraps stay satisfying but not overwhelming.
FAQs
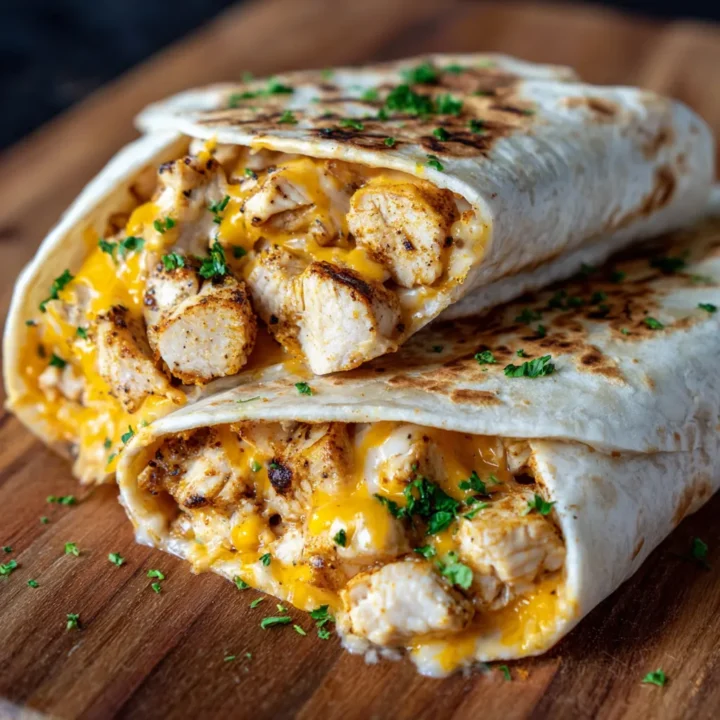
Cheesy Garlic Chicken Wraps
These Cheesy Garlic Chicken Wraps are the kind of meal that instantly earns a spot in your regular rotation—and for good reason.
Ingredients
- 2 large chicken breasts, diced
- 1 tablespoon olive oil
- 2 teaspoons garlic powder
- 1 teaspoon onion powder
- 1 teaspoon paprika
- Salt and black pepper, to taste
- 1 cup shredded cheddar cheese
- ½ cup shredded mozzarella cheese
- 4 large flour tortillas
- ½ cup creamy garlic sauce
- Fresh parsley, chopped (for garnish)
Instructions
- In a bowl, combine diced chicken with olive oil, garlic powder, onion powder, paprika, salt, and pepper. Toss until evenly coated.
- Heat a non-stick skillet over medium heat. Add the seasoned chicken and cook for 6–8 minutes, stirring occasionally, until golden and fully cooked. Remove from heat and let rest briefly.
- Lay tortillas flat on a clean surface. Spread an even layer of creamy garlic sauce over each tortilla.
- Divide the cooked chicken evenly among the tortillas. Sprinkle cheddar and mozzarella cheese over the warm chicken.
- Fold in the sides and roll each tortilla tightly into a wrap.
- Optional: Place wraps back in the skillet for 1–2 minutes per side until lightly golden and the cheese is fully melted.
- Garnish with fresh parsley and serve warm.
Notes
- For extra melt: Add the cheese while the chicken is still hot to help it melt evenly.
- Crispier wraps: Lightly toast the wrapped tortillas in a dry skillet for a golden exterior.
- Flavor boost: A pinch of chili flakes or smoked paprika adds gentle heat without overpowering the garlic.
- Make-ahead tip: Cook the chicken in advance and store it refrigerated for up to 2 days for faster assembly.
Nutrition Information:
Yield: 4 Serving Size: 1Amount Per Serving: Calories: 480Total Fat: 24gSodium: 720mgCarbohydrates: 32gFiber: 2gSugar: 3gProtein: 34g