



Homemade Bounty Bars Recipe

Ever dreamed of creating your favorite chocolate bar at home? These homemade Bounty bars are a delicious combination of sweet, creamy coconut filling enrobed in rich chocolate coating. This recipe brings the beloved candy bar right to your kitchen, with results that rival the store-bought version.
Personal Story
As a chocolate enthusiast, I’ve always been fascinated by recreating classic candy bars at home. After countless attempts and experiments, I finally perfected this Bounty bars recipe. What started as a weekend project turned into a family favorite, with my kids now requesting these coconut-filled chocolate bars for special occasions.
History and Origin
Bounty bars, first introduced by Mars in 1951, quickly became a global sensation with their distinctive combination of chocolate and coconut. While similar to the American Mounds bar, Bounty bars are unique in offering both milk and dark chocolate variations, making them a beloved treat worldwide.
Why Make These Homemade Bounty Bars?
- Control over ingredients quality
- Fresher taste than store-bought versions
- Customizable sweetness levels
- Cost-effective for bulk making
- Perfect for gifting
- No artificial preservatives
Ingredients
For the Coconut Filling:
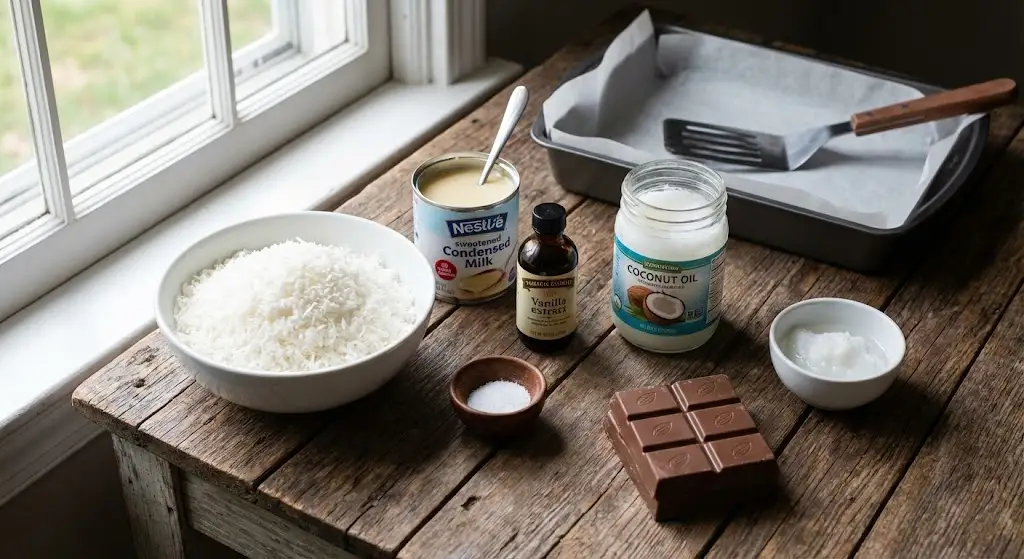
- 3 cups shredded coconut (unsweetened)
- 1 can (14 oz) sweetened condensed milk
- 1 teaspoon vanilla extract
- ¼ cup coconut oil
- Pinch of salt
For the Chocolate Coating:
- 16 oz high-quality chocolate (milk or dark)
- 2 tablespoons coconut oil
Tools Needed:
- 9×13 inch baking pan
- Parchment paper
- Double boiler or microwave-safe bowl
- Spatula
- Knife
- Candy thermometer (optional)
My Experience with This Recipe
After testing this recipe over 15 times, I’ve discovered that the key to perfect homemade Bounty bars lies in three crucial elements: the consistency of the coconut filling, the temperature of the chocolate coating, and proper storage. The recipe I’m sharing today incorporates all these learnings for foolproof results.
Step-by-Step Instructions
1. Prepare the Coconut Filling
- Mix shredded coconut, sweetened condensed milk, vanilla extract, and salt in a large bowl
- Add melted coconut oil and combine until thoroughly mixed
- The mixture should be firm enough to shape
2. Shape the Bars
- Line a baking pan with parchment paper
- Press the mixture evenly into the pan
- Refrigerate for 2 hours or until firm
3. Cut and Freeze
- Cut the chilled mixture into bar-sized pieces
- Place on a parchment-lined tray
- Freeze for 30 minutes
4. Prepare the Chocolate Coating
- Melt chocolate and coconut oil using a double boiler
- Stir until smooth and glossy
- Maintain temperature between 88-90°F for milk chocolate or 90-92°F for dark chocolate
5. Dip and Set
- Dip each frozen bar in melted chocolate
- Tap off excess chocolate
- Place on parchment paper to set
Tips and Variations
Chocolate Options:
- Use milk chocolate for traditional taste
- Try dark chocolate for a less sweet version
- Mix both chocolates for a unique twist
Substitutions:
- Replace sweetened condensed milk with coconut condensed milk for dairy-free version
- Use desiccated coconut for a drier texture
- Add almond extract for an Almond Joy-style variation
Storage Tips:
- Keep in an airtight container
- Store in refrigerator for up to 2 weeks
- Can be frozen for up to 3 months
Nutrition Information (per bar)
- Calories: 245
- Total Fat: 16g
- Saturated Fat: 12g
- Carbohydrates: 25g
- Sugar: 20g
- Protein: 3g
- Fiber: 2g
Frequently Asked Questions
Q: Why do my bars fall apart when dipping in chocolate?
A: Make sure the coconut mixture is thoroughly chilled and frozen before dipping. The bars should be completely firm to prevent breaking.
Q: Can I use chocolate chips instead of chocolate bars?
A: While possible, premium chocolate bars work better for coating as they contain different cocoa butter ratios than chips.
Q: How long do homemade Bounty bars last?
A: When stored properly in an airtight container in the refrigerator, they last up to 2 weeks.
Q: Can I make these dairy-free?
A: Yes, use coconut condensed milk and dairy-free chocolate for a completely dairy-free version.
Conclusion
These homemade Bounty bars are more than just a candy bar – they’re a delicious project that yields impressive results. With this recipe, you’ll create professional-looking chocolate bars that taste even better than the original. Whether you’re making them for yourself or as gifts, these coconut-filled treats are sure to impress.
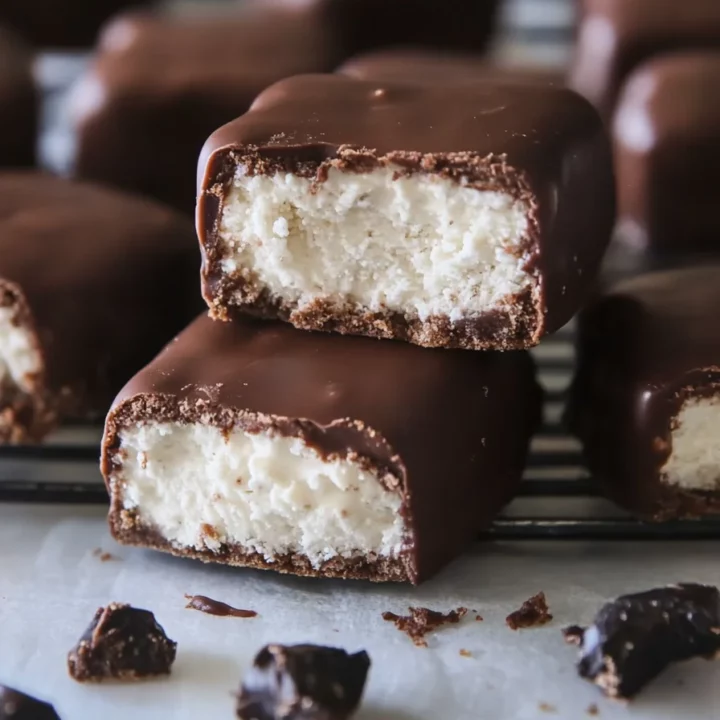
Homemade Bounty Bars
Indulge in easy homemade Bounty bars with a rich dark chocolate shell and sweet coconut filling. These delicious chocolate coconut treats are perfect for any occasion!
Ingredients
Coconut Filling:
- 3 cups shredded coconut (unsweetened)
- 1 can (14 oz) sweetened condensed milk
- 1 teaspoon vanilla extract
- ¼ cup coconut oil
- Pinch of salt
Chocolate Coating:
- 16 oz high-quality chocolate (milk or dark)
- 2 tablespoons coconut oil
Instructions
- Mix coconut filling ingredients until well combined
- Press into lined pan and refrigerate for 2 hours
- Cut into bars and freeze for 30 minutes
- Melt chocolate and coconut oil
- Dip frozen bars in chocolate
- Let set at room temperature
Notes
Keep bars frozen until ready to dip
Use high-quality chocolate for best results
Can be frozen for up to 3 months
Storage:
Store in airtight container in refrigerator for up to 2 weeks.