




There’s something undeniably satisfying about biting into a crispy, golden fried chicken sandwich—the kind with a tender buttermilk-soaked interior, a crunchy seasoned coating, and just the right touch of heat. If you’ve ever wished you could skip the drive-thru and enjoy that same fast-food-style goodness at home, this copycat fried chicken sandwich recipe is about to become your new favorite.
I love how simple ingredients—buttermilk, ranch seasoning, cayenne, and a double-dredged crust—come together to create a sandwich that feels indulgent yet totally doable in your own kitchen. And honestly, who doesn’t enjoy a homemade version that’s not only fresher, but customizable? Want it spicier? Extra crispy? Loaded with pickles? You get to make it exactly the way you like.
As you walk through the process, you’ll see just how approachable it is: a quick marinade to tenderize the chicken, a crunchy flour-and-cornstarch coating, and a perfectly timed fry that locks in flavor and texture. Whether you’re cooking for the family or recreating your favorite comfort food just for yourself, this sandwich delivers that irresistible crunch and satisfying flavor every time.
Let’s dive in and bring that classic crispy chicken sandwich experience right to your table—no drive-thru required.
Key Benefits & Why You Will Love This Recipe
If you’ve ever craved that irresistible crispy chicken sandwich experience without leaving home, this recipe brings all the comfort, crunch, and flavor straight to your kitchen. What I love most is how simple ingredients and a few smart techniques transform everyday chicken breasts into a drive-thru–quality meal—only fresher, hotter, and completely customizable.
Here’s why this copycat fried chicken sandwich recipe will win you over:
- Unbeatable Crunch: The combination of flour, cornstarch, and a double-dredge coating gives the chicken that signature extra-crispy, golden crust you expect from a great fried chicken sandwich.
- Tender, Juicy Chicken Every Time: A buttermilk marinade seasoned with ranch mix, salt, and a dash of hot sauce helps break down the chicken’s fibers, ensuring a tender and flavorful bite from edge to edge.
- Fast-Food Flavor, Homemade Quality: You get all the satisfaction of a popular fried chicken sandwich, minus the preservatives, long lines, or mystery ingredients.
- Customizable Heat Level: Whether you prefer mild or crave a spicy cayenne kick, you can easily adjust the seasoning to match your taste.
- Budget-Friendly Comfort Food: This sandwich uses affordable pantry staples, making it a perfect weeknight treat or weekend indulgence without overspending.
What makes this recipe even better is how approachable it is. You don’t need fancy equipment or professional frying experience—just a bit of guidance and some simple steps. By the time you finish cooking, you’ll have a crispy, juicy, restaurant-style chicken sandwich that feels like a small victory in the kitchen.
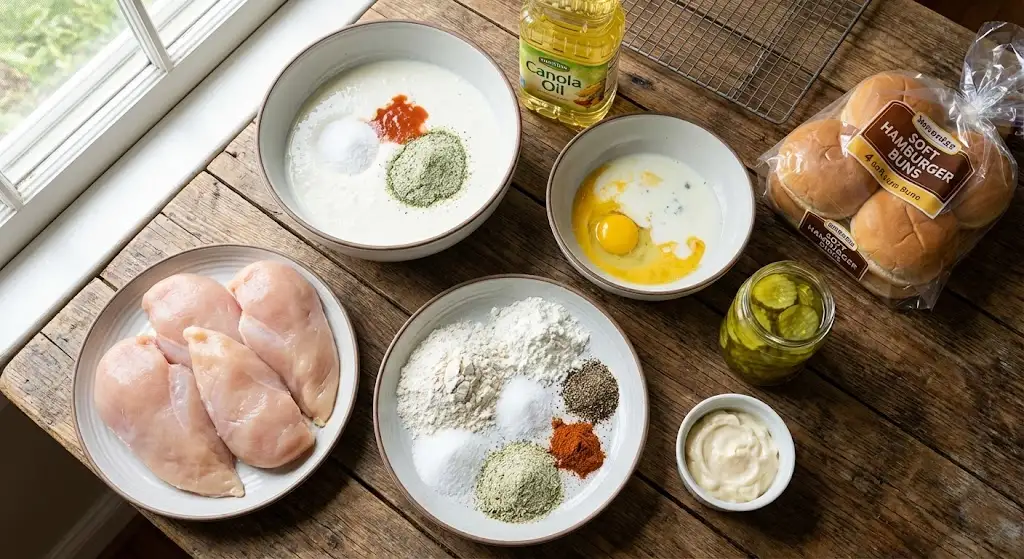
Ingredients
Before you start cooking, let’s break down everything you’ll need to create this crispy, flavorful copycat fried chicken sandwich. Having your ingredients prepped and ready makes the entire process smoother and much more enjoyable.
For the Marinade
This buttermilk mixture helps tenderize the chicken and infuse it with savory flavor.
- 1 cup buttermilk
- 2 teaspoons kosher salt
- 1 dash hot sauce
- 1 tablespoon dry ranch dressing mix
- 4 (5-ounce) skinless, boneless chicken breast halves
For the Breading
This blend is the secret to that crunchy, golden fried chicken coating.
- 1⅓ cups all-purpose flour
- 2 tablespoons cornstarch
- 2 teaspoons kosher salt
- ½ teaspoon freshly ground black pepper
- 1½ teaspoons cayenne pepper (optional for heat)
- 1 tablespoon dry ranch dressing mix
For the Egg Wash
The step that helps the breading cling perfectly to the chicken.
- 1 large egg, beaten
- ½ cup buttermilk
- ¼ cup milk
For Assembly
Simple components that bring your crispy chicken sandwich together.
- Canola oil, for frying
- 4 soft hamburger buns
- 6 tablespoons mayonnaise
- 12 dill pickle slices
Instructions
Now that everything is prepped, let’s walk through the process of turning simple ingredients into a crispy, golden fried chicken sandwich. I’ll guide you step-by-step so your chicken comes out tender, crunchy, and full of flavor every single time.
Marinate the Chicken
This step is key for juiciness and flavor.
- In a bowl, whisk together the buttermilk, kosher salt, hot sauce, and ranch dressing mix.
- Trim the chicken breasts if needed, then cut a few shallow diagonal slits in the thicker end of each piece—this helps them cook evenly.
- Submerge the chicken in the marinade, cover, and refrigerate for 2–4 hours.
- Tip: Don’t skip the marinade—it’s what makes the chicken tender and well-seasoned!
Prepare the Breading Station
A little organization here ensures the coating sticks beautifully.
- In a shallow dish, combine the flour, cornstarch, salt, black pepper, cayenne (if using), and ranch mix.
- In a separate bowl, whisk together the egg, buttermilk, and milk to form the wash.
Coat the Chicken
This is where the magic—and the crunch—happens.
- Remove a piece of chicken from the marinade, letting excess drip off.
- Dredge it thoroughly in the seasoned flour mixture.
- Dip it into the egg wash.
- Return it to the flour mixture for a second coat.
- Shake off excess and place the chicken on a wire rack.
- Repeat with all pieces and let them rest on the rack for at least 15 minutes.
- Why rest? It helps the breading stick, preventing it from falling off during frying.
Fry to Crispy Perfection
This step transforms your coated chicken into that iconic golden goodness.
- Heat canola oil in a deep skillet or pot to 350–375°F (175–190°C).
- Carefully lower a chicken piece into the hot oil.
- Fry for 4–5 minutes total, flipping halfway through.
- Cook until golden, crispy, and the internal temperature reaches 165°F (74°C).
- Transfer the fried chicken to a piece of crinkled foil or a clean wire rack to keep it crisp.
Assemble the Sandwich
Time to build your masterpiece.
- Lightly toast the hamburger buns for extra flavor and texture.
- Spread mayonnaise generously on the top and bottom buns.
- Add a layer of dill pickle slices.
- Place the hot, crispy chicken breast on top.
- Close the sandwich and serve immediately.
Pro Tips and Variations
Want to take your copycat fried chicken sandwich to the next level? These practical tips and fun variations will help you elevate flavor, boost crispiness, and customize your sandwich exactly the way you love it. Think of this section as your insider guide to achieving foolproof results every time.
Pro Tips for the Best Crispy Chicken
- Double-Dredging Is Key: That second dip in the flour mixture creates the signature extra-crunchy crust. Don’t rush it.
- Let the Coating Rest: Resting the coated chicken on a wire rack for 15–20 minutes helps the breading cling firmly, preventing it from sliding off in the oil.
- Mind the Oil Temperature: Keep the oil between 350–375°F (175–190°C). Too low and the chicken absorbs oil; too high and it burns before cooking through.
- Use Canola Oil or Any Neutral Oil: These oils have high smoke points and won’t overpower the flavor of your fried chicken.
- Slice Thick Chicken Breasts: Cutting shallow slits into the thicker side helps them cook evenly and prevents undercooked centers.
- Don’t Skip the Buttermilk Marinade: It tenderizes the chicken and seasons it from the inside out, giving you that juicy, flavorful bite.
Flavor Variations to Try
- Spicy Chicken Sandwich: Add extra cayenne pepper or a pinch of paprika and chili powder to the breading mix. You can also drizzle hot sauce over the finished sandwich.
- Extra-Crispy Version: Add an additional tablespoon of cornstarch to the flour mixture for a lighter, crispier crust.
- Garlic Ranch Twist: Mix garlic powder and a little extra ranch seasoning into the flour for a deeper savory profile.
- Pickle-Brined Upgrade: For an ultra-tangy kick, soak the chicken in pickle juice for 30 minutes before adding it to the buttermilk marinade.
- Air Fryer Friendly: Spray coated chicken lightly with oil and air fry at 375°F (190°C) for 12–15 minutes, flipping halfway through. It won’t be exactly like deep-fried, but still delicious and crispy.
Serving & Pairing Suggestions
Once your crispy fried chicken sandwich is ready, the fun part begins—serving it up in a way that makes every bite even better. Whether you’re planning a casual weeknight dinner or a comfort-food weekend treat, these pairing ideas help you turn a simple sandwich into a full, satisfying meal.
Perfect Pairings for Your Sandwich
- Classic French Fries: You can’t go wrong with a side of hot, crispy fries. Thick-cut, shoestring, or seasoned—anything works here.
- Creamy Coleslaw: The cool crunch of slaw balances the warmth and crispiness of the chicken beautifully.
- Pickle Spears: If you love the tangy pop of dill pickles on the sandwich, serve extra on the side for an added bite.
- Sweet Potato Fries: A slightly sweeter option that pairs surprisingly well with the savory, spicy coating.
- Mac and Cheese: For a richer comfort-food combo, a creamy mac and cheese brings that cozy, indulgent feel.
Refreshing Drink Options
- Iced Tea or Lemonade: Light and refreshing—perfect for cutting through the richness of the sandwich.
- Sparkling Water with Citrus: Helps cleanse the palate between bites, especially if you’ve added heat.
- Homemade Milkshakes: For a fast-food-style experience, pair your sandwich with a classic vanilla or chocolate shake.
Serving Tips for the Best Experience
- Serve Immediately: The chicken tastes best when it’s freshly fried and still hot and crisp.
- Keep Buns Warm: Light toasting adds flavor and helps the buns stand up to the juicy chicken.
- Add Extra Sauce: Besides mayo, try honey mustard, spicy mayo, or ranch dressing for a flavor boost.
- Layer for Balance: A layer of pickles under the chicken keeps the sandwich bright and well-balanced.
Tools and Equipment Guide
The right tools make the cooking process smoother, safer, and far more enjoyable—especially when you’re aiming for that perfectly crispy fried chicken sandwich. You don’t need professional kitchen gear, but a few reliable items can make a big difference in your results.
Essential Tools for Frying
- Deep, Heavy-Bottomed Skillet or Dutch Oven: Helps maintain steady heat, which is crucial for even frying.
- Cooking Thermometer: Keeping your oil between 350–375°F (175–190°C) ensures that golden, crunchy crust without greasy chicken.
- Wire Rack: Allows the chicken to rest after coating and frying, preventing the crust from getting soggy.
- Tongs or Heat-Resistant Slotted Spoon: For safely lowering the chicken into the oil and removing it afterward.
Helpful Prep Tools
- Shallow Dishes: Perfect for organizing your dredging station—one for the flour mixture, one for the egg wash.
- Mixing Bowls: For preparing the marinade and keeping the process clean and organized.
- Cutting Board & Sharp Knife: Handy for adding slits to the thicker part of the chicken breasts so they cook evenly.
For Assembly
- Toaster or Skillet: Toasting the hamburger buns adds flavor and keeps them from getting soggy.
- Spatula or Butter Knife: For spreading mayo or your sauce of choice evenly across the buns.
Optional but Helpful Extras
- Splatter Screen: Keeps oil from popping onto your stovetop (and you).
- Cooling Rack Over a Baking Sheet: Great if you’re frying in batches—keeps chicken warm and crisp in the oven without drying it out.
- Air Fryer: Useful if you want a lighter variation while still achieving good crispiness.
Troubleshooting Common Issues
Even with a solid recipe, a few bumps can happen along the way—especially when frying. Here’s a friendly guide to help you solve the most common issues so your fried chicken sandwich turns out crispy, juicy, and absolutely delicious every time.
1. The Coating Falls Off
This is the most common issue, but thankfully, it’s easy to fix.
- Let the dredged chicken rest for at least 15 minutes before frying—this helps the coating stick firmly.
- Avoid overcrowding the pan. Too many pieces lower the oil temperature and cause the breading to slip off.
- Handle the chicken gently when flipping; tongs work best.
2. The Chicken Isn’t Crispy Enough
Soft or pale crust? Try these simple adjustments:
- Check your oil temperature. It must stay between 350–375°F (175–190°C) for a crunchy exterior.
- Increase cornstarch slightly. Adding another tablespoon to the flour mix boosts crispiness.
- Don’t skip the double dredge. The second coat is what gives you that signature crunch.
3. The Chicken Is Undercooked in the Center
This usually happens with thicker pieces.
- Cut shallow slits into the thicker end of the breast before marinating to promote even cooking.
- Fry smaller pieces if you want faster, more reliable results.
- Check with a thermometer: The internal temperature should reach 165°F (74°C).
4. The Oil Is Smoking or Burning
This can affect both flavor and safety.
- Use oils with high smoke points like canola, vegetable, or peanut oil.
- Monitor the heat closely. Turn down the burner if it rises above 375°F.
5. The Chicken Turns Out Greasy
Greasy chicken usually means the oil wasn’t hot enough.
- Heat the oil properly before adding the chicken.
- Allow the chicken to drain on a wire rack rather than paper towels, which can trap steam and soften the crust.
6. The Flavor Is Too Mild or Too Spicy
Luckily, this is the easiest fix of all.
- Adjust seasonings in the flour mixture to suit your taste—add more cayenne for heat, or extra ranch seasoning for a savory punch.
- Taste test a small piece of breading before frying the whole batch if you’re unsure.
FAQs
Here are the most helpful and commonly asked questions to ensure your copycat fried chicken sandwich turns out perfectly every time. Each answer is crafted to be clear, practical, and beginner-friendly—just like having a personal cooking coach by your side.
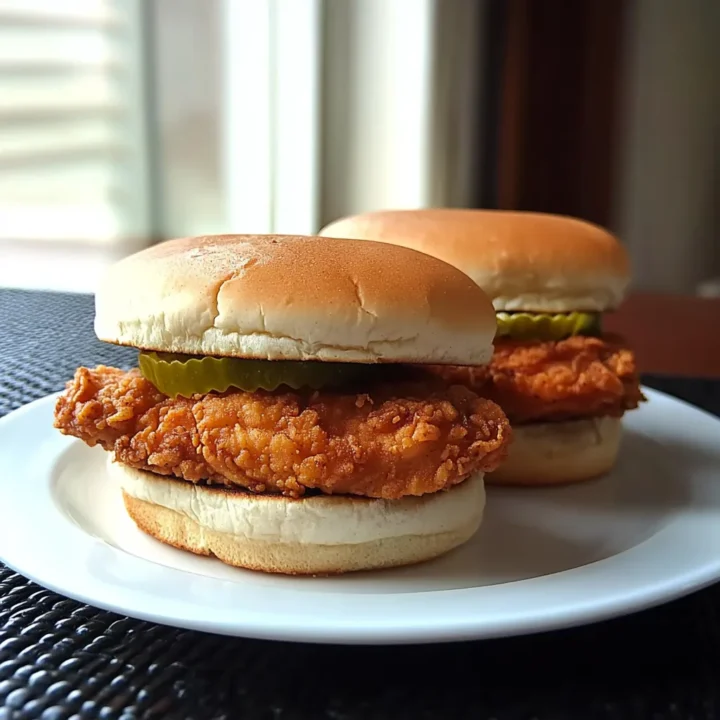
Copycat Fried Chicken Sandwich
If you’ve ever craved that irresistible crispy chicken sandwich experience without leaving home, this recipe brings all the comfort, crunch, and flavor straight to your kitchen.
Ingredients
Marinade:
- 1 cup buttermilk
- 2 tsp kosher salt
- 1 dash hot sauce
- 1 tbsp dry ranch dressing mix
- 4 (5 oz) boneless, skinless chicken breasts
Breading:
- 1⅓ cups all-purpose flour
- 2 tbsp cornstarch
- 2 tsp kosher salt
- ½ tsp black pepper
- 1½ tsp cayenne pepper (optional)
- 1 tbsp dry ranch dressing mix
Egg Wash:
- 1 large egg, beaten
- ½ cup buttermilk
- ¼ cup milk
For Frying & Assembly:
- Canola oil, for frying
- 4 soft hamburger buns
- 6 tbsp mayonnaise
- 12 dill pickle slices
Instructions
1. Marinate the Chicken
- Whisk together buttermilk, salt, hot sauce, and ranch mix.
- Cut shallow diagonal slits in thicker side of each chicken breast.
- Submerge chicken in marinade and refrigerate 2–4 hours.
2. Prepare Breading Stations
- Combine flour, cornstarch, salt, pepper, cayenne, and ranch mix in a shallow dish.
- In a second bowl, whisk egg with buttermilk and milk.
3. Bread the Chicken
- Remove chicken from marinade and dredge in flour mixture.
- Dip into egg wash.
- Return to flour for a second coating.
- Place coated chicken on a wire rack to rest for 15 minutes.
4. Fry the Chicken
- Heat canola oil to 350–375°F (175–190°C).
- Fry each piece 4–5 minutes total, flipping halfway.
- Cook until crisp, golden, and internal temperature reaches 165°F (74°C).
- Rest on crinkled foil or wire rack.
5. Assemble the Sandwich
- Toast buns lightly.
- Spread mayonnaise on both sides.
- Add pickle slices.
- Place crispy chicken on the bottom bun and close.
Notes
- Resting the coated chicken ensures the breading sticks and doesn’t fall off during frying.
- Cornstarch adds extra crispiness to the coating—don’t skip it.
- To make it spicier, add more cayenne or serve with spicy mayo.
- Keep fried chicken warm and crispy by placing it on a wire rack in a 200°F (95°C) oven while finishing a batch.
- For a slightly healthier twist, you can air fry the chicken at 375°F for 12–15 minutes, flipping halfway.
Nutrition Information:
Yield: 4 Serving Size: 1Amount Per Serving: Calories: 620Total Fat: 32gSaturated Fat: 6gSodium: 1450mgCarbohydrates: 48gFiber: 2gSugar: 6gProtein: 34g