



There’s something undeniably special about chocolate strawberries—that moment when juicy, fresh strawberries meet silky, melted chocolate and turn into an elegant treat with almost no effort. Whether you’re planning a romantic dessert, a quick no-bake sweet, or a beautiful addition to a party table, chocolate covered strawberries always feel thoughtful and indulgent. I love this recipe because it proves that simple ingredients can create something truly impressive. With just a handful of steps and the right chocolate, you’ll have glossy, irresistible chocolate-dipped strawberries that look bakery-worthy but are completely doable at home. If you’ve ever wondered how to make this classic dessert smooth, foolproof, and stress-free, you’re in exactly the right place.
Key Benefits & Why You’ll Love This Recipe
If you love desserts that feel luxurious but effortless, these chocolate strawberries are about to become your go-to favorite. This recipe is all about simplicity done right—no baking, no complicated steps, just a few quality ingredients and a technique that delivers stunning results every time.
Here’s why this recipe truly stands out:
- Minimal ingredients, maximum impact
With just fresh strawberries and rich chocolate, you get a dessert that looks elegant and tastes indulgent without extra effort. - Quick and beginner-friendly
Even if you’ve never worked with melted chocolate before, this method makes chocolate-dipped strawberries smooth, glossy, and stress-free. - Perfect for any occasion
From romantic evenings and special celebrations to last-minute guests, chocolate covered strawberries always feel thoughtful and impressive. - Naturally beautiful presentation
The contrast of vibrant strawberries and silky chocolate creates a dessert that doesn’t need decoration to shine. - Easy to customize
Keep them classic or dress them up later with drizzles, sprinkles, or chopped nuts—this base recipe gives you total flexibility.
What I love most is how this recipe turns a simple craving into something memorable. It’s the kind of dessert that makes people pause, smile, and ask, “You made these?”—and you’ll get to say yes, with confidence.
Ingredients
One of the best things about this recipe is how simple and intentional the ingredient list is. Each item plays a key role, so choosing quality here truly makes a difference in flavor, texture, and appearance.
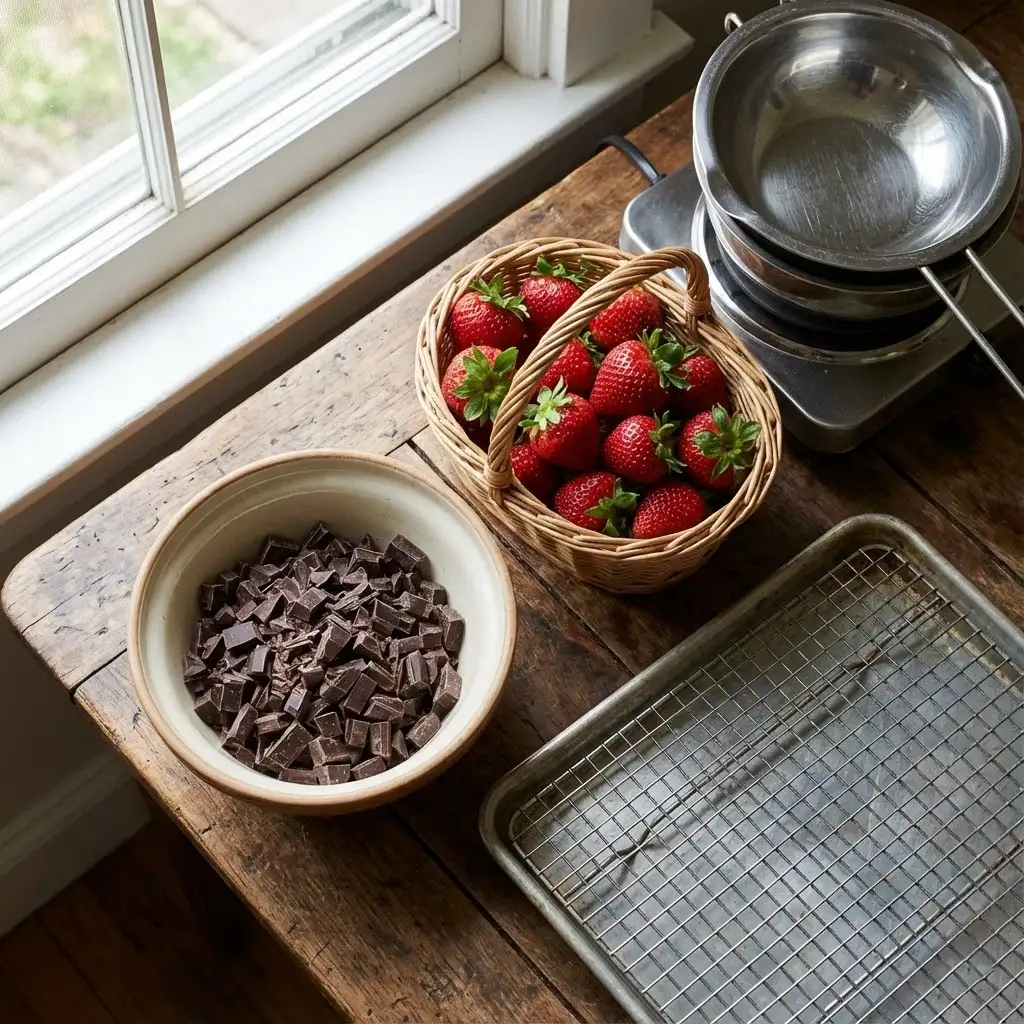
- 5 ounces bittersweet chocolate, chopped
A good-quality bittersweet chocolate melts smoothly and delivers a rich, balanced flavor that perfectly complements the natural sweetness of the strawberries. Chopping it evenly helps the chocolate melt faster and more evenly. - 1 pint fresh strawberries with leaves
Look for strawberries that are bright red, firm, and completely dry. The leaves aren’t just for looks—they make dipping easier and give your chocolate strawberries that classic, elegant finish.
Tip:
Avoid strawberries with moisture or soft spots. Even a little water can cause melted chocolate to seize, and firm berries help the chocolate set beautifully with a glossy finish.
Instructions
Making chocolate strawberries is all about gentle heat, patience, and a smooth dipping motion. Follow these steps, and you’ll get beautifully coated berries every single time.
- Melt the chocolate
Place the chopped bittersweet chocolate in a microwave-safe bowl or the top of a double boiler over gently simmering water. Heat slowly, stirring occasionally, until the chocolate is completely melted and silky smooth.
Tip: If using the microwave, heat in short bursts to avoid overheating. - Prepare your workspace
Set a wire rack or parchment-lined surface nearby. This makes it easy to transfer the dipped strawberries without smudging the chocolate. - Dip the strawberries
Hold each strawberry by the stem or leaves and dip it into the melted chocolate, coating about three-quarters of the berry. Gently swirl to remove excess chocolate for a clean, even finish. - Set the strawberries
Place the dipped strawberries stem-side down on the wire rack. This allows air to circulate and helps the chocolate set smoothly. - Chill until firm
Transfer the strawberries to the refrigerator and chill until the chocolate is fully hardened and glossy to the touch.
Pro Tips and Variations
Once you’ve mastered the basics, a few small adjustments can take your chocolate strawberries from simple to stunning. These tips help ensure perfect results while giving you room to customize the recipe to your taste or occasion.
Pro Tips for Perfect Results
- Make sure strawberries are completely dry
After washing, gently pat them dry and let them air-dry fully. Any moisture can prevent the chocolate from sticking or cause it to seize. - Melt chocolate gently
Low, steady heat keeps the chocolate smooth and glossy. If it starts to thicken, stir gently rather than reheating aggressively. - Dip at the right temperature
Chocolate should be warm and fluid—not hot. This helps it coat evenly and set with a clean finish. - Use a wire rack for setting
This allows excess chocolate to drip away and helps the coating firm up evenly without pooling at the bottom.
Easy Variations to Try
- Chocolate drizzle finish
Once the base coating sets, drizzle with melted white or milk chocolate for a bakery-style look. - Textured toppings
Roll freshly dipped strawberries in chopped nuts, shredded coconut, or finely crushed cookies before the chocolate hardens. - Different chocolate options
Swap bittersweet for dark, milk, or white chocolate to change the flavor profile while keeping the same method. - Extra shine
A tiny amount of neutral oil mixed into the melted chocolate can enhance smoothness and give your chocolate-dipped strawberries a beautiful sheen.
Serving & Pairing Suggestions
One of the reasons chocolate strawberries are so popular is how effortlessly they fit into almost any occasion. With their elegant look and balanced sweetness, they’re just as welcome at a casual gathering as they are at a romantic celebration.
How to Serve Them
- Serve slightly chilled or at cool room temperature
This keeps the chocolate firm while allowing the strawberry flavor to shine through. - Arrange on a simple platter or dessert board
Spacing them out highlights their glossy finish and makes them easy to grab. - Use liners for gifting
Paper or mini cupcake liners help keep each strawberry neat and presentation-ready.
Perfect Pairings
- Wine & beverages
Pair with sparkling wine, champagne, or a light red for a classic, romantic match. For non-alcoholic options, coffee or hot chocolate works beautifully. - Dessert spreads
Add chocolate covered strawberries to a dessert table alongside cookies, truffles, or fresh fruit for contrast. - Special occasions
These chocolate-dipped strawberries are ideal for Valentine’s Day, anniversaries, bridal showers, or as an edible gift that feels personal and thoughtful.
Tools and Equipment Guide
You don’t need fancy gadgets to make beautiful chocolate strawberries, but having the right tools on hand makes the process smoother, cleaner, and more enjoyable.
Essential Tools
- Microwave-safe bowl or double boiler
Either option works well for melting chocolate gently. A microwave-safe bowl is quick and convenient, while a double boiler offers more control over heat. - Heatproof spatula or spoon
Ideal for stirring melted chocolate smoothly and scraping the bowl clean. - Wire rack or parchment-lined tray
A wire rack allows excess chocolate to drip away, giving your chocolate covered strawberries a clean, even finish. Parchment paper works as a simple alternative. - Refrigerator space
You’ll need a flat, clear shelf so the strawberries can chill without touching each other.
Optional but Helpful
- Small offset spatula or fork
Useful for lifting berries or smoothing excess chocolate. - Paper towels
Perfect for drying strawberries thoroughly before dipping.
Troubleshooting Common Issues
Even a simple recipe like chocolate strawberries can raise a few questions along the way. If something doesn’t look quite right, don’t worry—most issues are easy to fix with a small adjustment.
Chocolate Becomes Thick or Grainy
- This usually happens when moisture gets into the chocolate or it overheats.
- Fix: Stop heating immediately and stir gently. If needed, add a tiny amount of neutral oil to help loosen the texture.
- Prevention: Keep all bowls, utensils, and strawberries completely dry.
Chocolate Won’t Stick to the Strawberries
- Moisture is almost always the culprit.
- Fix: Pat strawberries dry thoroughly and let them air-dry before dipping.
- Tip: Room-temperature strawberries help the chocolate adhere more evenly.
Chocolate Looks Dull Instead of Glossy
- Overheating or rapid chilling can dull the finish.
- Fix: Melt chocolate slowly and allow dipped strawberries to set naturally before chilling.
- Tip: Gentle, steady cooling keeps chocolate covered strawberries shiny and smooth.
Chocolate Pools at the Bottom
- Excess chocolate wasn’t removed during dipping.
- Fix: Gently swirl the strawberry while lifting it out of the chocolate to let excess drip off.
- Alternative: Use a wire rack so extra chocolate can drip away cleanly.
Chocolate Sets Too Fast While Dipping
- The chocolate may be cooling too quickly.
- Fix: Briefly rewarm it using very low heat, stirring constantly to avoid scorching.


FAQs
Chocolate Strawberries
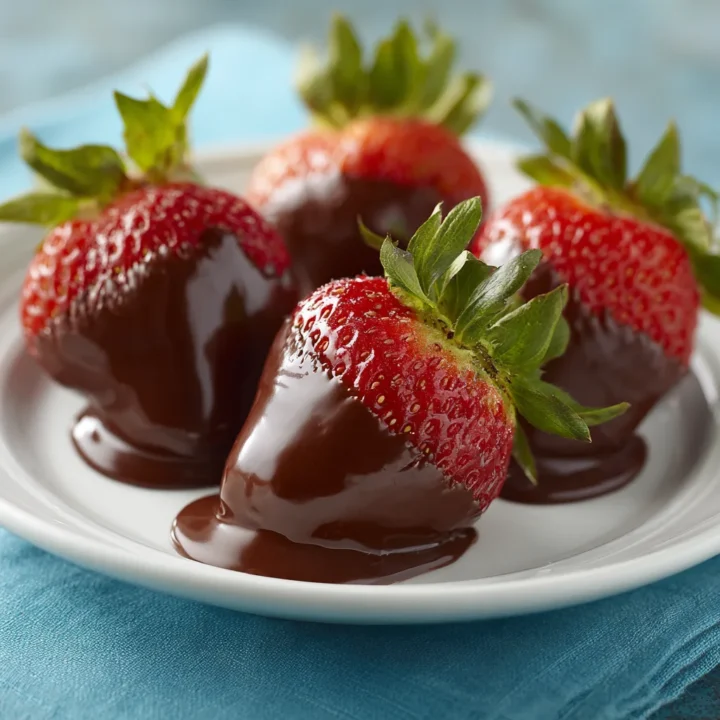
If you love desserts that feel luxurious but effortless, these chocolate strawberries are about to become your go-to favorite.
Ingredients
- 5 ounces bittersweet chocolate, chopped
- 1 pint fresh strawberries with leaves attached
Instructions
- Place the chopped chocolate in a microwave-safe bowl or the top of a double boiler over gently simmering water.
- Heat slowly, stirring occasionally, until the chocolate is fully melted and smooth.
- Hold each strawberry by the stem or leaves and dip it into the melted chocolate, coating about three-quarters of the berry.
- Gently swirl to allow excess chocolate to drip off.
- Place dipped strawberries stem-side down on a wire rack or parchment-lined tray.
- Refrigerate until the chocolate is fully set and firm.
Notes
- Dry strawberries completely before dipping to ensure the chocolate adheres smoothly.
- Chop chocolate evenly so it melts at a consistent rate without scorching.
- Avoid covering while chilling to prevent condensation from dulling the chocolate finish.
- For extra flair, drizzle with melted white or milk chocolate once the base layer sets.
Nutrition Information:
Yield: 4 Serving Size: 1Amount Per Serving: Calories: 255Total Fat: 16gSaturated Fat: 9gSodium: 5mgCarbohydrates: 28gFiber: 4gSugar: 21gProtein: 3g