

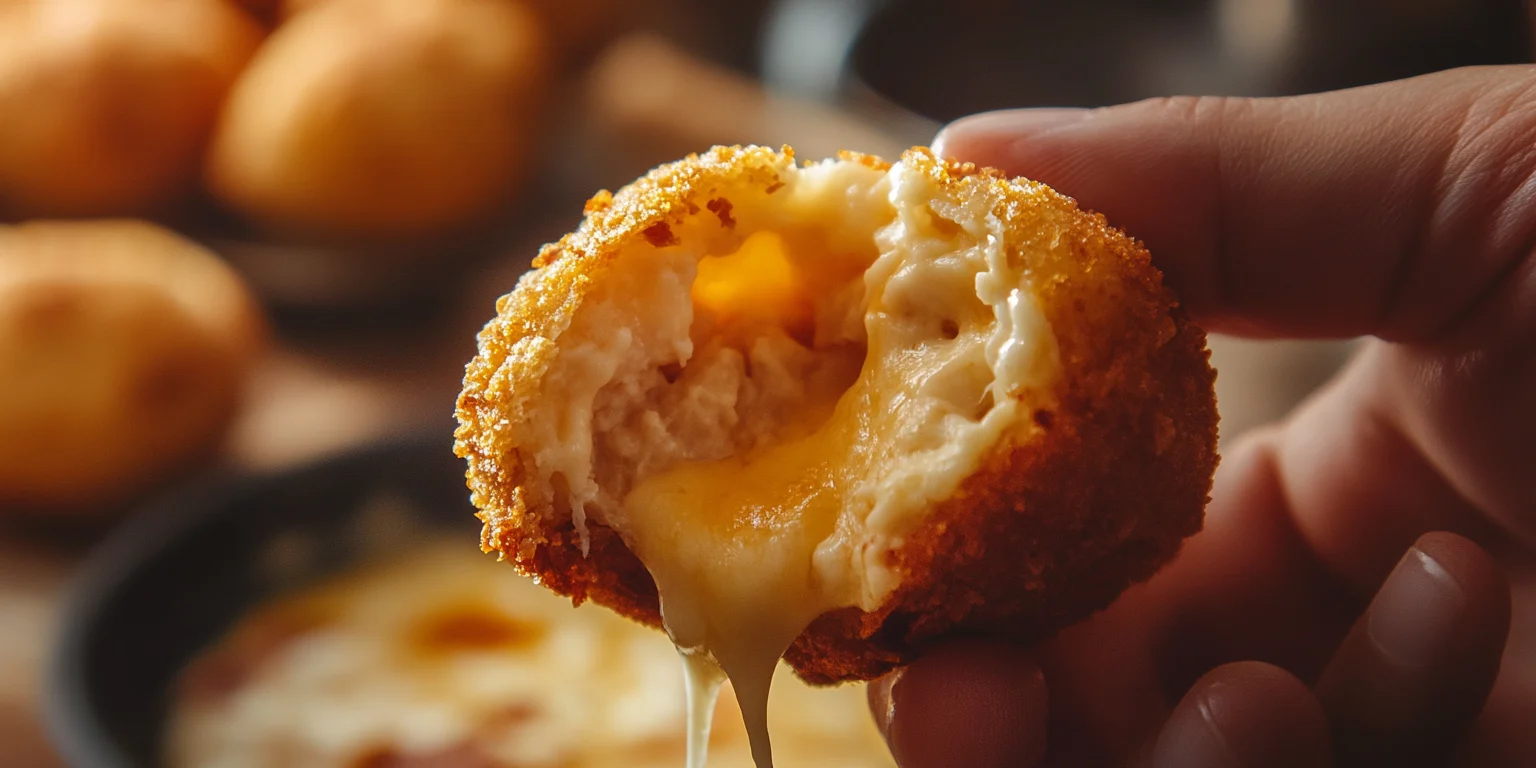



Hey there, food lover! Are you ready to dive into the vibrant flavors of Brazil? Today, I’m excited to share with you a recipe that’s sure to become a favorite: the authentic Brazilian coxinha. These crispy, golden chicken croquettes are a staple in Brazilian street food, and they’re just as delicious at home.
Have you ever tried coxinhas? If not, you’re in for a treat. Imagine a perfect blend of tender, shredded chicken, creamy cheese, and aromatic spices, all wrapped in a golden, flaky dough. It’s a party in your mouth! Whether you’re hosting a gathering or just craving a snack, coxinhas are versatile and sure to impress.
What makes this recipe special is its authenticity. We’re using traditional ingredients like chicken broth, garlic, and fresh parsley to capture the true essence of Brazilian cuisine. Plus, with a few simple steps, you’ll have these mouthwatering treats ready in no time.
So, let’s get started! I’ll guide you through every step, from preparing the dough to frying the coxinhas to perfection. By the end, you’ll be enjoying these delightful snacks with a cold drink, just like they do in Brazil. Ready to bring a taste of Brazil to your kitchen? Let’s go!
Key Benefits of Making Coxinhas at Home
Hey there, friend! Let’s talk about why you’re about to fall in love with making coxinhas at home. These Brazilian chicken croquettes aren’t just delicious—they’re a culinary adventure that brings the vibrant flavors of Brazil right to your kitchen. Here are a few key benefits that make this recipe a must-try:
1. Authentic Brazilian Flavor
-
Cultural Connection: Coxinhas are more than just a snack; they’re a taste of Brazilian culture. By making them at home, you’re not only enjoying a delicious treat but also connecting with a rich culinary tradition.
-
Fresh Ingredients: Using fresh ingredients like chicken, garlic, and parsley ensures that every bite is packed with authentic flavor. Plus, you get to control the quality of what goes into your food.
2. Versatility and Customization
-
Perfect for Any Occasion: Whether you’re hosting a party, having a casual get-together, or just craving a snack, coxinhas are the perfect choice. They’re easy to make in advance and can be enjoyed hot or cold.
-
Customizable: Feel free to tweak the recipe to your liking. Add more cheese for a creamier filling, or use different herbs and spices to suit your taste. The possibilities are endless!
3. Easy to Make
-
Step-by-Step Guide: I’ll walk you through each step, from preparing the dough to frying the coxinhas to perfection. With clear instructions and practical tips, you’ll be a pro in no time.
-
Time-Saving Tips: This recipe is designed to be efficient, so you can enjoy your coxinhas without spending hours in the kitchen. Plus, you can freeze them for future use, making them a convenient option anytime.
4. Healthy and Delicious
-
Nutritious Ingredients: While coxinhas are indulgent, they’re also made with wholesome ingredients like chicken and fresh vegetables. You can enjoy them guilt-free!
-
Balanced Meal: Serve your coxinhas with a side of fresh salad or Brazilian-style rice and beans for a balanced and satisfying meal.
5. Impress Your Guests
-
Showstopper Snack: Coxinhas are sure to impress your friends and family. Their crispy exterior and tender filling make them a standout snack that everyone will love.
-
Easy to Share: These croquettes are perfect for sharing, making them an ideal choice for parties and gatherings. Plus, they’re easy to transport, so you can bring them to potlucks or picnics.
6. Fun to Make
-
Hands-On Experience: Making coxinhas is a fun and interactive process. Rolling the dough and shaping the croquettes is almost therapeutic, and it’s a great activity to do with friends or family.
-
Learning Opportunity: This recipe is a fantastic way to learn more about Brazilian cuisine and cooking techniques. Plus, you’ll gain confidence in the kitchen as you master this delicious dish.
So, are you ready to bring a taste of Brazil into your home? Let’s dive into the recipe and start creating these mouthwatering coxinhas together. Trust me, once you try them, you’ll be hooked!
Ingredients for Brazilian Chicken Croquettes
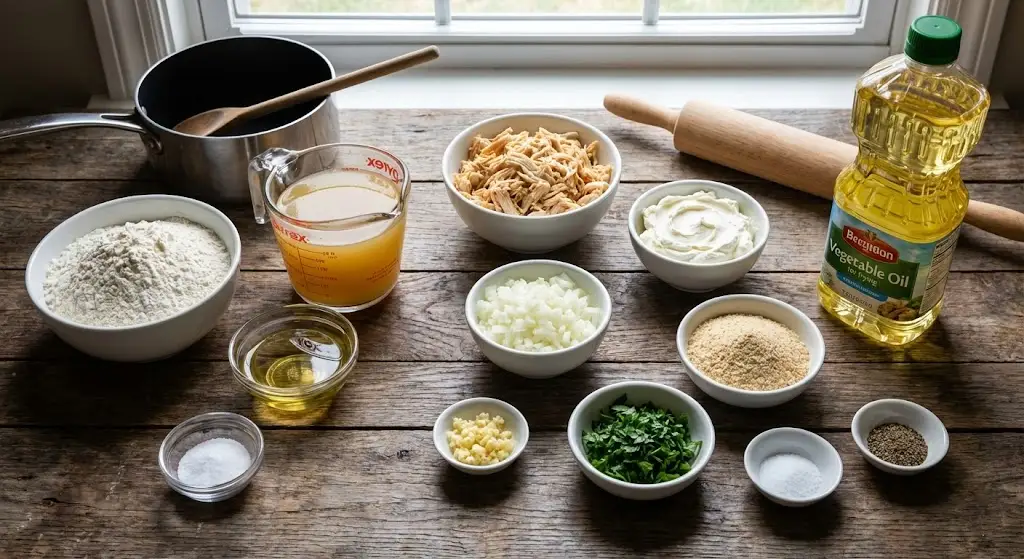
Alright, let’s get down to the nitty-gritty! To make these mouthwatering Brazilian coxinhas, you’ll need a few key ingredients. Don’t worry, they’re all easy to find, and I’ll walk you through each one so you know exactly what you need.
Ingredients List:
-
For the Dough:
-
2 cups all-purpose flour
-
1 cup chicken broth (homemade or store-bought)
-
1/4 cup vegetable oil
-
1/2 teaspoon salt
-
-
For the Filling:
-
For Frying:
-
Vegetable oil for frying (enough to cover the coxinhas)
-
A Quick Note on Ingredients:
-
Chicken: You can use either chicken breast or thigh. I personally love the flavor of chicken thigh, but both work great. If you don’t have shredded chicken on hand, you can easily make it by boiling or baking a whole chicken and shredding it.
-
Cream Cheese: This adds a creamy, rich texture to the filling. If you prefer a lighter option, you can substitute it with ricotta cheese.
-
Breadcrumbs: These help give the filling a bit of crunch and hold it together. You can use store-bought or make your own by pulsing stale bread in a food processor.
-
Parsley: Fresh herbs make all the difference. Parsley adds a bright, fresh flavor that complements the chicken and cheese perfectly.
Tips for Success:
-
Fresh Ingredients: Always use fresh ingredients when possible. Fresh garlic, onions, and herbs will give your coxinhas that authentic Brazilian flavor.
-
Quality Chicken Broth: A good-quality chicken broth is essential for the dough. It adds depth of flavor and helps the dough come together perfectly.
-
Room Temperature Ingredients: Make sure your cream cheese and chicken are at room temperature. This helps them mix more easily and ensures a smooth filling.
Now that you have all your ingredients ready, let’s move on to the fun part—making the coxinhas! Stay tuned for the step-by-step instructions.
Instructions for Making Brazilian Coxinha Recipe
Alright, my friend, it’s time to roll up our sleeves and get cooking! Making coxinhas might seem a bit intimidating at first, but trust me, it’s a breeze once you get the hang of it. Let’s break it down step by step, and you’ll be enjoying these crispy, golden Brazilian chicken croquettes in no time.
Step-by-Step Guide:
-
Prepare the Dough:
-
In a medium saucepan, combine the all-purpose flour, chicken broth, vegetable oil, and salt.
-
Cook over medium heat, stirring constantly until the mixture forms a soft dough. This should take about 5-7 minutes.
-
Remove the saucepan from the heat and let the dough cool until it’s just warm to the touch. This is important because you’ll need to handle the dough, and it should be cool enough not to burn your hands.
-
-
Make the Filling:
-
In a large mixing bowl, combine the shredded chicken, cream cheese, finely chopped onion, minced garlic, breadcrumbs, and finely chopped parsley.
-
Season the mixture with salt and pepper to taste. Mix everything together until well combined. The filling should be moist but not too wet.
-
-
Form the Coxinhas:
-
Once the dough is cool enough to handle, turn it out onto a lightly floured surface.
-
Divide the dough into small, manageable pieces. Each piece should be about the size of a golf ball.
-
Take one piece of dough and flatten it into a small circle using your hands or a rolling pin.
-
Place a spoonful of the chicken filling in the center of the dough circle.
-
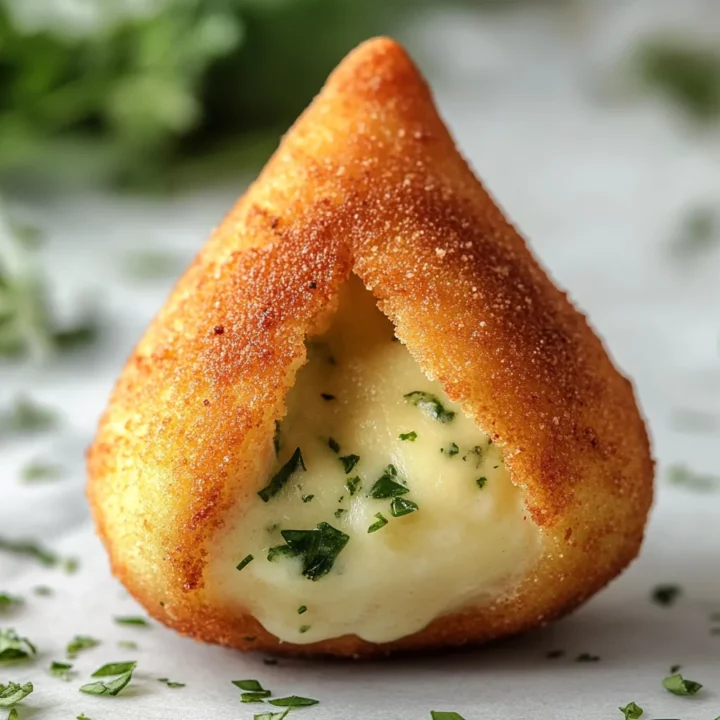
Carefully wrap the dough around the filling, sealing the edges tightly to encase the filling completely. Shape the dough into a teardrop shape, which is traditional for coxinhas.
-
Repeat this process with the remaining dough and filling. If the dough becomes too sticky, you can lightly flour your hands or the surface.
-
-
Fry the Coxinhas:
-
Fill a deep fryer or a large, deep skillet with enough vegetable oil to cover the coxinhas completely. Heat the oil to 350°F (175°C).
-
Carefully lower the coxinhas into the hot oil in batches, making sure not to overcrowd the pan. Fry them for about 3-4 minutes per batch, or until they are golden brown and crispy.
-
Use a slotted spoon or a spider strainer to remove the coxinhas from the oil and transfer them to a baking sheet lined with paper towels to drain any excess oil.
-
-
Serve and Enjoy:
-
Coxinhas are best enjoyed hot and crispy, but they can also be reheated in the oven if needed. Serve them with your favorite dipping sauce, such as aioli, tomato sauce, or hot sauce.
-
These delicious treats are perfect for a party, a casual gathering, or just a snack at home. Enjoy!
-
Tips for Success:
-
Handling the Dough: If the dough is too sticky, add a bit more flour. If it’s too dry, add a little more chicken broth.
-
Filling Consistency: The filling should be moist but not too wet. If it’s too wet, add a bit more breadcrumbs to help it hold together.
-
Frying Temperature: Keep an eye on the oil temperature. If it’s too hot, the coxinhas will brown too quickly on the outside while remaining undercooked inside. If it’s too cool, they’ll absorb too much oil and become greasy.
-
Safety First: Be careful when frying. Hot oil can be dangerous, so use tongs or a slotted spoon to handle the coxinhas and avoid splatters.
Pro Tips and Variations
Alright, you’ve got the basics down, but let’s take your coxinha game to the next level! Here are some pro tips and fun variations to help you master this recipe and keep things interesting.
Pro Tips:
-
Perfect Dough Consistency: The key to great coxinhas is the dough. Make sure it’s pliable but not too sticky. If it’s too sticky, add a bit more flour. If it’s too dry, a splash of chicken broth will help.
-
Filling Tips: When adding the filling, don’t overstuff the dough. Too much filling can cause the coxinhas to burst open while frying. A spoonful should be just right.
-
Shape and Size: Traditional coxinhas are shaped like teardrops, but you can also shape them into small balls or even mini football shapes for a fun twist. Just make sure they’re all roughly the same size so they cook evenly.
-
Oil Temperature: Keep your frying oil at a steady 350°F (175°C). Too hot, and the outside will burn before the inside is cooked. Too cool, and they’ll absorb too much oil and become greasy.
-
Double Frying: For an extra crispy exterior, you can double fry the coxinhas. Fry them once until they’re cooked through, then let them cool slightly before frying them again until they’re golden brown.
Fun Variations:
-
Gluten-Free Option: Substitute the all-purpose flour with a gluten-free flour blend. This works great for those with dietary restrictions.
-
Vegetarian Coxinha: Swap the shredded chicken for a plant-based protein like mushrooms, chickpeas, or even a store-bought vegan chicken substitute. The flavors will still shine!
-
Spicy Coxinha: Add a bit of heat to your filling with some finely chopped jalapeños or a pinch of cayenne pepper. If you like it spicy, this variation is for you.
-
Cheese Lovers: Increase the amount of cream cheese or add a different type of cheese like mozzarella or cheddar for an extra creamy filling.
-
Herb and Spice: Experiment with different herbs and spices. Add some cilantro for a fresh twist, or a bit of paprika for a smoky flavor.
-
Baked Coxinha: If you prefer to avoid frying, you can bake the coxinhas. Preheat your oven to 400°F (200°C) and bake the shaped coxinhas for about 20-25 minutes, or until they’re golden brown and crispy.
Tips for Success:
-
Experiment with Fillings: Feel free to mix and match ingredients in the filling. The basic recipe is just a starting point, so get creative!
-
Use Fresh Ingredients: Fresh herbs and spices make a huge difference. Don’t skimp on quality here.
-
Practice Makes Perfect: If your first batch isn’t perfect, don’t worry! Coxinhas take a bit of practice, but each attempt will get you closer to perfection.
Serving Suggestions
Now that you’ve mastered the art of making coxinhas, let’s talk about how to serve them to make the most of their deliciousness! These Brazilian chicken croquettes are incredibly versatile and can be enjoyed in a variety of ways. Here are some serving suggestions to help you get creative and impress your guests.
Classic Dipping Sauces:
-
Aioli: A creamy garlic sauce that pairs perfectly with the crispy exterior of coxinhas.
-
Tomato Sauce: A tangy, sweet sauce that adds a burst of flavor.
-
Hot Sauce: For those who love a bit of heat, a spicy hot sauce can elevate the experience.
-
Salsa: A fresh and zesty option that complements the rich flavors of the filling.
Side Dishes:
-
Brazilian-Style Rice and Beans: A traditional side that adds a hearty and filling element to your meal.
-
Salad: A light and refreshing salad can balance out the richness of the coxinhas. Try a simple mixed greens salad with a light vinaigrette.
-
Fried Plantains: A sweet and savory side that pairs beautifully with the savory coxinhas.
-
Coconut Milk Rice: A creamy and flavorful rice dish that adds a tropical twist.
Beverage Pairings:
-
Caipirinha: The classic Brazilian cocktail made with cachaça, lime, and sugar. It’s the perfect drink to pair with coxinhas.
-
Guarana Soda: A sweet and fizzy beverage that’s popular in Brazil. It pairs well with the savory flavors of the croquettes.
-
Iced Tea: A refreshing and simple option that complements the richness of the coxinhas.
-
Lemonade: A bright and tangy drink that can cut through the richness and add a refreshing contrast.
Party Ideas:
-
Appetizer Platter: Serve coxinhas on a platter with a variety of dipping sauces and sides for a crowd-pleasing appetizer.
-
Snack Station: Set up a self-serve snack station with coxinhas, dipping sauces, and beverages for a fun and interactive party experience.
-
Themed Party: Host a Brazilian-themed party and serve coxinhas alongside other traditional Brazilian dishes and drinks. Decorate with vibrant colors and Brazilian-inspired decor.
Tips for Success:
-
Presentation: Arrange the coxinhas beautifully on a platter with garnishes like fresh herbs or lime wedges to make them look even more appetizing.
-
Temperature: Coxinhas are best enjoyed hot and crispy, but they can also be served at room temperature. If you’re making them ahead of time, reheat them in the oven to maintain their crispiness.
-
Variety: Offer a variety of dipping sauces to cater to different tastes. This way, everyone can enjoy their coxinhas exactly how they like them.
Example Serving Ideas:
-
Appetizer Platter: Arrange coxinhas on a large platter with small bowls of aioli, tomato sauce, and hot sauce. Add a few lime wedges and fresh parsley for garnish.
-
Full Meal: Serve coxinhas with a side of Brazilian-style rice and beans, a mixed greens salad, and a pitcher of caipirinha for a complete and satisfying meal.
-
Snack Station: Set up a snack station with coxinhas, dipping sauces, fried plantains, and a cooler filled with guarana soda and iced tea.
Tools and Equipment Guide
Alright, let’s make sure you have everything you need to make these coxinhas! Here’s a quick guide to the tools and equipment you’ll need. Don’t worry, nothing too fancy required—just a few basics to help you create these delicious Brazilian treats.
Essential Tools and Equipment:
-
Saucepan: For cooking the dough. A medium-sized saucepan works perfectly.
-
Mixing Bowls: You’ll need a couple of bowls for mixing the filling and handling the dough.
-
Rolling Pin: Optional, but helpful if you want to roll out the dough evenly.
-
Slotted Spoon or Spider Strainer: Essential for frying. This helps you lift the coxinhas out of the hot oil without them falling apart.
-
Deep Fryer or Large Skillet: A deep fryer is ideal, but a large, deep skillet works just as well. Make sure it’s deep enough to hold enough oil to cover the coxinhas.
-
Thermometer: A frying thermometer is handy for checking the oil temperature. This ensures your coxinhas fry evenly and don’t get too greasy.
-
Baking Sheet: Line it with paper towels to drain excess oil after frying.
-
Paper Towels: For draining the coxinhas and keeping them crispy.
Tips for Success:
-
Safety First: Frying can be a bit tricky, so make sure you’re comfortable with handling hot oil. Use long-handled tools and be cautious to avoid splatters.
-
Temperature Control: Keeping the oil at a steady 350°F (175°C) is crucial. If you don’t have a thermometer, you can test the oil by dropping a small piece of dough into it. If it sizzles and floats to the top, the oil is ready.
-
Batch Frying: Don’t overcrowd the pan. Fry the coxinhas in small batches to ensure they cook evenly and don’t stick together.
-
Clean Up: Hot oil can be a pain to clean up, so make sure to let it cool completely before disposing of it or storing it for future use. Wipe down your tools and workspace as you go to make cleanup easier.
Example Setup:
-
Preparation Station: Set up your mixing bowls, saucepan, and rolling pin on your countertop. This is where you’ll prepare the dough and filling.
-
Frying Station: Have your deep fryer or skillet ready with the oil heating up. Keep your slotted spoon or spider strainer nearby for easy handling.
-
Draining Station: Line a baking sheet with paper towels. This is where you’ll place the fried coxinhas to drain excess oil and stay crispy.
Troubleshooting Common Issues
Even the best chefs encounter a few hiccups in the kitchen, and making coxinhas is no exception. But don’t worry, I’ve got you covered! Here are some common issues you might face and how to troubleshoot them so you can enjoy perfect coxinhas every time.
Common Issues and Solutions:
-
Dough is Too Sticky:
-
Issue: The dough is difficult to handle and sticks to your hands or the surface.
-
Solution: Gradually add a bit more flour to the dough until it reaches a manageable consistency. Be careful not to add too much, as this can make the dough tough.
-
-
Dough is Too Dry:
-
Issue: The dough is crumbly and doesn’t come together easily.
-
Solution: Add a small amount of chicken broth or water, a tablespoon at a time, until the dough is smooth and pliable.
-
-
Filling is Too Wet:
-
Issue: The filling is soggy, making it difficult to shape the coxinhas.
-
Solution: Add more breadcrumbs to the filling to absorb excess moisture. You can also try microwaving the shredded chicken for a minute to remove some moisture before mixing it with the other ingredients.
-
-
Coxinhas Falling Apart:
-
Issue: The coxinhas break apart while frying.
-
Solution: Ensure the dough is wrapped tightly around the filling and sealed well. If the dough is too thin, it may not hold the filling properly. Also, make sure the oil is hot enough (350°F/175°C) to set the crust quickly.
-
-
Uneven Cooking:
-
Issue: The coxinhas are brown on the outside but undercooked inside.
-
Solution: Fry the coxinhas in small batches to ensure even cooking. Overcrowding the pan can lower the oil temperature, leading to uneven frying. Also, make sure the oil is at the right temperature before adding the coxinhas.
-
-
Greasy Coxinhas:
-
Issue: The coxinhas are too greasy after frying.
-
Solution: Drain the fried coxinhas on paper towels immediately after frying to absorb excess oil. Make sure the oil temperature is high enough (350°F/175°C) to prevent the coxinhas from absorbing too much oil.
-
-
Dough Not Rising:
-
Issue: The dough doesn’t puff up and remains dense.
-
Solution: Ensure the dough is cooked properly and cooled before shaping. The steam created during cooking helps the dough rise. If the dough is too hot, it can be difficult to handle and may not rise properly.
-
Tips for Success:
-
Practice Patience: Coxinhas take a bit of practice to get right. If your first batch isn’t perfect, don’t get discouraged. Each attempt will get you closer to perfection.
-
Consistency is Key: Make sure the dough and filling have the right consistency. This will make shaping and frying the coxinhas much easier.
-
Temperature Control: Keeping the oil at a steady 350°F (175°C) is crucial for even frying. Use a thermometer to monitor the temperature and adjust the heat as needed.
-
Safety First: Frying with hot oil can be dangerous. Use long-handled tools and be cautious to avoid splatters. Always let the oil cool completely before cleaning up.
Example Troubleshooting:
-
Sticky Dough: If your dough is sticky, add a bit more flour. Start with a tablespoon and mix it in. If it’s still sticky, add another tablespoon until the dough is smooth and easy to handle.
-
Wet Filling: If your filling is too wet, add more breadcrumbs. Mix in a couple of tablespoons at a time until the filling holds together well.
Pairing Suggestions
Now that you’ve mastered the art of making coxinhas, let’s talk about how to pair them with other dishes and drinks to create a complete and memorable dining experience. Brazilian cuisine is all about vibrant flavors and hearty meals, so let’s explore some delicious pairings that will elevate your coxinhas to the next level.
Pairing Suggestions:
-
Classic Brazilian Dishes:
-
Feijoada: This hearty Brazilian stew made with black beans, pork, and beef is the perfect main course to pair with coxinhas. The rich, savory flavors complement the crispy, flavorful croquettes beautifully.
-
Moqueca: A traditional Brazilian fish stew cooked in a clay pot with coconut milk, palm oil, and a variety of spices. The creamy, aromatic flavors of moqueca pair wonderfully with the crispy exterior of coxinhas.
-
-
Side Dishes:
-
Brazilian-Style Rice and Beans: A staple in Brazilian cuisine, this dish adds a hearty and filling element to your meal. The combination of fluffy rice and flavorful beans complements the coxinhas perfectly.
-
Farofa: Toasted manioc flour seasoned with onions, garlic, and spices. This crunchy side dish adds a delightful texture contrast to the soft filling of the coxinhas.
-
Salad: A fresh and zesty salad can balance out the richness of the coxinhas. Try a simple mixed greens salad with a light vinaigrette or a more robust salad with avocado, tomatoes, and a citrus dressing.
-
-
Beverages:
-
Caipirinha: The classic Brazilian cocktail made with cachaça, lime, and sugar. It’s the perfect drink to pair with coxinhas, adding a refreshing and tangy contrast to the rich flavors.
-
Guarana Soda: This sweet and fizzy beverage is popular in Brazil and pairs well with the savory flavors of the coxinhas. It’s a fun and flavorful option for a casual meal.
-
Iced Tea: A simple and refreshing iced tea can be a great accompaniment to coxinhas. Add a splash of lemon or mint for a refreshing twist.
-
Lemonade: Bright and tangy, lemonade can cut through the richness of the coxinhas and add a refreshing contrast.
-
-
Dipping Sauces:
-
Aioli: A creamy garlic sauce that pairs perfectly with the crispy exterior of coxinhas.
-
Tomato Sauce: A tangy, sweet sauce that adds a burst of flavor.
-
Hot Sauce: For those who love a bit of heat, a spicy hot sauce can elevate the experience.
-
Salsa: A fresh and zesty option that complements the rich flavors of the filling.
-
Tips for Success:
-
Balance Flavors: When pairing coxinhas with other dishes, think about balancing flavors. Rich and savory dishes like feijoada or moqueca pair well with the crispy, flavorful coxinhas.
-
Texture Contrast: Adding a crunchy side dish like farofa or a fresh salad can create a delightful texture contrast.
-
Beverage Match: Choose beverages that complement the flavors of your meal. Caipirinhas and guarana soda are traditional choices, but don’t be afraid to experiment with other refreshing drinks.
Example Pairings:
-
Appetizer Platter: Serve coxinhas on a platter with small bowls of aioli, tomato sauce, and hot sauce. Add a few lime wedges and fresh parsley for garnish.
-
Full Meal: Serve coxinhas with a side of Brazilian-style rice and beans, a mixed greens salad, and a pitcher of caipirinha for a complete and satisfying meal.
-
Snack Station: Set up a snack station with coxinhas, dipping sauces, fried plantains, and a cooler filled with guarana soda and iced tea.
By pairing your coxinhas with these delicious dishes and drinks, you’ll create a memorable and authentic Brazilian dining experience. Whether you’re hosting a party or having a casual dinner, these pairings are sure to impress. Enjoy!
Conclusion
Wow, what a journey! From the vibrant flavors of Brazil to the crispy, golden perfection of coxinhas, we’ve covered a lot of ground. I hope you feel inspired and excited to bring these delicious Brazilian chicken croquettes into your kitchen. Whether you’re a seasoned chef or a curious beginner, coxinhas are a delightful and rewarding recipe to master.
Wrapping Up:
-
A Taste of Brazil: Coxinhas are more than just a snack; they’re a taste of Brazilian culture and a way to connect with the rich culinary traditions of this amazing country. Each bite is a celebration of flavor and texture.
-
Versatility and Creativity: We’ve explored how to make authentic coxinhas, but we’ve also touched on the endless possibilities for customization. From gluten-free options to spicy variations, there’s a coxinha for every palate.
-
Sharing the Love: Coxinhas are perfect for sharing. Whether you’re hosting a party, having a casual get-together, or just enjoying a snack at home, these Brazilian treats are sure to bring joy and satisfaction to everyone who tries them.
Final Thoughts:
-
Practice and Patience: Remember, making coxinhas takes a bit of practice. Don’t be discouraged if your first batch isn’t perfect. Each attempt will bring you closer to mastering this delicious recipe.
-
Experiment and Enjoy: Feel free to experiment with different ingredients, shapes, and flavors. The beauty of cooking is in the creativity and the joy it brings.
-
Connect and Share: Cooking is a wonderful way to connect with others. Share your coxinhas with friends and family, and don’t forget to share your experiences and variations with us! We’d love to hear how your coxinhas turned out.
FAQs
Alright, let’s address some of the most common questions about making coxinhas. Whether you’re a first-time cook or a seasoned chef, these FAQs should help you troubleshoot and perfect your recipe.
Frequently Asked Questions:
-
Can I use store-bought shredded chicken?
-
Answer: Absolutely! Store-bought shredded chicken works great, especially if you’re short on time. However, fresh shredded chicken will have a better texture and flavor. If you have the time, boiling or baking a whole chicken and shredding it yourself is always the best option.
-
-
How long can I store coxinhas?
-
Answer: Coxinhas can be stored in an airtight container in the refrigerator for up to 3 days. For longer storage, you can freeze them. Just make sure to let them cool completely before freezing. Reheat them in a preheated oven at 350°F (175°C) for about 10-15 minutes to restore their crispy texture.
-
-
Can I freeze coxinhas?
-
Answer: Yes, you can freeze coxinhas before frying them. Simply place the shaped coxinhas on a baking sheet lined with parchment paper and freeze them until solid. Then, transfer them to a freezer-safe bag or container. When you’re ready to fry, you can cook them straight from the freezer without thawing.
-
-
What can I use instead of cream cheese?
-
Answer: If you don’t have cream cheese, you can substitute it with ricotta cheese or a soft goat cheese. Both options will add a creamy texture to the filling. You can also use a combination of cheeses for added flavor.
-
-
How do I know when the oil is hot enough?
-
Answer: The ideal temperature for frying coxinhas is 350°F (175°C). You can use a frying thermometer to check the oil temperature. If you don’t have a thermometer, you can test the oil by dropping a small piece of dough into it. If the dough sizzles and floats to the top, the oil is ready.
-
-
Can I bake coxinhas instead of frying them?
-
Answer: Yes, you can bake coxinhas. Preheat your oven to 400°F (200°C) and place the shaped coxinhas on a baking sheet lined with parchment paper. Bake them for about 20-25 minutes, or until they are golden brown and crispy. Baking may result in a slightly different texture, but they will still be delicious.
-
-
How do I prevent the coxinhas from sticking together while frying?
-
Answer: Fry the coxinhas in small batches to avoid overcrowding the pan. Overcrowding can lower the oil temperature and cause the coxinhas to stick together. Also, make sure the oil is hot enough before adding the coxinhas.
-
-
Can I use gluten-free flour for the dough?
-
Answer: Yes, you can use a gluten-free flour blend for the dough. Just make sure to use a blend that is suitable for baking. You may need to adjust the amount of liquid slightly to achieve the right consistency.
-
-
What are some dipping sauce options?
-
Answer: There are many delicious dipping sauces that pair well with coxinhas. Some popular options include aioli, tomato sauce, hot sauce, salsa, and guacamole. You can also try a simple lemon-tahini sauce or a tangy mustard sauce.
-
-
How do I make the filling less spicy?
-
Answer: If you prefer a milder flavor, you can omit the jalapeños or cayenne pepper from the filling. You can also add more cream cheese or breadcrumbs to balance out the heat.
-
Brazilian Coxinha
Enjoy the authentic taste of Brazil with this coxinha recipe! These crispy Brazilian chicken croquettes are filled with savory chicken thigh and cream cheese, perfect for frying.
Ingredients
For the Dough:
- 2 cups all-purpose flour
- 1 cup chicken broth (homemade or store-bought)
- 1/4 cup vegetable oil
- 1/2 teaspoon salt
For the Filling:
- 2 cups shredded chicken (breast or thigh)
- 1/2 cup cream cheese, softened
- 1/4 cup finely chopped onion
- 2 cloves garlic, minced
- 1/4 cup breadcrumbs
- 1/4 cup finely chopped fresh parsley
- Salt and pepper to taste
For Frying:
- Vegetable oil for frying (enough to cover the coxinhas)
Instructions
Prepare the Dough:
- In a medium saucepan, combine the all-purpose flour, chicken broth, vegetable oil, and salt.
- Cook over medium heat, stirring constantly until the mixture forms a soft dough. This should take about 5-7 minutes.
- Remove the saucepan from the heat and let the dough cool until it’s just warm to the touch.
Make the Filling:
- In a large mixing bowl, combine the shredded chicken, cream cheese, finely chopped onion, minced garlic, breadcrumbs, and finely chopped parsley.
- Season the mixture with salt and pepper to taste. Mix everything together until well combined.
Form the Coxinhas:
- Once the dough is cool enough to handle, turn it out onto a lightly floured surface.
- Divide the dough into small, manageable pieces. Each piece should be about the size of a golf ball.
- Take one piece of dough and flatten it into a small circle using your hands or a rolling pin.
- Place a spoonful of the chicken filling in the center of the dough circle.
- Carefully wrap the dough around the filling, sealing the edges tightly to encase the filling completely. Shape the dough into a teardrop shape.
- Repeat this process with the remaining dough and filling.
Fry the Coxinhas:
- Fill a deep fryer or a large, deep skillet with enough vegetable oil to cover the coxinhas completely. Heat the oil to 350°F (175°C).
- Carefully lower the coxinhas into the hot oil in batches, making sure not to overcrowd the pan. Fry them for about 3-4 minutes per batch, or until they are golden brown and crispy.
- Use a slotted spoon or a spider strainer to remove the coxinhas from the oil and transfer them to a baking sheet lined with paper towels to drain any excess oil.
Serve and Enjoy:
- Coxinhas are best enjoyed hot and crispy, but they can also be reheated in the oven if needed. Serve them with your favorite dipping sauce, such as aioli, tomato sauce, or hot sauce.
Notes
Pro Tips:
- Handling the Dough: If the dough is too sticky, add a bit more flour. If it’s too dry, add a little more chicken broth.
- Filling Consistency: The filling should be moist but not too wet. If it’s too wet, add more breadcrumbs.
- Oil Temperature: Keep the oil at a steady 350°F (175°C) to ensure even frying and a crispy exterior.
- Safety First: Frying with hot oil can be dangerous. Use long-handled tools and be cautious to avoid splatters. Always let the oil cool completely before cleaning up.
- Experiment: Feel free to get creative with your coxinhas. Try different fillings, shapes, and dipping sauces to find your perfect combination.
Nutrition Information:
Yield: 13 Serving Size: 1Amount Per Serving: Calories: 150Total Fat: 8gSodium: 150mgCarbohydrates: 15gFiber: 1gSugar: 1gProtein: 7g