

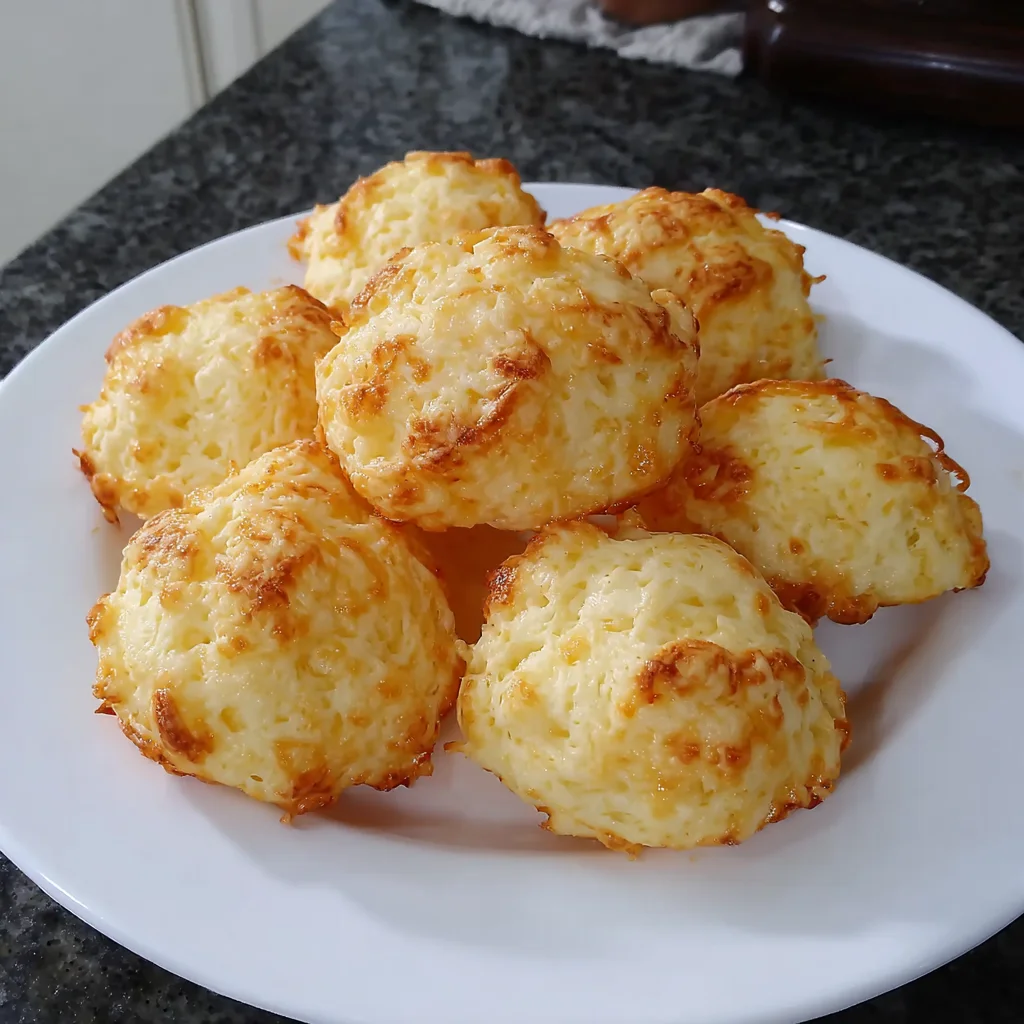



Have you ever bitten into something so irresistibly cheesy and chewy that you immediately wanted another? That’s exactly the charm of Brazilian Cheese Bread — Pão de Queijo. Naturally gluten-free, made with tapioca flour, and boasting a cloud-like center with a lightly crisp exterior, these little cheese puffs feel like comfort food in its purest form.
What I love most is how simple they are — a handful of pantry staples, a quick mix, and suddenly your kitchen smells like a cozy Brazilian café. Whether you enjoy them warm for breakfast, pair them with soup, or serve them as a snack that disappears faster than you expect, Pão de Queijo always delivers.
If you’ve been looking for an easy, foolproof way to bring a bit of Brazilian warmth to your table, you’re in the right place. Let’s dive into one of the most delightful bites South America has to offer.
Why You’ll Love This Brazilian Cheese Bread
If you’re looking for a recipe that’s simple, satisfying, and guaranteed to impress, Brazilian Cheese Bread (Pão de Queijo) checks every box. These naturally gluten-free cheese buns are wonderfully chewy on the inside with a delicate golden crust on the outside — the kind of snack that disappears the moment it hits the table.
Here’s why this recipe becomes a staple in so many kitchens:
- Quick & Foolproof: With a handful of everyday ingredients and a straightforward method, this recipe is beginner-friendly yet delivers impressively authentic results.
- Naturally Gluten-Free: Made with tapioca flour, these cheese breads offer that perfect chewy texture without any wheat — great for gluten-free lifestyles.
- Incredibly Versatile: Enjoy them warm for breakfast, pair them with soups, or serve them as a crowd-pleasing appetizer. They fit effortlessly into any occasion.
- Customizable Flavor: Parmesan adds a delicious savory depth, but you can easily mix in other cheeses or herbs to make them your own.
- Perfect Make-Ahead Snack: The dough can be portioned and frozen, so you can bake fresh cheese puffs anytime cravings strike.
Think of this recipe as your go-to for moments when you want something comforting yet exciting — a homemade treat that brings a little taste of Brazil right into your kitchen.
Ingredients You’ll Need
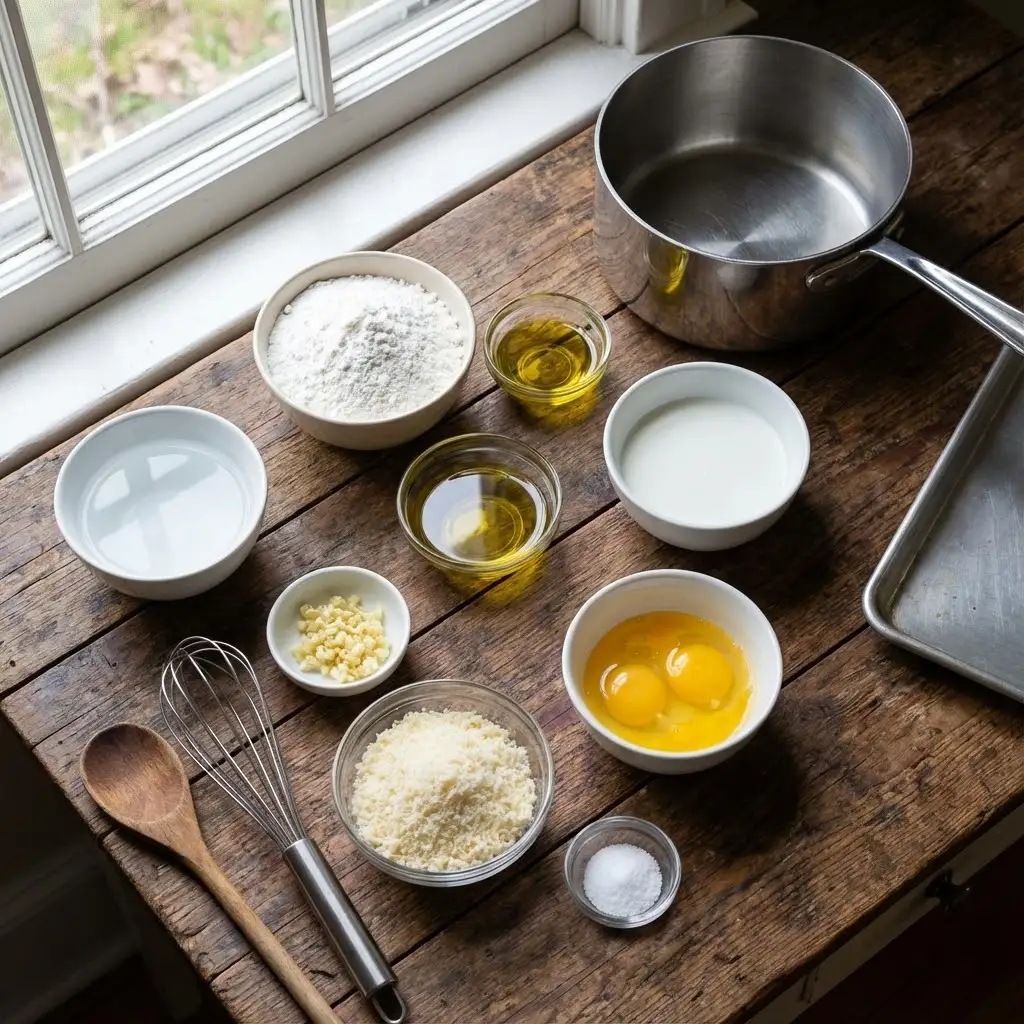
Before we dive into the mixing and baking, let’s take a quick look at what goes into these irresistibly chewy Pão de Queijo. Each ingredient plays a simple but important role in creating that classic soft-centered, golden-topped texture we love in Brazilian cheese bread.
Here’s what you’ll need:
- Olive Oil or Butter (½ cup): Adds richness and helps create that lightly crisp exterior.
- Water (⅓ cup): Works with the milk to hydrate the tapioca flour.
- Milk or Soy Milk (⅓ cup): Gives the dough body and enhances the bread’s subtle creaminess.
- Salt (1 teaspoon): Balances the cheesy flavor and enhances every bite.
- Tapioca Flour (2 cups): The star of the recipe — naturally gluten-free and responsible for the signature chewy texture.
- Minced Garlic (2 teaspoons): Adds a savory, aromatic boost to the dough.
- Freshly Grated Parmesan Cheese (⅔ cup): Brings that salty, nutty flavor and helps with browning.
- Eggs (2, beaten): Bind everything together and create the puff and lift during baking.
With your ingredients ready, you’re already halfway to a warm batch of authentic, cheesy, Brazilian goodness. Let’s move on to the fun part — bringing it all together.
How to Make Brazilian Cheese Bread
Making Pão de Queijo is wonderfully simple, and once you’ve done it once, it becomes one of those recipes you can prepare almost on autopilot. Here’s a clear, friendly walkthrough to help you get perfect, chewy Brazilian cheese buns every time.
1. Heat the Wet Ingredients
Start by combining the olive oil (or butter), water, milk, and salt in a saucepan.
Place it over high heat and bring it just to a boil.
Tip: This quick heating step helps “gelatinize” the tapioca flour, giving the bread its signature stretchy, chewy bite.
2. Mix in the Tapioca Flour
As soon as the mixture boils, remove it from the heat.
Add the tapioca flour and minced garlic, stirring until the mixture becomes smooth and slightly sticky.
Let it rest for 10–15 minutes — this short pause helps the dough cool and thicken, making it easier to mix with the eggs.
3. Add the Cheese and Eggs
Once cooled slightly, stir in the grated Parmesan and beaten eggs.
Don’t worry if the dough looks chunky or cottage-cheese-like — that’s exactly how Pão de Queijo dough should look at this stage.
4. Shape the Dough
Scoop the dough into ¼-cup portions and place them onto an ungreased baking sheet.
You can use a cookie scoop, measuring cup, or lightly greased hands.
Tip: For smaller, pop-in-your-mouth cheese bites, scoop the dough in tablespoon-sized portions instead.
5. Bake Until Golden
Bake at 375°F (190°C) for 15–20 minutes, or until the tops are lightly golden and the centers feel set.
The buns will puff up beautifully and release the most amazing cheesy aroma — that’s your sign they’re ready!
Pro Tips & Delicious Variations
If you want your Brazilian Cheese Bread (Pão de Queijo) to taste bakery-level amazing every time, these simple tips and fun variations will take your batch to the next level. Think of this as your cheat sheet for maximizing flavor, texture, and versatility.
Pro Tips for Perfect Pão de Queijo
- Use freshly grated cheese. Pre-shredded cheese contains anti-caking agents that can affect melting and texture. Fresh Parmesan gives the best flavor and browning.
- Let the dough rest. Allowing the tapioca mixture to cool for 10–15 minutes prevents the eggs from scrambling and helps everything blend smoothly.
- Expect a chunky dough. Don’t worry if the mixture looks lumpy — true Pão de Queijo dough is supposed to be rustic and cottage-cheese-like.
- Keep an eye on baking time. Since every oven runs differently, check the buns at the 15-minute mark. You’re aiming for lightly golden tops and a chewy center.
- Serve them warm. These cheese buns are at their absolute best right out of the oven.
Fun Variations to Try
- Cheese Blend Mix: Swap some Parmesan for mozzarella, cheddar, or a mild white cheese for a softer, stretchier interior.
- Garlic & Herb: Add dried oregano, parsley, or rosemary for a fragrant, savory twist.
- Spicy Kick: Mix in a pinch of cayenne, red pepper flakes, or smoked paprika.
- Mini Cheese Bites: Scoop tablespoon-sized portions and reduce bake time slightly for bite-sized snacks.
- Dairy-Free Version: Use soy milk and a dairy-free cheese alternative to keep the recipe plant-friendly.
- Air Fryer Adaptation: Air fry small scoops at 350°F (175°C) for 8–10 minutes for a quick, crisp batch.
Serving & Pairing Suggestions
One of the best things about Pão de Queijo is how effortlessly it fits into any meal or moment. These warm, chewy Brazilian cheese buns are incredibly versatile, making them just as perfect for a cozy breakfast as they are for an elegant appetizer spread.
Here are some delicious ways to enjoy them:
Serve Them Fresh & Warm
Pão de Queijo is at its peak right out of the oven — soft, airy, and wonderfully cheesy. Place them in a bread basket lined with a towel to keep them warm longer.
Breakfast & Brunch Pairings
- Enjoy with a cup of coffee, hot chocolate, or herbal tea.
- Pair with scrambled eggs, omelets, or fresh fruit for a simple but satisfying morning plate.
Perfect with Soups & Salads
Their chewy texture makes them the perfect companion to:
- Tomato soup
- Creamy potato or broccoli soup
- Chicken or vegetable stew
- Fresh green salads with citrus or vinaigrette
The bread’s mild, savory flavor complements both light and hearty dishes beautifully.
Appetizer Board Addition
Add them to a snack or charcuterie board alongside:
- Sliced meats
- Soft cheeses
- Olives and spreads
- Fresh veggies
They act as the warm, comforting element that ties everything together.
Snack & On-the-Go Bite
These cheese breads hold up well even after cooling, making them great for:
- Lunch boxes
- Road trips
- Midday snacks
- Picnic spreads
Tools & Equipment Guide
You don’t need any fancy tools to make delicious Brazilian Cheese Bread (Pão de Queijo) at home — just a few simple kitchen essentials. Having the right equipment not only makes the process smoother but also helps you achieve that perfect golden exterior and chewy center every time.
Essential Tools
- Saucepan: Used to heat the oil, milk, water, and salt — an important step for activating the tapioca flour.
- Mixing Bowl: Useful for combining the cooled tapioca mixture with the cheese and eggs.
- Wooden Spoon or Silicone Spatula: Ideal for stirring the hot dough and folding in the cheese.
- Baking Sheet: An ungreased sheet works perfectly for baking the dough into airy, puffed cheese buns.
- Measuring Cups & Spoons: For accurate ingredient proportions, especially the tapioca flour and liquids.
- Cookie Scoop or Measuring Cup: Helps portion the dough into even ¼-cup mounds (or smaller if making mini bites).
Optional but Helpful Tools
- Stand Mixer: Can make mixing easier once the tapioca mixture thickens — especially if you’re making a large batch.
- Mini Muffin Tin: Creates uniform, bite-sized cheese puffs and helps keep their shape.
- Parchment Paper: Not required, but can make cleanup easier.
- Cooling Rack: Ensures even airflow so the buns don’t become soggy after baking.
Troubleshooting Common Issues
Even though Pão de Queijo is a simple and forgiving recipe, a few common issues can arise — especially when working with tapioca flour and gluten-free dough. Here’s a friendly guide to help you troubleshoot and ensure every batch comes out perfectly golden, chewy, and cheesy.
1. Dough Too Dry or Crumbly
- Cause: Too little liquid or over-measuring tapioca flour.
- Fix: Add a splash of milk or water, one tablespoon at a time, until the dough reaches a sticky, slightly chunky consistency.
2. Dough Too Wet or Sticky
- Cause: Too much liquid or under-measuring flour.
- Fix: Add a little more tapioca flour gradually and mix until manageable. The dough should be soft but scoopable.
3. Buns Don’t Puff Up
- Cause: Eggs not fully incorporated, or oven temperature too low.
- Fix: Ensure eggs are beaten well and folded in evenly. Preheat your oven fully to 375°F (190°C) for optimal puffing.
4. Chewy Interior Too Dense
- Cause: Overmixing after adding the eggs or overbaking.
- Fix: Mix just until combined and bake only until tops are lightly golden. Slightly underbaking can keep the center soft and chewy.
5. Uneven Browning
- Cause: Oven hot spots or unevenly sized dough balls.
- Fix: Use a baking sheet rotated halfway through baking, and make sure dough portions are uniform.
Frequently Asked Questions (FAQs)
Here are answers to some of the most common questions about Brazilian Cheese Bread (Pão de Queijo). These tips will help you feel confident in making perfect, chewy, and cheesy buns every time.
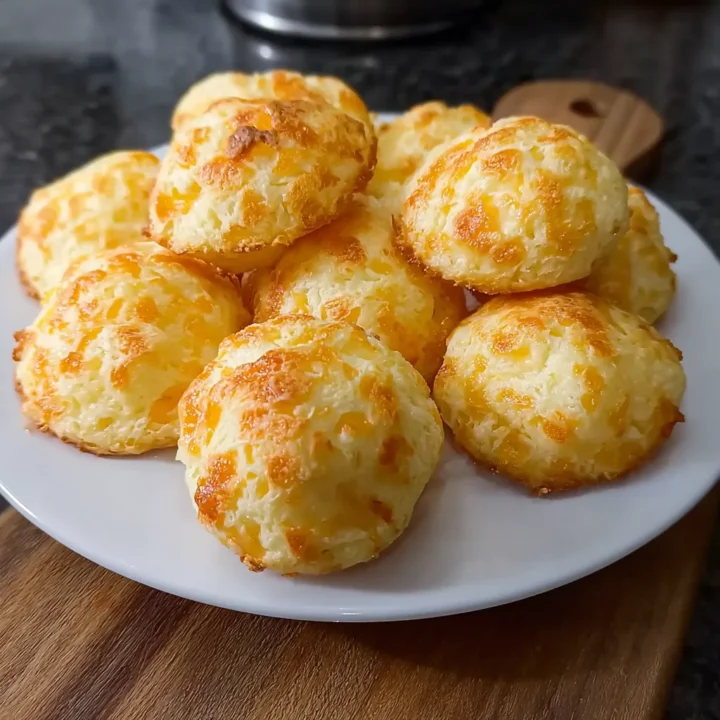
Brazilian Cheese Bread (Pão de Queijo)
If you’re looking for a recipe that’s simple, satisfying, and guaranteed to impress, Brazilian Cheese Bread (Pão de Queijo) checks every box.
Ingredients
- ½ cup olive oil or butter
- ⅓ cup water
- ⅓ cup milk or soy milk
- 1 teaspoon salt
- 2 cups tapioca flour
- 2 teaspoons minced garlic
- ⅔ cup freshly grated Parmesan cheese
- 2 beaten eggs
Instructions
- Preheat the oven to 375°F (190°C).
- Heat wet ingredients: In a saucepan, combine olive oil (or butter), water, milk, and salt. Bring to a boil, then remove from heat.
- Mix in tapioca flour: Stir in tapioca flour and minced garlic until smooth. Let the dough rest 10–15 minutes.
- Add cheese and eggs: Stir in the Parmesan and beaten eggs. Dough will look chunky — that’s normal.
- Shape the dough: Drop ¼-cup mounds of dough onto an ungreased baking sheet.
- Bake: 15–20 minutes, until tops are lightly golden.
- Serve warm: Enjoy the cheesy, chewy goodness immediately.
Notes
- Use freshly grated cheese for the best flavor and melting texture.
- Dough can be portioned and frozen for later baking.
- For mini bites, use tablespoon-sized portions and slightly reduce bake time.
- Experiment with cheese blends or herbs for customized flavor.
- Perfect for breakfast, snacks, or as an appetizer with soups, salads, or coffee.
Nutrition Information:
Yield: 10 Serving Size: 1Amount Per Serving: Calories: 180Total Fat: 10gSaturated Fat: 3gCholesterol: 45mgSodium: 200mgCarbohydrates: 17gFiber: 1gSugar: 0.5gProtein: 5g