




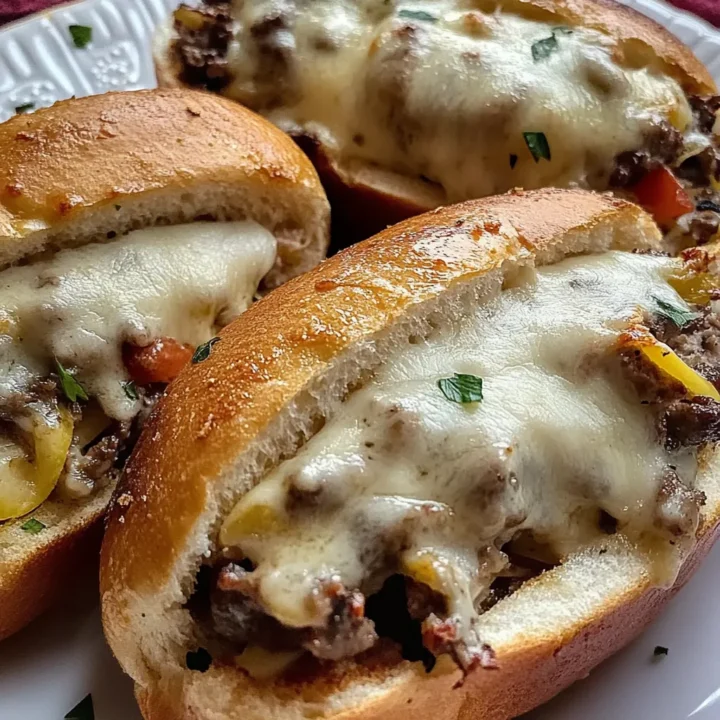
If you’re craving a crowd-pleasing dish that’s equal parts cozy comfort food and effortless party magic, these Baked Philly Cheesesteak Sliders might just become your new go-to. Think tender slices of seasoned sirloin, melty provolone, and savory sautéed onions—all tucked into soft mini rolls and baked until perfectly golden. Whether you’re hosting a game-day gathering, planning a casual family night, or simply looking for an easy weeknight dinner with big cheesesteak flavor, these sliders check every box.
What I love most about this recipe is how approachable it is. You get all the classic Philly cheesesteak goodness without the fuss of individual sandwiches, and the baked slider format makes it ideal for feeding a hungry crowd. Plus, the combination of cream cheese, provolone, and pickled peppers adds a rich, tangy twist that takes the traditional flavors to a whole new level.
If you’ve been searching for a recipe that feels indulgent but still quick and practical, you’re in the right place. Let’s dive into what makes these cheesy, juicy, oven-baked sliders such a standout.
There’s something undeniably satisfying about a recipe that feels decadent yet simple enough for any night of the week—and that’s exactly what these Baked Philly Cheesesteak Sliders deliver. Before you even start cooking, it helps to understand what makes this dish so special: layers of juicy, skillet-seared sirloin, melty provolone cheese, and savory sautéed onions tucked inside soft slider rolls. It’s everything you love about a classic Philly cheesesteak, transformed into a shareable, oven-baked dish that’s perfect for gatherings, game days, or quick dinners.
To help you get the best results every time, here’s what truly elevates this recipe:
- Use high-quality steak. A tender cut like top sirloin ensures your sliders stay juicy and flavorful, even after baking.
- Don’t skip the onions. Sautéing them in the same skillet as the beef builds a deeper, more authentic cheesesteak flavor.
- Hollowing the rolls matters. Creating space inside each roll helps the cheesy beef mixture settle in without spilling over.
- Layer your cheese. Mixing provolone into the filling and adding more on top guarantees that perfect melty, stretchy finish.
As you walk through the steps, think of this recipe as a flexible guide rather than a rigid set of rules. Want a spicier bite? Increase the cayenne or add hotter pickled peppers. Prefer extra creaminess? Stir in a touch more cream cheese. The beauty of these cheesy baked sliders lies in how easily they adapt to your taste.
Take your time, enjoy the process, and imagine the moment you pull the tray from the oven—golden edges, bubbling cheese, and a savory aroma that guarantees everyone will come rushing to the kitchen.
Ingredients
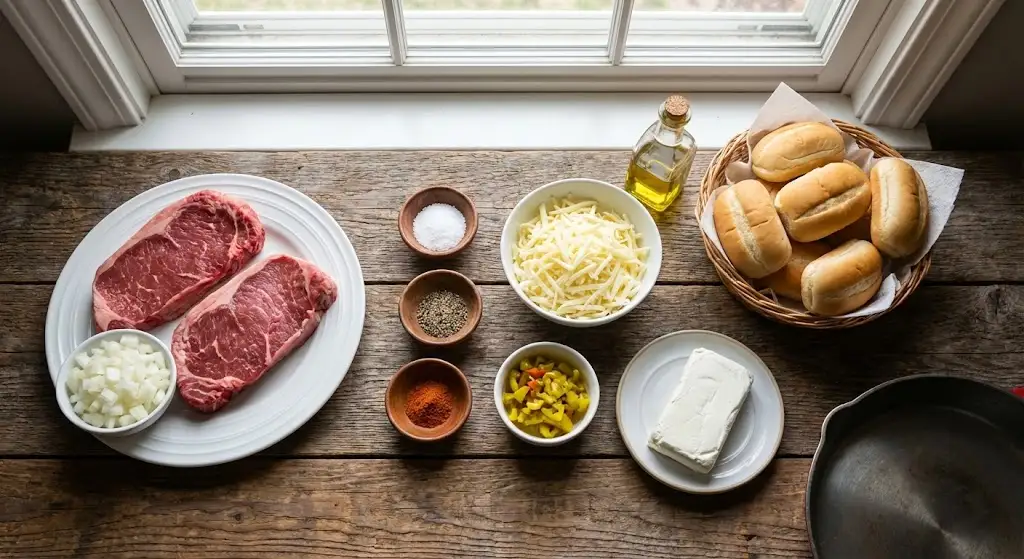
Before you dive into assembling these irresistible Philly Cheesesteak Sliders, take a moment to get familiar with each ingredient and why it matters. Every component plays a role in building that signature cheesy, savory, perfectly balanced flavor. Here’s what you’ll need:
For the Sliders
- 1 tablespoon olive oil – Helps the steak sear beautifully and adds richness.
- 1 pound beef top sirloin steaks – A tender, flavorful cut that slices easily and stays juicy after baking.
- Salt & freshly ground black pepper, to taste – Essential for seasoning the meat from the start.
- A pinch of cayenne pepper – Adds a subtle heat without overpowering the cheesesteak flavor.
- ½ cup diced onions – Brings sweetness and depth once sautéed.
- 10 mini sandwich rolls – Soft rolls or slider buns that hold the filling without falling apart.
For the Cheesy Filling
- 2 ½ cups freshly shredded provolone cheese – Melts beautifully and delivers that classic Philly flavor.
- ½ cup chopped pickled peppers – Adds tanginess and a gentle kick that brightens the richness.
- ½ cup softened cream cheese – Creates a creamy, cohesive filling that stays tucked inside the rolls.
- 1 teaspoon kosher salt – Enhances every layer of flavor in the mixture.
- ¼ teaspoon freshly ground black pepper – Rounds out the seasoning for a balanced finish.
Instructions
Making these Baked Philly Cheesesteak Sliders is all about building layers of flavor, and with a few simple steps, you’ll have a tray of cheesy, golden perfection ready to serve. Follow this guide as if I’m right there in the kitchen with you:
1. Cook the Steak and Onions
- Heat the olive oil in a large skillet over medium-high heat.
- Season the top sirloin steaks generously with salt, black pepper, and a pinch of cayenne.
- Place the steaks in the hot skillet and sear for 5–6 minutes.
- Flip the steaks, then scatter the diced onions around them.
- Continue cooking for another 5–6 minutes, until the steak is firm but still slightly pink in the center.
- Push the onions underneath the steaks and cook for 2–3 more minutes, just until they’re browned but still have slight crunch.
- Transfer the steaks and onions—along with their flavorful juices—to a plate to cool slightly.
2. Prepare the Rolls
- Preheat your oven to 425°F (220°C).
- Line a baking sheet with aluminum foil for easy cleanup.
- Place the mini sandwich rolls on the tray.
- Using a small knife, cut into the top of each roll at a 45° angle and gently remove some of the bread inside.
- This creates a pocket to hold the creamy, cheesy filling without overflowing.
3. Build the Filling
- Thinly slice the cooled steaks, then cut the slices crosswise into ½-inch pieces.
- Add the steak pieces to a large mixing bowl.
- Toss in the sautéed onions and any juices that were released.
- Add 1 ½ cups of provolone, the pickled peppers, cream cheese, kosher salt, and black pepper.
- Mix until everything is fully combined and creamy.
- Taste and adjust seasoning if needed.
4. Assemble & Bake
- Spoon the steak mixture into each hollowed roll, packing it generously.
- Top each slider with the remaining 1 cup of provolone cheese for that perfect melty finish.
- Bake for 15 minutes, or until the cheese is melted and the edges of the rolls are golden brown.
- Let the sliders cool slightly before serving—they hold together better and taste even richer.
These steps keep the process smooth and enjoyable, ensuring each slider is loaded with flavor and baked to perfection. Let the aroma guide you—the kitchen will smell incredible long before the timer goes off!
Pro Tips and Variations
Think of these Philly Cheesesteak Sliders as your culinary playground—easy to customize, simple to prepare, and delicious every time. Here are some practical tips and creative twists to help you elevate the recipe:
Pro Tips for the Best Sliders
- Slice the steak thinly. Cutting the steak into thin strips (and then into small pieces) makes the filling tender and easier to pack into the rolls.
- Use freshly shredded cheese. Pre-shredded cheese contains anti-caking agents that prevent smooth melting. Fresh provolone melts creamier and tastes richer.
- Don’t rush the onions. Letting them brown slightly in the skillet builds authentic cheesesteak flavor without turning them mushy.
- Hollow the rolls just enough. You want room for the filling, but leave enough structure so the sliders stay intact while baking.
- Pack the filling tightly. This keeps each bite loaded with beef, melted provolone, and creamy goodness.
Flavor Variations
- Spicy Kick: Add chopped jalapeños or use hot pickled peppers for extra heat.
- Garlicky Twist: Stir in a teaspoon of garlic powder or sauté minced garlic with the onions.
- Mushroom Lovers: Sauté sliced mushrooms with the onions for a richer, earthier flavor.
- Cheese Swap: Try mozzarella for a stretchier melt, or use white American cheese for a classic Philly touch.
- Roll Options: Hawaiian rolls add a light sweetness that pairs beautifully with the savory beef mixture.
Make-Ahead Options
- Prepare the steak filling up to 24 hours in advance and refrigerate it.
- Assemble the sliders just before baking so the rolls don’t become soggy.
- Leftovers reheat well at 350°F for 8–10 minutes.
With these tips and variations, you can personalize the sliders to fit your taste or your guests’ preferences—making each batch just as satisfying as the last!
Serving & Pairing Suggestions
These Baked Philly Cheesesteak Sliders are already a star on their own, but pairing them with the right sides and serving ideas can turn a simple meal into a full spread everyone will rave about. Whether you’re hosting a game-day party or planning a casual family dinner, here are some delicious ways to round out the experience:
How to Serve Your Sliders
- Right out of the oven: Let them cool for just a couple of minutes so the cheese sets slightly—this keeps the sliders intact and easier to pick up.
- Serve on a platter: Pile them onto a large serving board or tray for a grab-and-go, party-friendly presentation.
- Add dipping sauces: Offer options like creamy ranch, garlic aioli, spicy mayo, or cheese sauce for an extra punch of flavor.
Perfect Pairings
- Crispy French fries or potato wedges: A classic match for cheesesteak flavors.
- Fresh green salad: Adds a refreshing contrast to the rich, cheesy sliders.
- Coleslaw: Its crunchy, tangy profile balances the savory beef beautifully.
- Roasted vegetables: Simple roasted broccoli or bell peppers pair well without overpowering.
- Pickles: Their acidity cuts through the creaminess for a satisfying bite.
Great Drinks to Serve With These Sliders
- Iced tea or lemonade for lighter, refreshing choices.
- Craft beer—especially lagers, pilsners, or light ales—to complement the savory steak.
- Sparkling water with citrus for a lowkey, clean pairing.
When to Serve Them
- Game-day gatherings
- Family movie nights
- Tailgate parties
- Casual get-togethers
- Holiday appetizers or potlucks
These pairing ideas help highlight the rich, savory flavors of your sliders while turning the meal into a balanced and memorable spread.
Tools and Equipment Guide
Having the right tools on hand makes preparing these Philly Cheesesteak Sliders smoother, faster, and more enjoyable. You don’t need anything fancy—just a few reliable kitchen essentials that help you build flavor, assemble the sliders easily, and bake them to golden perfection.
Essential Tools
- Large Skillet:
A heavy-bottomed or cast-iron skillet helps you get that perfect sear on the steak while evenly cooking the onions. - Sharp Chef’s Knife:
Crucial for slicing the cooked steak thinly and cleanly. A sharp knife keeps the meat from tearing and ensures tender bites. - Cutting Board:
Choose a sturdy board with enough space to work comfortably when slicing the steak and prepping your ingredients.
Mixing & Preparation Tools
- Large Mixing Bowl:
You’ll need this to combine the steak, onions, melted cheese, cream cheese, and peppers into a cohesive filling. - Small Paring Knife:
Perfect for hollowing out the rolls with control and precision. - Spatula or Wooden Spoon:
Ideal for mixing the filling evenly so every slider gets the right balance of meat and cheese.
Baking Essentials
- Baking Sheet:
A simple sheet pan holds your sliders together and helps them crisp on the bottom. - Aluminum Foil:
Lining your tray makes cleanup effortless and prevents sticking. - Oven:
Set to 425°F (220°C) to melt the cheese thoroughly and lightly toast the rolls.
Optional but Helpful Tools
- Food Thermometer:
Great for ensuring the steak is cooked to your preferred doneness before slicing. - Silicone Basting Brush:
If you want to brush the tops of the rolls with melted butter for extra flavor and shine.
Having these tools ready before you begin not only streamlines the cooking process but also helps ensure consistent, delicious results—making your sliders taste as good as they look.
Troubleshooting Common Issues
Even with a straightforward dish like Baked Philly Cheesesteak Sliders, a few small mistakes can affect the final texture or flavor. Here’s a quick guide to help you avoid common pitfalls and fix them if they come up, ensuring your sliders come out perfectly melty, juicy, and flavorful every time.
1. The Steak Turns Out Dry
What happened:
The steak may have overcooked or been cut too thick.
How to fix it:
- Slice the steak very thinly after cooking—this keeps each piece tender.
- Reduce cook time slightly next round, especially if your skillet runs hotter.
- Make sure the meat juices are added back into the filling to boost moisture.
2. The Cheese Doesn’t Melt Smoothly
What happened:
Pre-shredded cheese can melt unevenly due to anti-caking agents.
How to fix it:
- Use freshly shredded provolone for the creamiest melt.
- Make sure the sliders bake long enough for the top layer to fully melt and bubble.
3. Sliders Turn Soggy
What happened:
Too much moisture inside the rolls or filling packed while overly hot.
How to fix it:
- Let the steak cool slightly before mixing with cheese.
- Hollow the rolls just enough so the filling has space and doesn’t spill over.
- Avoid using rolls that are too soft or flimsy—sturdier slider buns hold up better when baked.
4. Tops of the Rolls Brown Too Quickly
What happened:
High heat or placement too close to the oven’s top element.
How to fix it:
- Loosely tent the sliders with foil halfway through baking.
- Move the baking tray to the center or lower-middle rack.
5. Filling Falls Out While Serving
What happened:
The rolls weren’t hollowed enough or the filling wasn’t packed tightly.
How to fix it:
- Use a small paring knife to create a deep but controlled pocket.
- Gently press the filling into each roll before topping with cheese.
6. Flavor Feels Too Mild
What happened:
Seasoning may have been light or peppers too mild.
How to fix it:
- Add more cayenne or choose hotter pickled peppers.
- Season the steak generously before cooking—don’t be shy with salt and pepper.
- Mix a bit of garlic powder or onion powder into the filling for a deeper flavor profile.
With these quick fixes, you can troubleshoot on the fly and ensure every batch of sliders is as delicious as the last—crispy on the edges, gooey in the center, and loaded with bold cheesesteak flavor.
FAQs
Here are some of the most common questions home cooks ask when making Philly Cheesesteak Sliders, along with clear, helpful answers to make your cooking experience even smoother.
Baked Philly Cheesesteak Sliders
There’s something undeniably satisfying about a recipe that feels decadent yet simple enough for any night of the week—and that’s exactly what these Baked Philly Cheesesteak Sliders deliver.
Ingredients
For the Sliders:
- 1 tablespoon olive oil
- 1 pound beef top sirloin steaks
- Salt and freshly ground black pepper, to taste
- Pinch of cayenne pepper
- ½ cup diced onions
- 10 mini sandwich rolls
For the Cheesy Filling:
- 2 ½ cups freshly shredded provolone cheese
- ½ cup chopped pickled peppers
- ½ cup softened cream cheese
- 1 teaspoon kosher salt
- ¼ teaspoon freshly ground black pepper
Instructions
1. Cook the Steak and Onions
- Heat olive oil in a skillet over medium-high heat.
- Season steaks with salt, pepper, and cayenne.
- Cook for 5–6 minutes, flip, then add onions around the steak.
- Cook another 5–6 minutes until slightly pink inside.
- Push onions under the steaks and cook 2–3 minutes more.
- Transfer steaks, onions, and juices to a plate.
2. Prepare the Rolls
- Preheat oven to 425°F (220°C).
- Line a baking sheet with foil.
- Place rolls on the tray.
- Cut a 45° angle into each roll and hollow out the center.
3. Make the Filling
- Thinly slice steak, then cut into ½-inch pieces.
- Add steak, onions, and juices to a bowl.
- Mix in 1 ½ cups provolone, pickled peppers, cream cheese, salt, and pepper.
- Stir until creamy and well combined.
4. Assemble & Bake
- Spoon filling into each roll.
- Top with remaining 1 cup provolone.
- Bake for 15 minutes, until cheese melts and edges are golden.
Notes
- Use fresh provolone for optimal melting—pre-shredded cheese won’t melt as smoothly.
- Let the steak cool slightly before mixing to avoid melting the cream cheese too early.
- Hollow the rolls just enough to hold the filling without tearing through the bottom.
- Add heat with extra cayenne, jalapeños, or hot pickled peppers.
- Make ahead tip: Prepare the filling 24 hours in advance and store in the fridge.
Nutrition Information:
Yield: 10 Serving Size: 1Amount Per Serving: Calories: 310Total Fat: 18gSaturated Fat: 9gSodium: 520mgCarbohydrates: 20gFiber: 1gSugar: 4gProtein: 18g