




Have you ever craved a dessert that tastes like pure sunshine on a plate? That’s exactly what this Hawaiian Cheesecake delivers — a creamy, tropical twist on classic cheesecake that feels like a mini vacation with every bite. Blending silky cream cheese with sweet pineapple, coconut flakes, and a lightly crunchy graham crust, this tropical cheesecake dessert brings together all the flavors you love in one irresistibly refreshing treat.
What I love most about this recipe is how effortless it is. With simple ingredients, minimal prep, and an overnight chill that lets the flavors deepen, it becomes the perfect make-ahead dessert for gatherings, holidays, or those days when you just want something special waiting in the fridge. The whipped topping and pineapple add a bright, fruity lift, while the pecans bring a subtle, nutty crunch — a combination that always surprises guests in the best way.
If you’re looking for a dessert that’s creamy, vibrant, and undeniably fun to make, this pineapple-coconut cheesecake is about to become a new favorite in your kitchen. Let’s dive into a slice of island-inspired goodness.
Why You’ll Love This Hawaiian Cheesecake
If you’re looking for a dessert that feels like a breath of warm island air, this Hawaiian cheesecake might just become your new go-to recipe. It combines the creamy richness of classic cheesecake with bright, tropical flavors — all wrapped in a comforting graham cracker crust. Here’s why this recipe stands out and why you’ll love making (and eating!) it:
A Taste of the Tropics in Every Bite
The blend of pineapple, coconut, and creamy cheesecake filling creates a balanced flavor that’s refreshing without being overly sweet. It’s the kind of dessert that instantly transports you to a sunny, beachy escape.
Simple Ingredients, Big Payoff
You don’t need anything fancy to achieve this gorgeous cheesecake. Most ingredients are pantry staples, and the process is wonderfully straightforward. Even if you’re new to baking, this recipe makes you feel like a pro from the very first step.
Make-Ahead Friendly
Because this cheesecake needs time to chill, it’s perfect for:
- Hosting gatherings
- Holiday dinners
- Meal prep for sweet cravings
- Stress-free entertaining
Just prepare it the day before, chill overnight, and enjoy a ready-to-serve make-ahead dessert.
Beautiful Texture & Layers
Each slice gives you:
- A velvety creamy cheesecake center
- A lightly crunchy coconut-pecan filling
- A refreshing pineapple topping
- A cloud-like layer of whipped topping
It’s indulgent without feeling heavy — the ideal balance.
Customizable & Fun
Whether you love extra coconut, prefer a nuttier crunch, or want a lighter version with a no-calorie sweetener, this recipe welcomes tweaks. It’s flexible enough for beginners and exciting enough for experienced bakers.
Ingredients for Your Hawaiian Cheesecake
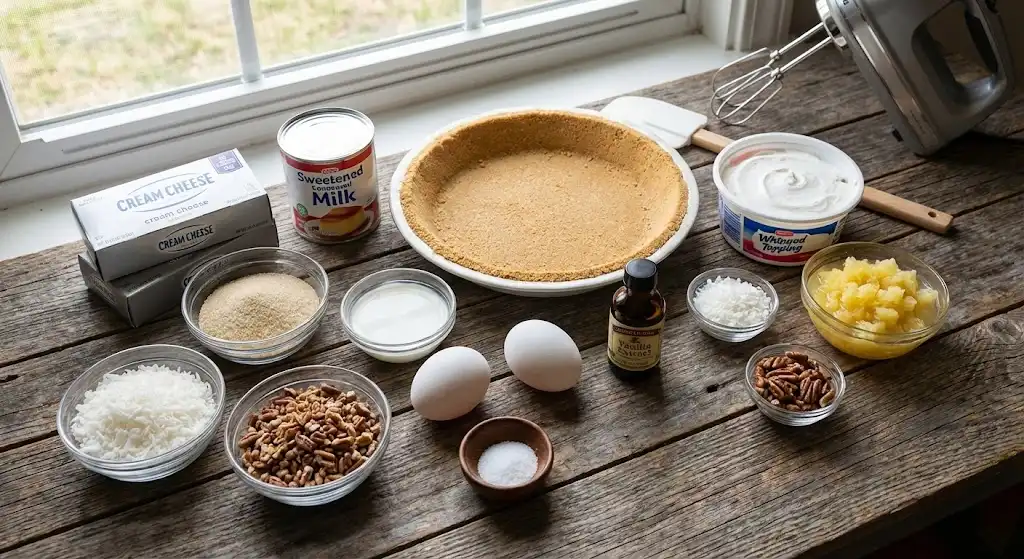
Before you dive into baking, let’s set you up with everything you need for this tropical-inspired cheesecake. I’ll break it down into two simple parts — the creamy cheesecake base and the refreshing pineapple-coconut topping. Keeping your ingredients organized not only saves time but also helps you move through the recipe with confidence and ease.
Cheesecake Base
Gather these ingredients to create the rich, velvety center and lightly crunchy texture that make this tropical cheesecake dessert so special:
- 2 (8-ounce) packages cream cheese, softened
- 1 (14-ounce) can sweetened condensed milk
- 1 cup granular no-calorie sucralose sweetener (Splenda®)
- 1 cup finely flaked coconut
- ¼ cup milk
- ¼ cup crushed pecans
- 2 eggs
- 2 teaspoons vanilla extract
- 1 pinch salt
- 1 (9-inch) prepared graham cracker crust
These ingredients come together to form a creamy, flavorful filling with hints of coconut and pecan that give the cheesecake its signature tropical twist.
Topping
This bright, refreshing layer brings the island vibes full circle:
- 1 (8-ounce) container frozen whipped topping, thawed
- 1 (15-ounce) can crushed pineapple, drained well
- 3 tablespoons finely flaked coconut
- 1 tablespoon crushed pecans
These toppings create a light, fruity finish with just the right amount of texture — the perfect contrast to the smooth, chilled cheesecake underneath.
How to Make This Hawaiian Cheesecake
Making this pineapple-coconut cheesecake is easier than you might think, and with a few simple steps, you’ll have a creamy, tropical dessert chilling in the fridge. Follow along as if we’re baking together — I’ll guide you through each stage so you feel confident from start to finish.
1. Preheat the Oven
Start by warming your oven to 350°F (175°C).
This ensures even baking and helps the cheesecake set with that smooth, velvety texture we love.
2. Prepare the Cheesecake Filling
In a large mixing bowl:
- Beat the softened cream cheese, sweetened condensed milk, and sweetener until smooth and creamy.
- A hand mixer makes this step effortless and prevents lumps.
- Add the coconut, milk, pecans, eggs, vanilla, and a pinch of salt.
- Mix again just until everything is fully combined.
- Don’t overmix — we want a silky filling without too much air.
- Mix again just until everything is fully combined.
You’ll notice the batter becomes rich and slightly textured thanks to the coconut and pecans. That’s exactly what gives this tropical cheesecake dessert its unique charm.
3. Fill the Crust
Pour the mixture into your 9-inch graham cracker crust, smoothing the top with a spatula.
The filling should sit evenly in the crust and be ready for baking.
4. Bake to Perfection
Place the cheesecake on the center rack and bake for 35–40 minutes.
You’re looking for:
- Lightly browned edges
- A center that’s set but still slightly wobbly
This balance ensures your cheesecake stays creamy rather than dense.
5. Chill Overnight
Once baked, let the cheesecake cool to room temperature.
Then refrigerate for at least 8 hours, or ideally overnight.
This step deepens the flavors and firms up the filling for that perfect slice.
6. Add the Tropical Topping
When the cheesecake is fully chilled:
- Spread the drained crushed pineapple evenly over the surface.
- Add a layer of whipped topping for a cloud-like finish.
- Sprinkle with coconut and pecans for texture and visual flair.
This final layer is what transforms the cheesecake into a true Hawaiian-style dessert — bright, refreshing, and irresistibly tropical.
Pro Tips & Delicious Variations
To help you get the most out of this Hawaiian cheesecake, here are some practical tips and creative twists. Whether you’re aiming for a richer texture, a brighter tropical flavor, or a lighter version of the dessert, these suggestions will guide you like a friend in the kitchen.
Pro Tips for the Perfect Tropical Cheesecake
- Use room-temperature cream cheese
This ensures a smooth, lump-free filling and helps everything blend evenly.
- Don’t overmix the batter
Too much air can cause cracks. Mix just until your ingredients come together.
- Drain the pineapple very well
Excess moisture can make the topping watery, so give it a gentle press through a sieve.
- Chill long enough
The overnight chill isn’t optional — it’s what sets the texture and intensifies the coconut-pineapple flavor.
- Let the cheesecake cool before chilling
Putting it in the fridge while still warm may cause condensation and a soft, wet surface.
Fun Variations to Try
- Toasted Coconut Version
Lightly toast your coconut flakes before mixing them into the batter or sprinkling on top. It adds a deeper, nutty flavor.
- Macadamia Nut Twist
Swap the pecans for chopped macadamia nuts for an extra island-inspired crunch.
- Lower-Sugar Option
Since this recipe already uses a no-calorie sweetener, you can further reduce sugar by using sugar-free condensed milk and fresh whipped cream.
- Pineapple-Mango Fusion
Add a few tablespoons of finely chopped mango to the topping for a brighter, sweeter tropical bite.
- Crust Upgrade
Try a homemade graham cracker crust mixed with coconut flakes or crushed tropical cookies for added flavor.
Serving & Pairing Suggestions
One of the best parts of this Hawaiian cheesecake is how beautifully it fits into a variety of occasions. Whether you’re hosting a summer gathering, bringing a dessert to a potluck, or simply treating yourself to something tropical, these serving ideas will help you make every slice unforgettable.
How to Serve Your Hawaiian Cheesecake
- Serve chilled: This cheesecake is at its best when cold, allowing the creamy center and pineapple topping to shine.
- Use a warm knife for clean slices: Dip the knife in hot water, wipe it dry, then slice. Repeat between cuts for perfect edges.
- Garnish for extra flair: Add a sprinkle of toasted coconut, a fresh pineapple wedge, or a mint leaf to make each slice look photo-ready.
Perfect Pairings
To elevate your dessert experience, try pairing your cheesecake with:
- Fresh tropical fruits like mango, papaya, kiwi, or additional pineapple
- A light fruit coulis such as raspberry or passion fruit for a sweet-tart contrast
- Tropical beverages, including pina coladas, iced coconut water, mango lemonade, or hibiscus tea
- Vanilla bean ice cream for an indulgent pairing that complements the cheesecake’s creamy texture
Ideal Occasions for This Dessert
This tropical cheesecake dessert fits right in at:
- Backyard barbecues
- Summer birthdays
- Brunch gatherings
- Holiday parties with a tropical theme
- Casual family nights when you want something refreshing
Tools & Equipment Guide
Before you start mixing, whipping, and baking, having the right tools on hand will make this Hawaiian cheesecake come together smoothly. You don’t need anything fancy — just a few kitchen essentials that help ensure the filling turns out creamy, the crust stays intact, and the topping spreads beautifully.
Essential Tools You’ll Need
- Mixing Bowls
At least one large bowl for the cheesecake filling and a smaller one for the topping. Glass or stainless steel both work great.
- Electric Mixer or Hand Mixer
This is key for achieving that silky, lump-free cream cheese base. You can mix by hand, but an electric mixer saves time and effort.
- Spatula
A silicone spatula helps you scrape down the sides of the bowl and spread the batter evenly into the crust.
- Measuring Cups & Spoons
Accuracy matters in cheesecake, especially when it comes to liquids and sweeteners.
- 9-inch Graham Cracker Crust
Using a ready-made crust keeps this recipe simple and convenient. If you prefer a homemade crust, a 9-inch pie dish works perfectly.
- Oven
Preheated to 350°F (175°C) for even baking and a smooth set.
- Cooling Rack
Helps the cheesecake cool evenly before it goes into the refrigerator.
- Refrigerator
A crucial part of the process — the long chill is what creates that firm, creamy texture.
Optional but Helpful Tools
- Fine Mesh Strainer
Ideal for draining crushed pineapple thoroughly to prevent a watery topping.
- Offset Spatula
Makes spreading whipped topping over the chilled cheesecake smooth and effortless.
- Sharp Knife (warmed for slicing)
Run it under hot water for clean, picture-perfect slices every time.
Troubleshooting Common Issues
Even with a simple recipe like this Hawaiian cheesecake, a few bumps can happen along the way — but don’t worry, I’ve got you covered. Here are the most common issues bakers run into, along with easy fixes to help you get a perfectly creamy, tropical cheesecake every time.
The Cheesecake Cracked on Top
Cracks are common, but here’s how to prevent and manage them:
- Cause: Overmixing the batter or baking at too high a temperature.
- Fix:
- Mix just until smooth — no need to beat vigorously.
- Make sure your oven is at 350°F (175°C) and not running hot.
- If cracks happen, simply cover with whipped topping and pineapple. No one will ever know!
- Mix just until smooth — no need to beat vigorously.
The Center Looks Too Soft or Jiggly
A little wobble is good — a lot might be concerning.
- Cause: Underbaking or checking too early.
- Fix:
- The cheesecake should be slightly jiggly in the center but set around the edges.
- Bake a few more minutes if needed, but avoid overbaking which makes it dense.
- The cheesecake should be slightly jiggly in the center but set around the edges.
The Topping Turned Watery
This is one of the most common issues with fruit toppings.
- Cause: Pineapple wasn’t drained enough.
- Fix:
- Press the crushed pineapple firmly through a fine mesh strainer.
- Use paper towels to blot any excess juice before adding it to the cheesecake.
- Press the crushed pineapple firmly through a fine mesh strainer.
Lumpy Cheesecake Filling
Smooth filling is key to a creamy texture.
- Cause: Cold cream cheese.
- Fix:
- Always soften your cream cheese to room temperature before mixing.
- Beat it well with the condensed milk and sweetener before adding the remaining ingredients.
- Always soften your cream cheese to room temperature before mixing.
The Crust Became Soggy
A firm crust is the foundation of a great cheesecake.
- Cause: Moisture from the filling or topping.
- Fix:
- Ensure pineapple is well-drained.
- Allow the cheesecake to cool fully before adding topping.
- Chill it long enough for the crust to firm back up.
- Ensure pineapple is well-drained.
FAQs
Here are some of the most common questions about making this Hawaiian cheesecake, along with clear, helpful answers to guide you through every step. Whether you’re prepping ahead, swapping ingredients, or curious about storage, this section has you covered.
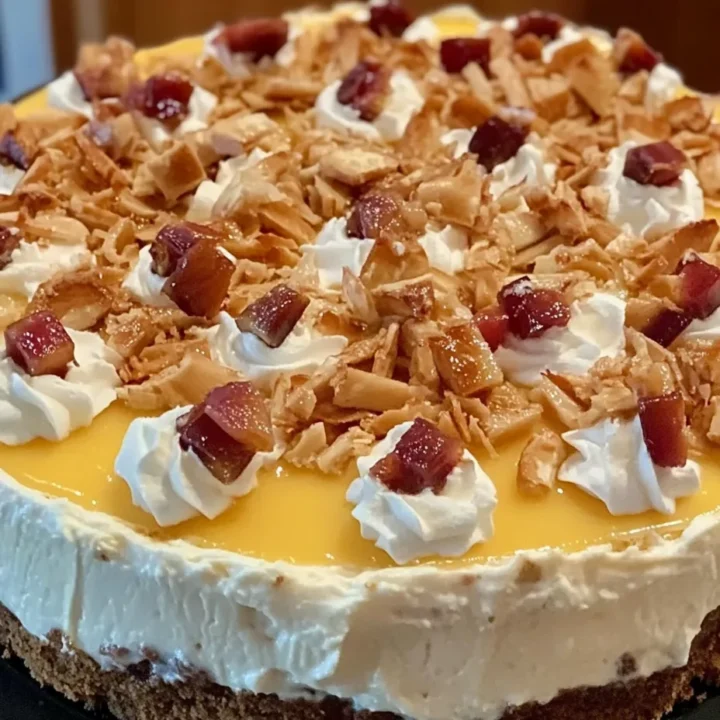
Hawaiian Cheesecake
If you’re looking for a dessert that feels like a breath of warm island air, this Hawaiian cheesecake might just become your new go-to recipe.
Ingredients
Cheesecake Base:
- 2 (8-ounce) packages cream cheese, softened
- 1 (14-ounce) can sweetened condensed milk
- 1 cup granular no-calorie sucralose sweetener (Splenda®)
- 1 cup finely flaked coconut
- ¼ cup milk
- ¼ cup crushed pecans
- 2 eggs
- 2 teaspoons vanilla extract
- 1 pinch salt
- 1 (9-inch) prepared graham cracker crust
Topping:
- 1 (8-ounce) container frozen whipped topping, thawed
- 1 (15-ounce) can crushed pineapple, drained
- 3 tablespoons finely flaked coconut
- 1 tablespoon crushed pecans
Instructions
1. Preheat
- Preheat your oven to 350°F (175°C).
2. Make the Cheesecake Filling
- Beat the cream cheese, condensed milk, and sweetener until smooth.
- Add coconut, milk, pecans, eggs, vanilla, and salt. Mix again until fully combined.
3. Fill the Crust
- Pour the batter into the 9-inch graham cracker crust and smooth the top.
4. Bake
- Bake for 35–40 minutes until the edges are lightly browned and the center is set.
5. Chill
- Let cool, then refrigerate 8 hours to overnight for best texture.
6. Top & Serve
- Spread the drained crushed pineapple evenly on top.
- Add the whipped topping.
- Sprinkle with coconut and pecans before serving.
Notes
Soften the cream cheese completely for a smooth filling with no lumps.
Drain pineapple thoroughly to avoid a watery topping.
A little jiggle is okay - don’t overbake; the center will firm up as it chills.
Make ahead! The flavor improves after resting overnight.
Customize it:
- Swap pecans for macadamia nuts
- Toast coconut for deeper flavor
- Add a splash of coconut extract for extra tropical notes
Nutrition Information:
Yield: 8 Serving Size: 1Amount Per Serving: Calories: 420Total Fat: 28gSaturated Fat: 16gSodium: 260mgCarbohydrates: 36gFiber: 2gSugar: 21gProtein: 8g