




If you’re anything like me, some nights call for a dinner that feels comforting and impressive—without leaving a sink full of dishes behind. That’s exactly where this One-Pot Crispy Chicken and Rice comes in. It’s the kind of meal that fills the kitchen with irresistible aromas while quietly doing most of the work for you. Have you ever wondered how to get perfectly crispy chicken thighs while still ending up with tender, flavorful rice underneath? This recipe solves that beautifully.
By searing the chicken first and then baking everything together, you get golden, crackly skin and rice that soaks up every drop of savory chicken stock. It’s an easy one-pot dinner that feels both rustic and refined—perfect for busy weeknights, relaxed weekends, or anytime you want dependable comfort food with minimal effort. Let’s get into why this dish deserves a permanent spot in your recipe rotation.
Key Benefits & Why You’ll Love This Recipe
This One-Pot Crispy Chicken and Rice is the kind of recipe you’ll come back to again and again—not just because it’s delicious, but because it genuinely makes cooking easier and more rewarding. It’s designed to work with you in the kitchen, not against you.
Here’s what makes it a standout:
- One pot, less cleanup
Everything comes together in a single Dutch oven, which means fewer dishes and more time to actually enjoy dinner. It’s a true one-pot chicken and rice recipe that keeps things simple without cutting corners on flavor. - Crispy chicken, no compromise
By searing the skin-on chicken thighs first, you lock in flavor and create that golden, crackly skin everyone loves. Baking the chicken on top of the rice keeps it crisp while the grains gently absorb the savory juices below. - Rice packed with flavor
Instead of plain water, the rice cooks directly in chicken stock, soaking up every bit of richness from the pan drippings, garlic, and onion. The result is tender, fluffy rice that tastes like it’s been simmering for hours. - Perfect for busy nights
This is an easy one-pot dinner that feels comforting and impressive without requiring constant attention. Once it’s in the oven, you can step away knowing everything will finish together beautifully. - Flexible and forgiving
Whether you’re cooking for family or guests, this dish adapts well. You can easily adjust seasoning, add herbs, or tweak the liquid as needed—making it ideal for cooks of all experience levels.
If you love recipes that deliver big flavor with smart technique and minimal effort, this oven-baked chicken and rice is about to become a favorite in your kitchen.
Ingredients
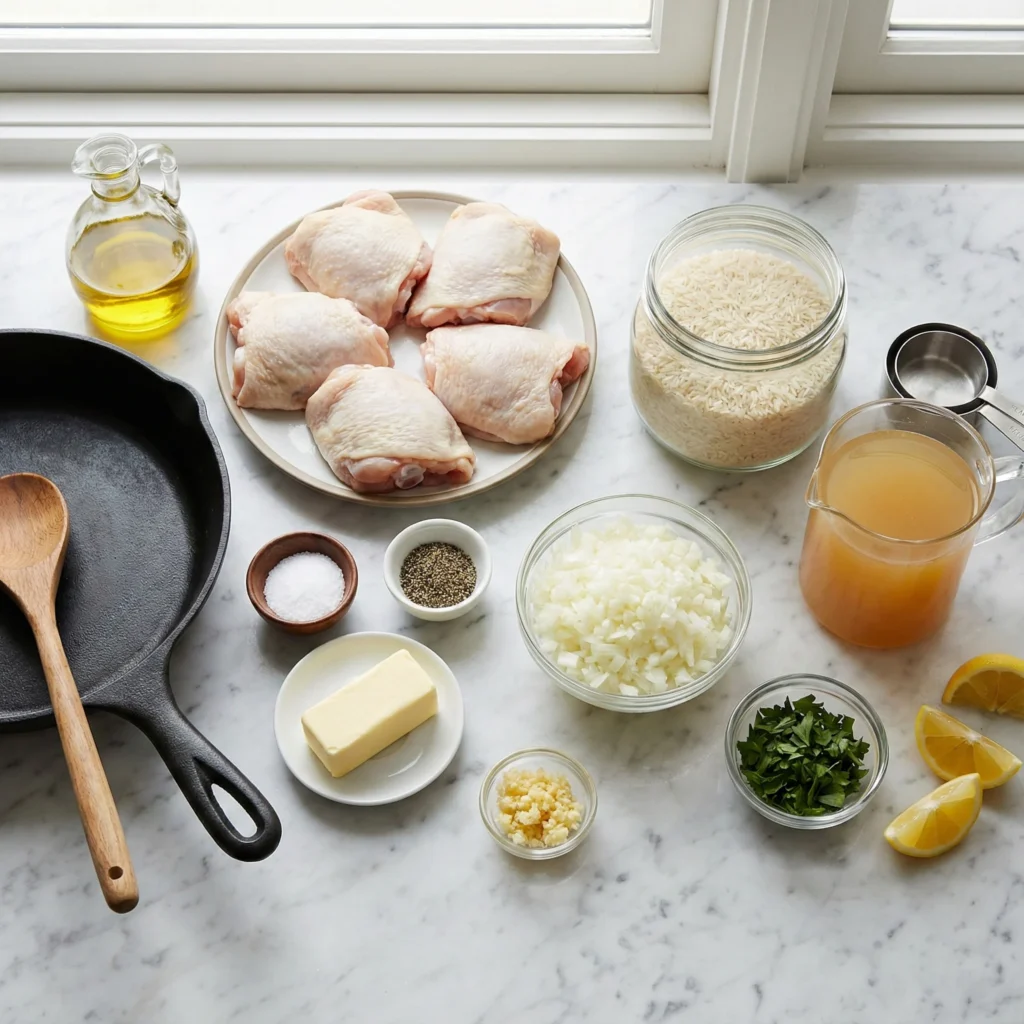
One of the best things about this One-Pot Crispy Chicken and Rice is how approachable the ingredient list is. Every component has a clear purpose, and together they build layers of flavor without feeling complicated or overwhelming. Think simple pantry staples used the right way.
Here’s what you’ll need and why it matters:
- Olive oil
Used for searing the chicken, it helps create that golden, crispy skin while adding a subtle richness to the base of the dish. - Bone-in, skin-on chicken thighs
This cut is ideal for a crispy chicken and rice recipe. The skin crisps beautifully, while the bone keeps the meat juicy and flavorful throughout baking. - Kosher salt & ground black pepper
Simple seasoning goes a long way here. Dividing the salt ensures both the chicken and the rice are well-seasoned from start to finish. - Unsalted butter
Melted into the chicken drippings, butter deepens the flavor and gives the rice a rich, comforting base. - Yellow onion
Finely chopped onion softens as it cooks, adding natural sweetness and balance to the savory chicken and rice. - Fresh garlic
Just a small amount brings warmth and aroma without overpowering the dish. - Uncooked long-grain rice
Long-grain rice holds its shape and absorbs liquid evenly, making it perfect for oven-baked chicken and rice without turning mushy. - Chicken stock
Cooking the rice in stock instead of water is key. It infuses every grain with deep, savory flavor and ties the whole dish together. - Flat-leaf parsley
Added at the end, parsley brings freshness and a pop of color that lightens the finished dish. - Lemon wedges
A squeeze of lemon just before serving brightens the flavors and cuts through the richness, making each bite feel balanced and lively.
Tip: Stick with fresh, quality ingredients here—because this is a one-pot meal, each element really shines.
Instructions
This recipe flows in a simple, intentional rhythm—each step builds flavor and sets the stage for the next. Take your time with the early steps, especially the sear, and the rest will come together effortlessly. I’ll walk you through it just like I would if we were cooking side by side.
- Preheat and prep
Start by preheating your oven to 375°F (190°C). This ensures even cooking once everything goes into the oven. - Season the chicken
Pat the chicken thighs dry, then season them evenly with most of the salt and black pepper. Dry skin and proper seasoning are key to achieving truly crispy chicken thighs. - Sear for maximum crispiness
Heat olive oil in a large Dutch oven over medium-high heat. Place the chicken skin-side down and resist the urge to move it. Let it cook undisturbed until the skin is deeply golden and releases easily from the pot. Flip and cook briefly on the other side, then transfer the chicken to a plate.
Don’t worry if the chicken isn’t fully cooked yet—it will finish in the oven. - Build flavor in the same pot
Add butter to the flavorful drippings and let it melt. Stir in the onion and cook until soft and translucent, scraping up the browned bits from the bottom. Add the garlic and cook just until fragrant. - Toast the rice
Stir the uncooked long-grain rice into the pot, coating every grain in the buttery mixture. Let it toast briefly—this step enhances flavor and helps the rice cook evenly. - Add liquid and assemble
Pour in the chicken stock along with the remaining seasoning and bring everything to a gentle boil. Nestle the seared chicken thighs on top of the rice, skin facing up so it stays crisp. - Bake until tender and golden
Transfer the uncovered pot to the oven and bake until the rice has absorbed the liquid and the chicken is cooked through. If the rice needs more moisture, add a splash of stock and continue baking. - Finish and brighten
Once done, sprinkle with fresh parsley and squeeze lemon juice over the top just before serving. This final touch lifts the flavors and brings the dish together beautifully.
The result is a perfectly balanced one-pot chicken and rice recipe—crispy on top, tender underneath, and packed with comforting, savory flavor in every bite.
Pro Tips and Variations
This One-Pot Crispy Chicken and Rice is wonderfully reliable, but a few smart tweaks can take it from great to exceptional. These tips will help you fine-tune the texture, boost flavor, and adapt the recipe to suit your taste or pantry.
Pro Tips for Best Results
- Start with dry chicken skin
Before seasoning, pat the chicken thighs completely dry. Moisture is the enemy of crispiness, and this small step makes a noticeable difference. - Don’t rush the sear
Let the chicken cook undisturbed while it’s skin-side down. When it’s ready, it will naturally release from the pot—no sticking, no tearing. - Keep the chicken above the liquid
Nestling the chicken on top of the rice allows the skin to stay crisp while the rice absorbs the flavorful juices below. - Adjust liquid gradually
If the rice looks dry before it’s fully tender, add warm chicken stock a little at a time. This keeps the texture fluffy, not soggy.
Easy Variations to Try
- Herb-forward version
Add fresh thyme, rosemary, or bay leaves to the rice before baking for a more aromatic oven-baked chicken and rice. - Spiced-up twist
Sprinkle smoked paprika, cumin, or a pinch of chili flakes into the rice for subtle heat and depth. - Lemon-garlic upgrade
Stir a bit of lemon zest into the rice and finish with extra lemon juice for a brighter, more vibrant flavor. - Veggie boost
Fold in sliced mushrooms, peas, or chopped spinach during the last 10–15 minutes of baking for added texture and color.
Serving & Pairing Suggestions
This One-Pot Crispy Chicken and Rice is satisfying enough to stand on its own, but the right pairings can turn it into a well-rounded, memorable meal. Think fresh, light, and simple sides that balance the richness of the chicken and rice without competing for attention.
Here are a few easy ways to serve it:
- Fresh green salads
A crisp salad with lemon vinaigrette or light olive oil dressing adds brightness and contrast to the savory crispy chicken and rice. - Steamed or roasted vegetables
Broccoli, green beans, asparagus, or carrots work beautifully. Their natural sweetness pairs well with the savory rice cooked in chicken stock. - Warm, crusty bread
Perfect for scooping up flavorful rice and juices left at the bottom of the pot—simple, comforting, and always appreciated. - Yogurt or garlic sauce
A spoonful of plain yogurt, herbed yogurt sauce, or mild garlic sauce on the side adds a creamy element without overpowering the dish.
How to Plate It
- Serve the rice first, then top with a chicken thigh so the crispy skin stays visible and crackly.
- Finish with an extra squeeze of lemon and a sprinkle of fresh parsley just before serving for color and freshness.
Tools and Equipment Guide
One of the reasons this One-Pot Crispy Chicken and Rice works so well is that it relies on the right tools—nothing fancy, just dependable kitchen staples that do their job properly. Using the correct equipment helps ensure even cooking, crispy chicken skin, and perfectly tender rice.
Here’s what you’ll need and why it matters:
- Dutch oven (or heavy oven-safe pot)
This is the star tool for this recipe. A Dutch oven retains heat evenly, making it ideal for searing the chicken and baking the rice without hot spots. It’s what allows this dish to truly shine as a one-pot chicken and rice recipe. - Wooden spoon
Perfect for scraping up the flavorful browned bits after searing the chicken. Those bits add depth and richness to the rice. - Measuring cups and spoons
Accurate measurements help maintain the right rice-to-liquid ratio, which is key for fluffy, fully cooked rice. - Tongs
Useful for flipping and transferring the chicken without tearing the skin, keeping it intact and crispy. - Oven mitts
A simple but essential reminder—your pot goes from stovetop to oven, so handle it carefully.
No Dutch oven?
A deep, oven-safe skillet or a heavy lidded casserole dish can work as long as it can safely move from the stovetop to the oven.
Troubleshooting Common Issues
Even reliable recipes can raise a few questions while cooking. If something doesn’t look quite right, don’t worry—this One-Pot Crispy Chicken and Rice is forgiving, and small adjustments can easily get it back on track.
Here are the most common issues and how to fix them:
- The rice isn’t fully cooked
If the rice is still firm but the liquid has been absorbed, add warm chicken stock in small amounts (about ¼ cup at a time). Cover loosely and continue baking until the rice is tender. Different rice brands absorb liquid differently, so this is completely normal. - The chicken skin isn’t crispy enough
This usually happens if the chicken wasn’t seared long enough or if the skin sat in liquid. Make sure the chicken is placed on top of the rice, skin facing up. For extra crispiness, you can briefly place the pot under the broiler at the end—just keep a close eye on it. - The rice turned mushy
Too much liquid or overbaking can cause this. Stick to long-grain rice and avoid stirring once the chicken is added. The rice needs time to steam, not agitate. - The bottom is browning too quickly
If you notice excessive browning, place the pot on a higher oven rack and check that your oven temperature is accurate. - The chicken is cooked but the rice needs more time
Tent the pot loosely with foil to protect the chicken skin while the rice finishes cooking underneath.
FAQs

One-Pot Crispy Chicken and Rice
This One-Pot Crispy Chicken and Rice is the kind of recipe you’ll come back to again and again—not just because it’s delicious, but because it genuinely makes cooking easier and more rewarding.
Ingredients
- 1 tablespoon olive oil
- 6 bone-in, skin-on chicken thighs (about 4 ounces each)
- 1½ teaspoons kosher salt, divided
- ¾ teaspoon ground black pepper, divided
- 1 tablespoon unsalted butter
- ⅔ cup finely chopped yellow onion
- 2 cloves garlic, minced
- 1½ cups uncooked long-grain rice
- 3 cups chicken stock (plus more as needed)
- 1 tablespoon finely chopped flat-leaf parsley
- 1 medium lemon, cut into wedges
Instructions
- Preheat the oven to 375°F (190°C).
- Heat olive oil in a large Dutch oven over medium-high heat.
- Season the chicken thighs with most of the salt and pepper.
- Place chicken skin-side down in the pot and sear until deeply golden and crisp. Flip briefly, then remove and set aside.
- Add butter to the pot, followed by onion. Cook until softened, scraping up any browned bits.
- Stir in garlic and cook until fragrant.
- Add rice and toast briefly, coating the grains in the flavorful fat.
- Pour in chicken stock and remaining seasoning; bring to a gentle boil.
- Nestle chicken thighs on top of the rice, skin-side up.
- Transfer to the oven and bake uncovered until the rice is tender and the chicken is fully cooked.
- If needed, add extra stock in small amounts while baking.
- Finish with parsley and fresh lemon juice before serving.
Notes
- For crispier skin: Make sure the chicken skin is fully dry before searing and avoid covering the pot while baking.
- Rice texture control: Add stock gradually if needed—too much liquid can make the rice mushy.
- Flavor boost: A bay leaf or fresh thyme added to the rice enhances aroma without overpowering the dish.
- Leftovers: Store refrigerated in an airtight container for up to 3 days. Reheat gently with a splash of stock.
Nutrition Information:
Yield: 6 Serving Size: 1Amount Per Serving: Calories: 480Total Fat: 28gSaturated Fat: 8gSodium: 720mgCarbohydrates: 32gFiber: 1gSugar: 2gProtein: 30g