




If you’re anything like me, you love an appetizer that looks impressive but doesn’t demand hours in the kitchen. These cheesy thumbprint appetizers with hot pepper jelly are exactly that kind of recipe—the type you make once and then find yourself reaching for every time guests are on the way. I still remember serving a batch at a casual get-together and watching them disappear faster than anything else on the table. That irresistible mix of melty cheddar cheese and sweet-heat pepper jelly has a way of pulling people back for “just one more.”
What makes these bite-sized appetizers so special is their balance: rich, savory cheese paired with a glossy pop of sweet and spicy flavor, all wrapped into a simple, oven-baked snack. They’re easy enough for a last-minute party, elegant enough for holiday entertaining, and endlessly versatile for game days, potlucks, or cozy nights in. If you’re looking for a crowd-pleasing appetizer that delivers big flavor with minimal effort, you’re about to find a new favorite.
Key Benefits & Why You’ll Love This Recipe
There’s something truly satisfying about a recipe that delivers big flavor with minimal effort, and these cheesy thumbprint appetizers do exactly that. From the first bite, you get a rich, savory base with a pop of sweet and spicy heat that feels indulgent yet perfectly balanced. It’s the kind of appetizer that quietly steals the spotlight—no fuss, no complicated steps, just dependable deliciousness.
Here’s why this recipe earns a permanent place in your entertaining rotation:
- Simple, pantry-friendly ingredients
You only need a handful of basics to make these bite-sized appetizers, which means no last-minute grocery stress and no hard-to-find items. - Perfect for entertaining, big or small
Whether you’re hosting a holiday party, planning game-day snacks, or bringing something to a potluck, these cheesy appetizers fit right in and always disappear fast. - Make-ahead friendly
The dough can be prepared in advance, giving you more flexibility when timing matters—especially helpful when juggling multiple dishes. - A flavor combo everyone loves
The contrast of sharp cheese and glossy hot pepper jelly creates that crave-worthy sweet-and-spicy appetizer profile people instantly recognize and enjoy. - Beginner-friendly, yet impressive
Even if you’re new to baking savory snacks, this recipe guides you step by step, producing a polished, party-ready result that looks far more complex than it is.
If you’re looking for an easy appetizer recipe that feels special without being complicated, this one checks every box. It’s reliable, adaptable, and designed to make you feel confident in the kitchen—exactly what a great recipe should do.
Ingredients
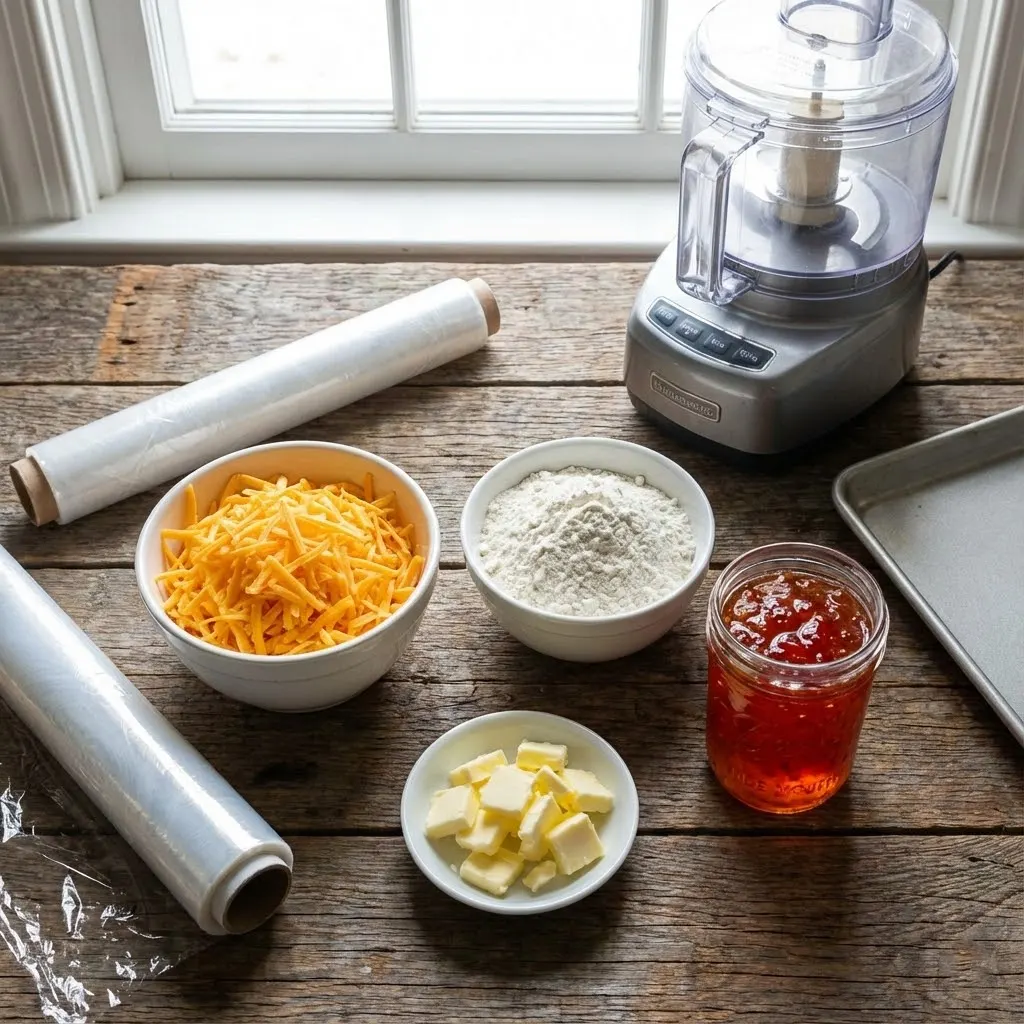
One of the best things about these cheesy thumbprint appetizers with hot pepper jelly is how short and straightforward the ingredient list is. Each component has a clear purpose, working together to create that irresistible balance of savory richness and sweet heat.
Here’s what you’ll need:
- 2 cups shredded Cheddar cheese
Sharp Cheddar works best here, adding bold flavor and helping the dough hold together beautifully as it bakes. - 1 cup all-purpose flour
This gives structure to the dough while keeping the texture tender rather than bready. - 6 tablespoons chilled butter, chopped
Cold butter is key. It creates a delicate, melt-in-your-mouth texture once baked. - ½ cup hot pepper jelly
The star finishing touch. Its glossy sweetness and gentle heat contrast perfectly with the savory cheese base.
Ingredient Tip:
For the best results, shred your own cheese instead of using pre-shredded. Freshly shredded cheese melts more smoothly and blends better into the dough, giving you a more cohesive and flavorful appetizer.
Instructions
This recipe comes together quickly, and once you see how simple the process is, you’ll feel confident making these cheesy thumbprint appetizers for any occasion. Think of it as a relaxed, step-by-step rhythm—nothing rushed, nothing complicated.
- Prepare your ingredients
Start by gathering everything you need. Having all your ingredients ready makes the process smooth and stress-free. - Make the cheese dough
In a food processor, combine the shredded Cheddar cheese, flour, and chilled butter. Pulse until the mixture resembles coarse crumbs and naturally comes together into a soft dough. You’re looking for a texture that holds when pressed, not sticky or dry. - Chill the dough
Wrap the dough tightly and refrigerate for about 30 minutes. This step is important—it firms up the butter and helps the appetizers keep their shape while baking. - Shape the dough
Preheat your oven to 400°F (200°C). Roll the chilled dough into 1½-inch balls and place them about 1 inch apart on a baking sheet. Even spacing allows for gentle spreading without merging. - Create the thumbprints
Bake for 5 minutes, then carefully remove the tray. Press your thumb into the center of each ball to create a small indentation. Don’t press all the way through—just enough to hold the filling. - Add the pepper jelly
Spoon about 1 teaspoon of hot pepper jelly into each indentation. The contrast of color alone is enough to make these appetizers stand out. - Finish baking
Return the baking sheet to the oven and bake for another 5 minutes, or until the edges are lightly golden and the centers are set.
Helpful Tip:
Let the appetizers rest for a few minutes before serving. This allows the cheese base to firm slightly, making them easier to handle while still warm and delicious.
Pro Tips and Variations
Once you’ve mastered the basic method, these cheesy thumbprint appetizers with hot pepper jelly become incredibly flexible. A few small tweaks can elevate the flavor, adjust the heat level, or help you tailor the recipe to different occasions.
Pro Tips for Best Results
- Keep the dough cold
If the dough starts to soften while shaping, pop it back into the refrigerator for a few minutes. Cold dough holds its shape better and prevents excessive spreading. - Use consistent sizing
Rolling the dough into evenly sized balls ensures uniform baking, so every appetizer comes out perfectly golden. - Don’t overfill the centers
A teaspoon of pepper jelly is just right. Too much can bubble over and burn at the edges during baking. - Line your baking sheet
Parchment paper or a silicone mat makes cleanup easier and helps prevent sticking.
Easy Variations to Try
- Switch up the cheese
Try sharp white Cheddar, smoked Cheddar, or a blend of Cheddar and Monterey Jack for a slightly different flavor profile. - Adjust the heat level
Mild pepper jelly keeps things family-friendly, while hot or extra-hot versions turn these into bold sweet-and-spicy appetizers. - Add a savory twist
A pinch of garlic powder, smoked paprika, or finely chopped fresh herbs mixed into the dough adds depth without overpowering the cheese. - Make them festive
Use red or green pepper jelly for holiday gatherings to add a seasonal pop of color.
These small adjustments let you personalize the recipe while keeping the same crowd-pleasing, bite-sized appetizer everyone loves.
Serving & Pairing Suggestions
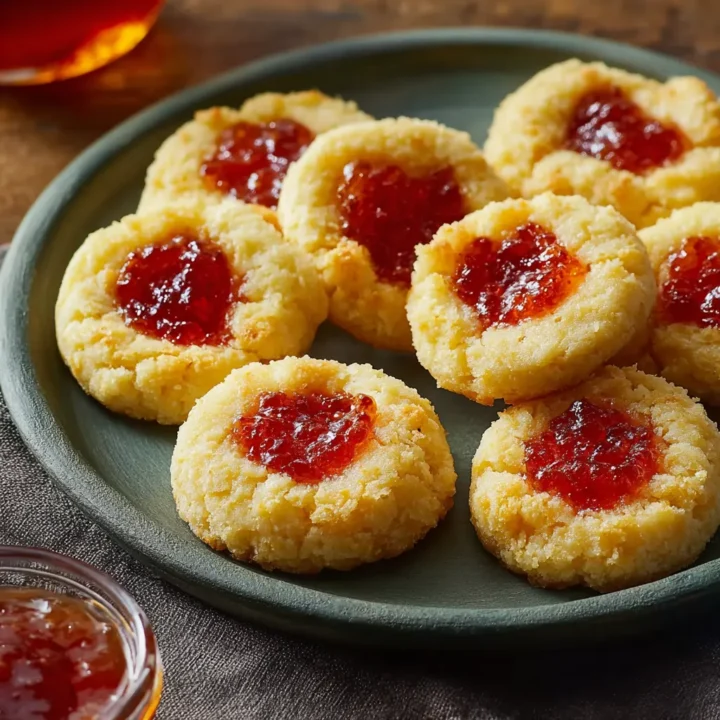
These cheesy thumbprint appetizers are at their best when served warm, just after the cheese base has set and the pepper jelly is still glossy and inviting. Their bite-sized shape makes them easy to grab, which is exactly why they’re such a hit at gatherings.
How to Serve Them
- Arrange them on a simple platter so the vibrant pepper jelly centers stand out.
- Serve warm or at room temperature—both work beautifully for parties and buffets.
- Add small cocktail napkins or appetizer picks to keep things neat and guest-friendly.
Perfect Pairings
- Drinks:
These pair especially well with crisp white wine, sparkling water, or light cocktails that balance the sweet-and-spicy flavor. - Appetizer spreads:
Serve alongside fresh vegetables, crackers, or mild dips to create contrast and variety on the table. - Occasion ideas:
They’re ideal for holiday parties, game-day snacks, potlucks, or even as a pre-dinner bite when you want something quick but memorable.
Because they’re rich without being heavy, these sweet-and-spicy cheese appetizers fit seamlessly into almost any menu, adding just the right touch of comfort and flair.
Tools and Equipment Guide
You don’t need a fully stocked kitchen to make these cheesy thumbprint appetizers with hot pepper jelly, which is part of their charm. A few basic tools are all it takes to move smoothly from prep to perfectly baked bites.
Essential Tools
- Food processor
This is the easiest way to blend the cheese, flour, and butter evenly. It creates the right coarse texture quickly without overworking the dough. - Plastic wrap
Used to wrap and chill the dough, helping it firm up and hold its shape during baking. - Baking sheet
A standard rimmed baking sheet works perfectly for these bite-sized appetizers. - Parchment paper or silicone baking mat
Not required, but highly recommended to prevent sticking and make cleanup effortless.
Helpful Extras
- Measuring cups and spoons
Accurate measurements keep the dough balanced and consistent every time. - Small spoon or measuring teaspoon
Makes filling the thumbprint centers with pepper jelly neat and controlled. - Cooling rack (optional)
Useful if you’re making multiple batches and want to cool them evenly before serving.
Having these tools ready before you start keeps the process relaxed and enjoyable, letting you focus on shaping and baking rather than scrambling for equipment.
Troubleshooting Common Issues
Even with a simple recipe like these cheesy thumbprint appetizers, small issues can pop up. The good news is that most problems are easy to fix once you know what to look for.
The dough is too crumbly
- This usually means the mixture needs a bit more blending. Pulse the dough a few more times in the food processor until it naturally comes together when pressed.
The dough is too soft or sticky
- Warm butter is often the culprit. Chill the dough for an extra 10–15 minutes before shaping to make it easier to handle.
The appetizers spread too much while baking
- Make sure the dough is properly chilled and avoid overcrowding the baking sheet. Cold dough and proper spacing help maintain their shape.
The thumbprints close up in the oven
- Press the indentations a little deeper after the first bake if needed, being careful not to break through the bottom.
The pepper jelly overflows or burns
- Use a measured teaspoon for filling. Too much jelly can bubble over and caramelize too quickly at high heat.
By keeping these tips in mind, you’ll get consistently crisp edges, tender centers, and perfectly filled sweet-and-spicy cheese appetizers every time.
FAQs
Cheesy Thumbprint Appetizers with Hot Pepper Jelly
There’s something truly satisfying about a recipe that delivers big flavor with minimal effort, and these cheesy thumbprint appetizers do exactly that.
Ingredients
- 2 cups shredded Cheddar cheese
- 1 cup all-purpose flour
- 6 tablespoons chilled butter, chopped
- ½ cup hot pepper jelly
Instructions
- Gather all ingredients and set them out for easy access.
- In a food processor, blend the Cheddar cheese, flour, and chilled butter until the mixture resembles coarse crumbs and forms a soft dough.
- Wrap the dough tightly and refrigerate for 30 minutes to firm up.
- Preheat the oven to 400°F (200°C).
- Roll the chilled dough into 1½-inch balls and place them 1 inch apart on a lined baking sheet.
- Bake for 5 minutes, then remove from the oven and gently press a thumbprint into the center of each ball.
- Fill each indentation with about 1 teaspoon of hot pepper jelly.
- Return to the oven and bake for an additional 5 minutes, or until the edges are lightly golden.
- Cool slightly before serving.
Notes
- Shred your own cheese for smoother blending and better texture.
- Keep the dough cold to prevent spreading during baking.
- Don’t overfill the centers—pepper jelly expands slightly as it heats.
- For variety, try mild or extra-hot pepper jelly depending on your heat preference.
- These appetizers can be shaped ahead of time and baked just before serving for maximum freshness.
Nutrition Information:
Yield: 24 Serving Size: 1Amount Per Serving: Calories: 110Total Fat: 8gSaturated Fat: 5gCholesterol: 25mgSodium: 170mgCarbohydrates: 6gFiber: 0gSugar: 3gProtein: 4g