

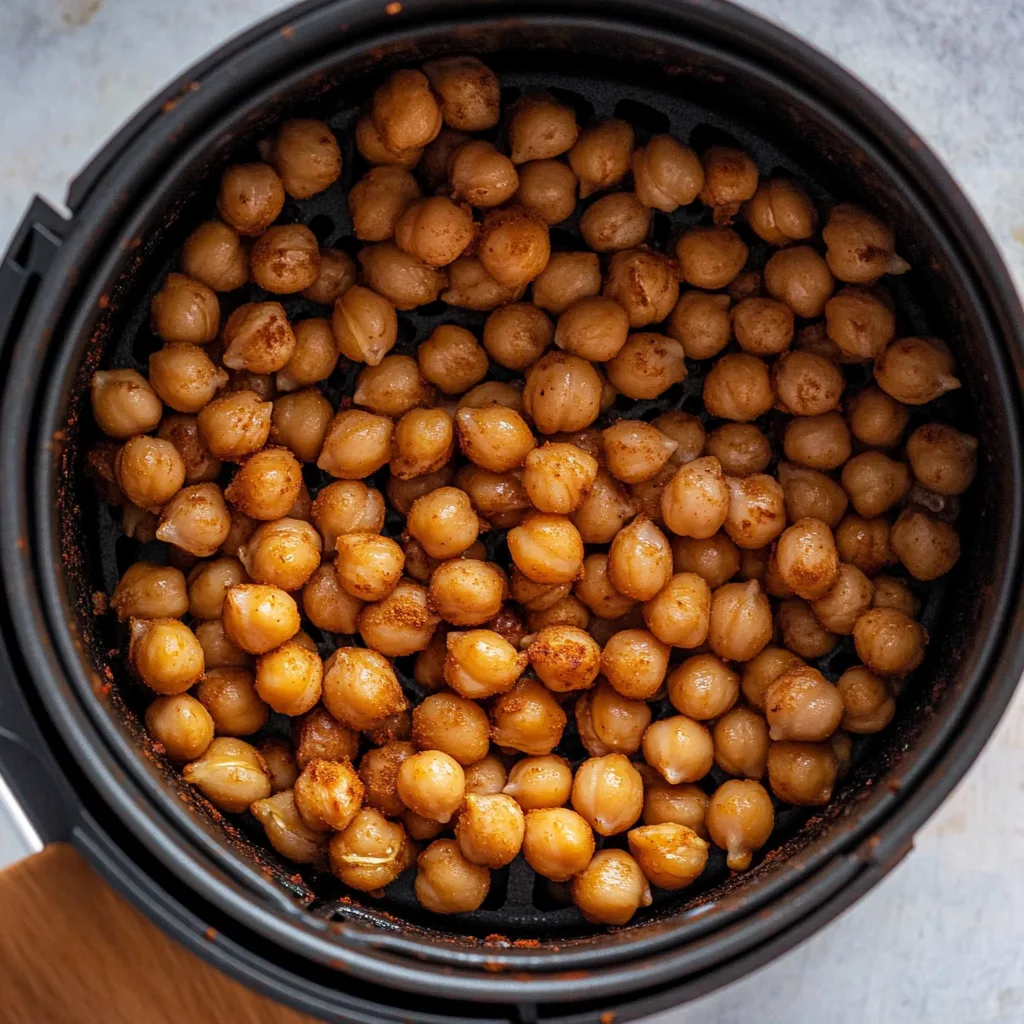



If you’re anything like me, you love a snack that’s crispy, flavorful, and ready in minutes—and that’s exactly why this Air Fryer Chickpeas Recipe has become one of my go-to treats. There’s something irresistible about the way chickpeas transform in the air fryer: golden, crunchy, and perfectly seasoned, without the excess oil you’d get from traditional roasting.
Have you ever opened a bag of store-bought roasted chickpeas and wished they tasted fresher, spicier, or just… better? That’s the beauty of making them at home. With a handful of pantry staples—think chili-lime seasoning, garlic, a touch of cayenne, and a drizzle of avocado oil—you can create a protein-packed, gluten-free snack that’s completely customizable.
What I love most is their versatility. These crispy chickpeas are perfect for snacking, tossing onto salads, sprinkling over bowls, or packing into meal-prep containers for the week. And because they cook in just 12 to 15 minutes, they’re ideal for busy days when you want something healthy and satisfying without the fuss.
Let’s dive in and turn a simple can of chickpeas into your new favorite crunchy, high-protein air fryer snack.
This is Why You Will Love This Recipe
If you’re looking for a snack that’s crispy, flavorful, and genuinely satisfying, this Air Fryer Chickpeas Recipe checks every box. It’s the kind of recipe you’ll find yourself making again and again—not just because it’s quick, but because it delivers consistent crunch with minimal effort. Think of it as the perfect blend of convenience and nutrition: high in plant-based protein, naturally gluten-free, and packed with bold chili-lime flavor.
Here’s why you’re going to love it:
✔ They’re incredibly easy to make
All you need is a can of chickpeas, a splash of avocado oil, and a few pantry spices. No soaking, no long roasting times—just dry, season, and pop them into the air fryer.
✔ They come out perfectly crispy every time
The air fryer circulates heat in a way that gives these chickpeas that addictive, roasted crunch in just minutes. No sogginess. No uneven browning.
✔ They’re a budget-friendly, high-protein snack
Chickpeas are inexpensive, filling, and packed with fiber and protein. Whether you’re snacking between meals or topping a salad, they give you that savory, crunchy bite without guilt.
✔ They’re endlessly customizable
Once you try this chili-lime version, you can switch it up with other seasoning blends—smoky paprika, ranch, garlic-parmesan, or even sweet cinnamon for something different.
✔ They’re perfect for meal prep
Make a batch, let them cool, and store them for quick snacking throughout the week. They stay crisp and flavorful when stored properly.
With just a few basic ingredients and the magic of the air fryer, you’ll have a go-to crunchy snack that’s healthier, faster, and far more flavorful than anything store-bought. Let’s keep going—you’re about to make your new favorite crispy air fryer treat.
Ingredients
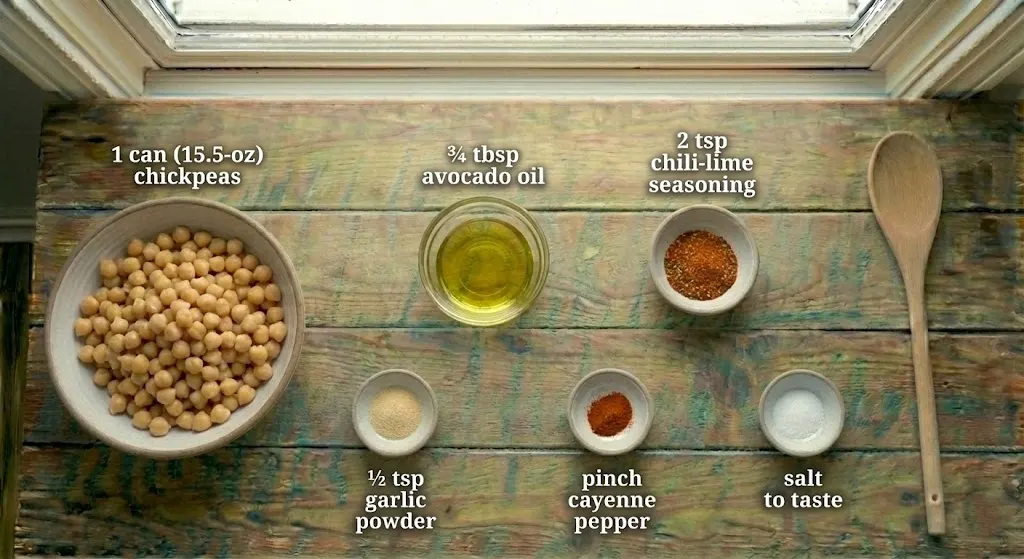
Before you start, gather these simple pantry staples. Each one plays a role in building that bold, crispy, chili-lime flavor you’ll love:
- 1 (15.5-ounce) can chickpeas, drained and rinsed
- ¾ tablespoon avocado oil — helps the seasoning stick and promotes crispiness
- 2 teaspoons chili-lime seasoning (like Tajín®) — adds a bright, zesty kick
- ¼ teaspoon garlic powder — for warm, savory depth
- A pinch of cayenne pepper, or to taste — optional heat boost
- Salt, to taste — added at the end to keep the chickpeas crisp
Instructions
Making these crispy air fryer chickpeas is simple, quick, and perfect for beginners. Follow these steps, and you’ll have a batch of crunchy, flavorful chickpeas in minutes:
- Preheat the air fryer
Set your air fryer to 400°F (200°C). While it heats, lightly spray the basket with cooking spray or place a parchment liner inside to prevent sticking. - Dry the chickpeas thoroughly
Spread the drained and rinsed chickpeas on a plate lined with paper towels.
Pat them dry with another paper towel on top — removing moisture is the key to achieving maximum crispiness. - Season the chickpeas
Transfer the dried chickpeas to a medium bowl.
Drizzle with avocado oil, then add the chili-lime seasoning, garlic powder, and cayenne.
Toss well to ensure each chickpea is evenly coated. - Air fry until crispy
Pour the seasoned chickpeas into the air fryer basket in an even layer.
Cook for 12 to 15 minutes, shaking or stirring halfway through.
Keep an eye on them — cooking times may vary based on your air fryer model and basket size. - Finish and cool
Sprinkle with salt as soon as they come out.
Let them cool slightly; they’ll continue to crisp up as they rest.
Pro Tips and Variations
Getting the perfect batch of crispy air fryer chickpeas is all about technique and flavor balance. Here are some helpful tips and tasty variations to elevate your results every time:
Pro Tips for Maximum Crispiness
- Dry them completely
Moisture is the enemy of crunch. Take an extra minute to pat them dry thoroughly — it makes a huge difference. - Remove loose skins (optional)
You don’t have to, but gently rubbing the chickpeas with a paper towel to loosen excess skins can help them crisp more evenly. - Don’t overcrowd the basket
Spread them out in a single layer. Overcrowding traps steam and leads to softer chickpeas. - Season after cooking with salt
Salt pulls moisture from food, so adding it at the end helps keep the chickpeas crunchy. - Let them cool before storing
Warm chickpeas trapped in a container will lose their crunch. Give them a few minutes to cool completely.
Flavor Variations to Try
- Smoky Paprika
Paprika + garlic powder + a pinch of cumin for warm, smoky notes. - Ranch-Style
Use ranch seasoning or a blend of dill, onion powder, garlic, and parsley. - Garlic-Parmesan
Toss cooked chickpeas with grated Parmesan and extra garlic powder. - Sweet Cinnamon Crunch
A touch of cinnamon and sugar for a lightly sweet, crispy snack. - Mediterranean Herb
Oregano, thyme, and lemon zest for a bright, herbaceous flavor.
Serving & Pairing Suggestions
These crispy air fryer chickpeas are incredibly versatile, making them perfect for snacking, topping, and adding crunch to all kinds of dishes. Here are some fun and practical ways to enjoy them:
As a Snack on Their Own
Enjoy them warm, straight out of the air fryer, for a protein-packed, crunchy treat. They’re great for midday cravings, movie nights, or healthy snacking on the go.
Add Them to Salads
Use them as a healthier alternative to croutons. They add texture, flavor, and extra fiber to any salad — especially bowls with greens, grains, or roasted veggies.
Sprinkle Over Bowls & Soups
These chickpeas bring a delicious crunch to:
- Grain bowls
- Buddha bowls
- Creamy soups
- Roasted veggie platters
Their chili-lime seasoning adds brightness to warm or savory dishes.
Use Them as a Meal Prep Booster
Pack them into containers with sliced veggies, hummus, or wraps. They stay crisp and flavorful when stored properly, making them perfect for weekly meal prep.
Add Them to Wraps & Tacos
Tuck them into tacos or wraps for an unexpected kick and a satisfying crispy bite.
Tools and Equipment Guide
You don’t need much to make perfectly crispy air fryer chickpeas — just a few simple tools that help streamline the process and ensure consistent results. Here’s what you’ll want to have on hand:
Air Fryer
The star of the recipe. Any model works — basket-style air fryers tend to crisp chickpeas more evenly, but oven-style versions do the job too. Just be aware that cooking times may vary slightly.
Air Fryer Basket Liner (Optional)
Parchment liners or reusable silicone liners help prevent sticking and make cleanup faster. If you don’t have one, a quick spray of cooking oil is enough.
Mixing Bowl
Use a medium bowl to evenly coat the chickpeas with oil and seasoning before air frying.
Paper Towels
These are essential for drying the chickpeas thoroughly. The drier they are, the crispier they’ll get.
Measuring Spoons
To ensure you get the perfect balance of chili-lime seasoning, garlic powder, and cayenne.
Storage Container
If you’re meal prepping, store the cooled chickpeas in an airtight container to maintain freshness and crunch.
Troubleshooting Common Issues
Even though this recipe is simple, a few small missteps can keep your chickpeas from turning perfectly crispy. Here’s how to fix the most common problems so your batch comes out crunchy every time:
Chickpeas Aren’t Crispy Enough
This is the most common issue — and the easiest to fix.
- They weren’t dried properly.
Pat them thoroughly with paper towels before seasoning. Excess moisture leads to steam, not crunch. - The basket was overcrowded.
Spread them in a single layer. If needed, cook in two batches. - They need more time.
Air fryers vary. Add 2–3 extra minutes until they reach your desired crispiness.
Chickpeas Are Burning
If they’re getting too dark before they’re fully crisp:
- Lower the temperature to 375°F (190°C) and increase the cooking time slightly.
- Shake the basket more often to prevent hot spots.
- Check for smaller chickpeas — they cook faster and may need to be removed early.
They Taste Bland
If the flavor isn’t popping:
- Increase the chili-lime seasoning or add a squeeze of lime juice after cooking for brightness.
- Add salt at the end — it sticks better and boosts all the other flavors.
- Try a second seasoning boost: sprinkle a bit more Tajín or garlic powder right after air frying.
Seasoning Isn’t Sticking
If the spices slide off:
- Make sure the chickpeas are dry before adding oil.
- Toss them thoroughly in the mixing bowl to ensure even coating.
- Add just enough oil — too little won’t hold seasoning, too much can make them soft.
Chickpeas Turn Soft After Storing
This happens when moisture gets trapped in the container.
- Let them cool completely before storing.
- Store in a breathable container or leave the lid slightly ajar.
- Re-crisp them by air frying for 3–4 minutes.
FAQs
Here are answers to some of the most common questions about making crispy air fryer chickpeas. Use these tips to perfect your batch every time:
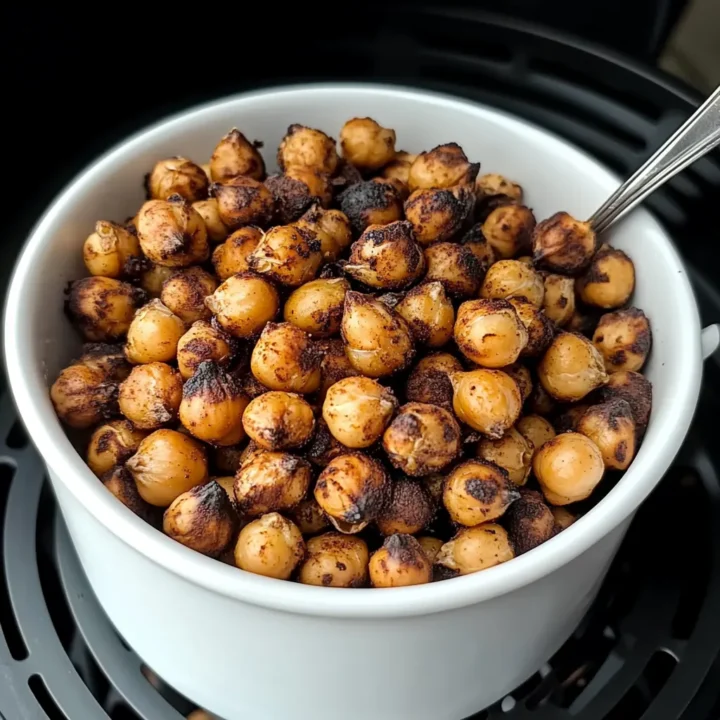
Air Fryer Chickpeas Recipe
If you’re looking for a snack that’s crispy, flavorful, and genuinely satisfying, this Air Fryer Chickpeas Recipe checks every box.
Ingredients
- 1 (15.5-ounce) can chickpeas, drained and rinsed
- ¾ tablespoon avocado oil
- 2 teaspoons chili-lime seasoning (like Tajín®)
- ¼ teaspoon garlic powder
- A pinch of cayenne pepper, or to taste
- Salt, to taste
Instructions
- Preheat your air fryer to 400°F (200°C). Lightly spray the basket with cooking spray or line it with parchment.
- Dry the chickpeas thoroughly using paper towels—this step is key for crispiness.
- Season: Add chickpeas to a bowl, drizzle with avocado oil, and toss with chili-lime seasoning, garlic powder, and cayenne.
- Air fry: Spread them in a single layer in the basket. Cook for 12–15 minutes, shaking halfway through, until golden and crispy.
- Finish: Sprinkle with salt while still warm. Let cool slightly—they’ll crisp up even more as they cool.
Notes
- Dry thoroughly: Moisture is the #1 reason chickpeas turn out soft.
- Add salt after cooking: Helps keep them crunchy and prevents moisture loss.
- Adjust cooking time: Smaller air fryers may cook faster; keep an eye on them during the last 3 minutes.
- Make them your own: Swap seasonings—smoked paprika, BBQ, ranch, curry, lemon pepper, or cinnamon sugar.
- Storage tip: Allow to cool fully before storing. Keep in a breathable container to maintain crunch.
Nutrition Information:
Yield: 4 Serving Size: 1Amount Per Serving: Calories: 130Total Fat: 3.5gSaturated Fat: 0.3gCarbohydrates: 20gFiber: 6gSugar: 1gProtein: 5g