




There’s something truly special about cracking through a crisp caramelized top and discovering a silky, vanilla-kissed custard underneath—and that’s exactly the magic this Simple Crème Brûlée Dessert delivers. If you’ve ever thought this classic French dessert was too fancy or complicated to make at home, this recipe is here to change your mind. With just a handful of everyday ingredients and a straightforward method, you can create an easy crème brûlée that feels restaurant-worthy yet completely approachable.
I love this recipe because it proves that elegance doesn’t have to be difficult. Using a smooth vanilla custard base, a gentle water bath, and a quick caramelized sugar topping, you’ll end up with a dessert that’s rich, creamy, and perfectly balanced. Whether you’re planning a special dinner or simply treating yourself, this homemade crème brûlée is a timeless dessert that always impresses—without the stress.
Key Benefits & Why You’ll Love This Recipe
This Simple Crème Brûlée Dessert is the kind of recipe that instantly builds confidence in the kitchen. It delivers everything you love about a classic French dessert—creamy texture, rich vanilla flavor, and that signature crackly sugar top—without unnecessary steps or complicated techniques. If you’re looking for an easy crème brûlée that feels impressive but stays stress-free, this one truly delivers.
Here’s why it deserves a spot in your dessert rotation:
- Minimal ingredients, maximum payoff
With just a few pantry staples, you create a smooth, luxurious custard that tastes far more indulgent than the effort required. - Beginner-friendly yet elegant
The method is straightforward and forgiving, making this a perfect introduction to custard desserts while still feeling refined enough for guests. - Creamy, perfectly balanced texture
The gentle baking process produces a silky vanilla custard base with no heaviness—just pure, melt-in-your-mouth comfort. - Make-ahead convenience
This homemade crème brûlée can be prepared in advance, chilled, and finished with a caramelized topping right before serving—ideal for entertaining. - Versatile for any occasion
Whether it’s a cozy night in or a special dinner, this dessert adapts beautifully without ever feeling overdone.
What I love most is how this recipe turns a traditionally intimidating dessert into something approachable and reliable. You don’t need professional training—just a little patience and the joy of creating something special from simple steps.
Ingredients
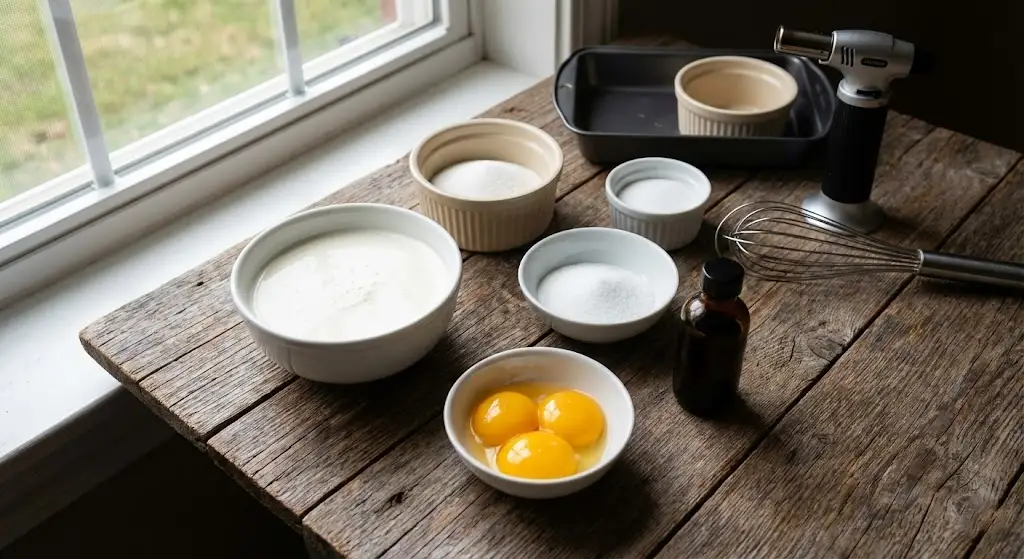
One of the best things about this Simple Crème Brûlée Dessert is how little you need to create something so elegant. Each ingredient plays a clear role, coming together to form a smooth, creamy custard with a perfectly crisp sugar topping. Stick to quality basics, and the results will speak for themselves.
Here’s what you’ll need:
- Heavy cream (1 cup)
This is the foundation of the dessert, giving the custard its rich, silky texture. Full-fat cream is essential for the classic mouthfeel of a traditional crème brûlée. - White sugar (5 tablespoons, divided)
Three tablespoons gently sweeten the custard, while the remaining sugar creates that signature caramelized topping with a satisfying crack. - Large egg yolks (3)
Egg yolks are key to achieving a smooth, creamy custard. They provide structure without making the dessert dense. - Vanilla extract (¼ teaspoon)
A small amount enhances the flavor of the custard, adding warmth and depth without overpowering the cream.
💡 Ingredient tip: Because this recipe relies on simple components, freshness matters. High-quality cream and real vanilla make a noticeable difference in the final flavor of your homemade crème brûlée.
Instructions
Making this Simple Crème Brûlée Dessert is all about gentle steps and a little patience. Think of it as guiding the ingredients into becoming something special rather than rushing the process. Follow these steps, and you’ll be rewarded with a smooth custard and a perfectly crisp topping.
- Prepare the oven and dishes
Preheat your oven to 350°F (175°C). Place two ramekins inside a deep roasting pan and set them aside. This setup is key for even baking later. - Warm the cream mixture
In a microwave-safe bowl, whisk together the heavy cream and 3 tablespoons of sugar until combined. Heat the mixture for 1–2 minutes, just until warm—not boiling—then whisk again to fully dissolve the sugar. - Create the custard base
Slowly whisk in the egg yolks and vanilla extract until the mixture is smooth and cohesive. Take your time here to avoid adding air bubbles, which helps keep the custard silky. - Fill the ramekins and add the water bath
Carefully pour the custard mixture into the prepared ramekins. Transfer the pan to the oven rack, then pour hot water into the roasting pan until it reaches halfway up the sides of the ramekins. This water bath ensures a gentle, even bake. - Bake until just set
Bake for about 50 minutes, until the custard is set around the edges but still slightly jiggly in the center. This soft wobble means the texture will be perfectly creamy once chilled. - Chill thoroughly
Remove the ramekins from the water bath and let them cool briefly. Refrigerate for at least 2 hours, or until completely cold and firm. - Caramelize the sugar topping
Sprinkle 1 tablespoon of sugar evenly over each custard. Use a kitchen torch to melt and caramelize the sugar until golden and bubbly. Let the topping cool for a minute to harden before serving.
Pro Tips and Variations
Once you’ve mastered this Simple Crème Brûlée Dessert, a few small tweaks can take it from great to unforgettable. These tips and variations will help you fine-tune the texture, flavor, and finish while keeping the process approachable and stress-free.
Pro Tips for Best Results
- Whisk gently, not vigorously
Over-whisking introduces air, which can lead to bubbles or a grainy surface. A smooth, calm whisk keeps the custard silky. - Don’t skip the water bath
The bain-marie protects the custard from direct heat, ensuring even cooking and preventing curdling. - Watch the bake, not the clock
Ovens vary. Look for set edges with a soft jiggle in the center—this is the secret to a creamy vanilla custard base. - Torch with a light hand
Keep the flame moving when caramelizing the sugar. This creates an even, crackly topping without burning.
Easy Flavor Variations
- Citrus twist
Add a small strip of orange or lemon zest to the warm cream, then strain before adding the egg yolks for a subtle brightness. - Espresso-infused custard
Stir in a teaspoon of instant espresso powder to create a coffee-forward version that pairs beautifully with dessert wine. - Vanilla bean upgrade
Swap the extract for real vanilla bean seeds if you want a deeper, more aromatic flavor in your homemade crème brûlée.
These small adjustments let you personalize the dessert while keeping the heart of this easy crème brûlée recipe intact—simple, elegant, and always satisfying.
Serving & Pairing Suggestions
This Simple Crème Brûlée Dessert truly shines when served with intention. The contrast between the chilled, creamy custard and the crisp caramelized topping makes every bite feel special, so a little thoughtful presentation goes a long way.
How to Serve
- Serve the crème brûlée well chilled with the sugar topping freshly torched for the best texture contrast.
- Present it directly in the ramekin for a classic, elegant look.
- Add a light garnish—such as fresh berries or a mint leaf—to enhance visual appeal without overpowering the dessert.
Perfect Pairings
- Coffee or espresso
The slight bitterness beautifully balances the sweetness of the custard and caramelized sugar. - Light dessert wines
A chilled Moscato or late-harvest white wine complements the creamy vanilla custard base. - Fresh fruit
Berries or sliced citrus offer a refreshing contrast to the richness of this homemade crème brûlée.
Whether served at the end of a dinner party or enjoyed as a quiet indulgence, this easy crème brûlée feels luxurious while remaining effortlessly approachable—exactly what a great dessert should be.
Tools and Equipment Guide
Having the right tools on hand makes preparing this Simple Crème Brûlée Dessert smoother and more enjoyable. The good news? You don’t need a professional kitchen—just a few reliable basics to achieve that classic creamy custard and crisp sugar topping.
Essential Tools
- Ramekins
These small ceramic dishes are ideal for baking individual portions evenly and creating that signature presentation. - Roasting pan
Used to hold the ramekins during baking, it allows you to add a water bath that ensures gentle, even heat. - Mixing bowl & whisk
A simple whisk is all you need to combine the ingredients smoothly without introducing too much air into the custard. - Microwave-safe bowl
Helps warm the cream and sugar gently, making it easier to dissolve the sugar before adding the egg yolks.
For the Finishing Touch
- Kitchen torch
This is the easiest way to caramelize the sugar topping evenly, creating that crisp crack you expect from an easy crème brûlée.
Troubleshooting Common Issues
Even with a straightforward recipe, small details can make a big difference. If your Simple Crème Brûlée Dessert doesn’t turn out exactly as expected the first time, don’t worry—these common issues are easy to fix with a few adjustments.
Custard Turned Out Runny
- This usually means the custard wasn’t baked long enough or chilled thoroughly.
- Make sure the edges are set with a gentle jiggle in the center, then chill for at least two hours before adding the sugar topping.
Custard Is Grainy or Curdled
- Overheating is often the cause.
- Always use a water bath and avoid boiling the cream. Gentle heat is key to a smooth vanilla custard base.
Sugar Topping Burned Instead of Caramelized
- The torch was held too close or stayed in one spot too long.
- Keep the flame moving and stop as soon as the sugar melts and turns golden.
Cracks or Bubbles on the Surface
- This can happen if the custard mixture is over-whisked.
- Whisk just until combined to keep the texture creamy and refined.
Once you understand these small details, making homemade crème brûlée becomes incredibly reliable. Each attempt builds confidence, turning this easy crème brûlée into a dessert you can master and repeat with ease.
FAQs
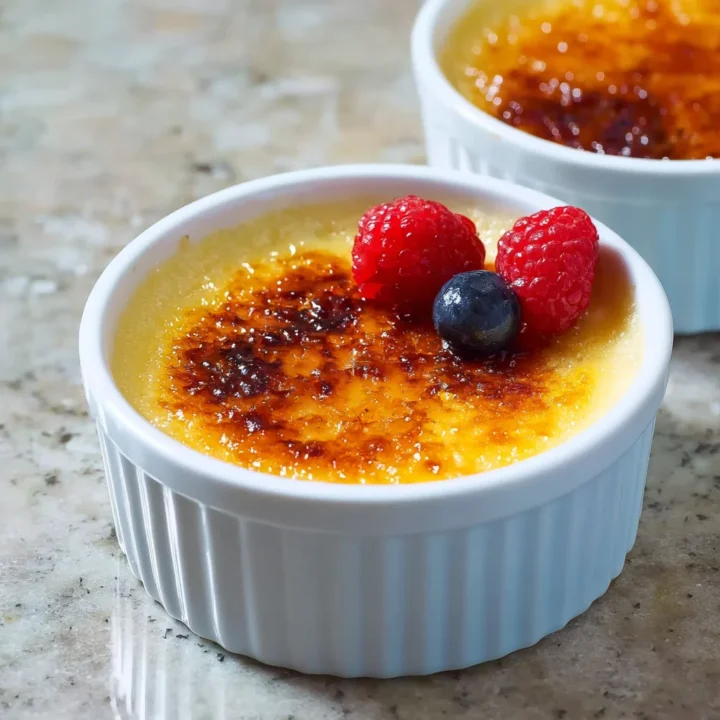
Simple Crème Brûlée Dessert
This Simple Crème Brûlée Dessert is the kind of recipe that instantly builds confidence in the kitchen.
Ingredients
- 1 cup heavy cream
- 3 tablespoons white sugar
- 3 large egg yolks
- ¼ teaspoon vanilla extract
- 2 tablespoons white sugar, divided (for topping)
Instructions
- Preheat oven to 350°F (175°C). Place two ramekins in a deep roasting pan.
- Whisk heavy cream and 3 tablespoons sugar in a microwave-safe bowl. Heat for 1–2 minutes until warm; whisk again to dissolve sugar.
- Gently whisk in egg yolks and vanilla extract until smooth.
- Divide mixture evenly between ramekins.
- Pour hot water into the roasting pan until it reaches halfway up the sides of the ramekins.
- Bake for about 50 minutes, until edges are set and centers gently jiggle.
- Remove ramekins from the water bath and refrigerate for at least 2 hours.
- Sprinkle 1 tablespoon sugar over each custard. Torch until caramelized and golden. Let set before serving.
Notes
- For the smoothest texture, whisk gently and avoid incorporating air.
- Always caramelize the sugar topping just before serving to keep it crisp.
- If using a broiler instead of a torch, watch closely—sugar can burn quickly.
- Chill thoroughly; the custard continues to set as it cools.
Nutrition Information:
Yield: 2 Serving Size: 1Amount Per Serving: Calories: 420Total Fat: 34gSaturated Fat: 20gCholesterol: 240mgSodium: 55mgCarbohydrates: 24gSugar: 22gProtein: 6g