




There’s something irresistibly comforting about the smell of garlic bread baking in the oven, isn’t there? For me, it instantly brings back memories of cozy family dinners and that first warm, buttery bite that disappears far too quickly. This garlic bread spread is the secret behind that unforgettable flavor — rich, herby, and perfectly balanced, with just the right touch of Parmesan to make every slice feel special.
If you’ve ever wondered how to make a homemade garlic butter spread that tastes better than anything store-bought, you’re in the right place. This easy, customizable garlic butter for bread comes together in minutes and transforms a simple loaf into golden, bakery-style garlic bread. Whether you’re serving pasta, soup, or hosting a casual gathering, this herbed garlic spread is one of those small recipes that delivers big comfort and even bigger flavor.
Key Benefits & Why You’ll Love This Garlic Bread Spread
This garlic bread spread is one of those simple recipes that quietly becomes a kitchen staple. It’s easy to make, incredibly flavorful, and designed to give you consistent, bakery-style results every single time. Whether you’re cooking for guests or just upgrading a weeknight dinner, this spread delivers comfort and convenience in equal measure.
Here’s why it deserves a spot in your recipe rotation:
- Big flavor with minimal effort
A handful of pantry herbs, real butter, and fresh garlic come together to create a rich, aromatic garlic butter for bread that tastes far more complex than the effort required. - Better than store-bought
Making your own homemade garlic butter spread means full control over flavor, saltiness, and texture—no preservatives, no artificial aftertaste, just clean, bold garlic flavor. - Perfectly customizable
Love herbs? Add more. Prefer it milder? Dial back the garlic. This herbed garlic spread adapts easily to your taste without compromising results. - Versatile for any meal
While it’s ideal for classic garlic bread, this spread also works beautifully on rolls, baguettes, flatbreads, or even as a finishing touch for vegetables and pasta. - Reliable texture and browning
The balance of butter, Parmesan, and herbs helps the spread melt evenly, soak into the bread just enough, and finish with a golden, lightly crisp surface—no soggy centers, no burnt edges.
If you’re looking for a dependable, flavor-forward garlic bread spread that feels homemade, comforting, and effortlessly impressive, this recipe checks every box without complicating your time in the kitchen.
Ingredients
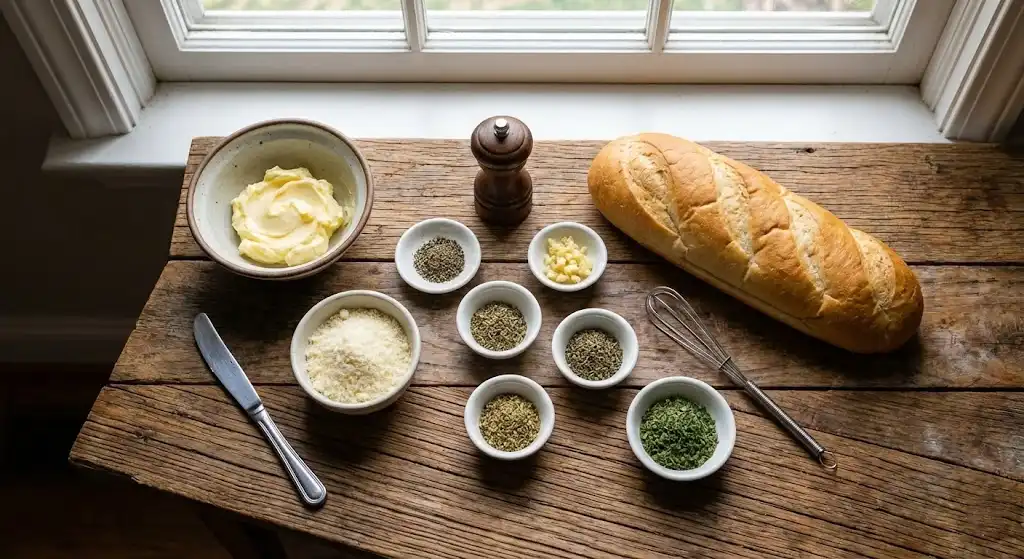
One of the best things about this garlic bread spread is how simple and accessible the ingredients are. Each one plays a specific role in building layers of flavor, so using good-quality basics makes a noticeable difference in the final result.
Here’s what you’ll need:
- Butter (softened)
The foundation of the spread. Softened butter blends smoothly and ensures the garlic butter melts evenly into the bread rather than sitting on top. - Grated Parmesan cheese
Adds a subtle saltiness and depth, giving the spread a slightly savory, almost nutty finish without overpowering the garlic. - Fresh garlic, minced
This is where the bold flavor comes from. Finely minced garlic distributes evenly, creating a balanced garlic butter for bread that isn’t too sharp in any single bite. - Dried herbs (marjoram, basil, oregano, parsley, fines herbs)
This blend creates a classic herbed garlic spread with a gentle, aromatic profile. Each herb contributes warmth and complexity without competing for attention. - Ground black pepper
A small but important addition that sharpens the overall flavor and keeps the butter from tasting flat. - Unsliced Italian bread
Its sturdy crumb and crisp crust make it ideal for soaking up the homemade garlic butter spread while still baking up golden and slightly crisp.
Instructions
Making this garlic bread spread is straightforward, but a few small details make all the difference in flavor and texture. Think of this as a relaxed, step-by-step guide—nothing rushed, just simple techniques that lead to great results.
- Preheat and prepare
Start by preheating your oven to 350°F (175°C). This allows the bread to warm gradually so the garlic butter spread melts evenly before browning. - Mix the spread thoroughly
In a bowl, combine the softened butter, grated Parmesan, minced garlic, dried marjoram, basil, fines herbs, oregano, parsley, and black pepper. Mix until fully blended and smooth, making sure the herbs and garlic are evenly distributed throughout the butter. - Prepare the bread
Slice the Italian bread loaf in half lengthwise. Place both halves cut-side up on a baking sheet. This position helps the garlic butter for bread soak in without leaking away. - Spread generously
Using a spoon or spatula, spread the mixture evenly over both halves. Don’t be shy—this is where the flavor comes from. A generous layer ensures every bite carries that classic herbed garlic spread taste. - Bake until melted and bubbling
Place the baking sheet on the top rack and bake for 10–15 minutes, just until the butter melts and begins to bubble gently. - Finish under the broiler
Turn on the broiler and watch closely. Broil for 1–2 minutes until the edges turn golden and lightly crisp. Remove immediately once it reaches your desired color to avoid burning.
Following these steps gives you perfectly melted, golden garlic bread spread with a rich aroma and irresistible texture—simple, reliable, and always satisfying.
Pro Tips and Variations
Once you’ve mastered the basics, this garlic bread spread becomes incredibly flexible. Small adjustments can tailor the flavor to match your meal or personal preference, without changing the core recipe.
Pro Tips for Best Results
- Always use softened butter
Butter that’s too cold won’t mix evenly, while melted butter can make the bread greasy. Softened butter creates a smooth, spreadable garlic butter for bread that bakes evenly. - Minced garlic matters
Finely minced garlic blends more smoothly into the butter and prevents harsh, uneven bites. - Watch the broiler closely
The final browning happens fast. Stay nearby to avoid burning and keep that perfect golden finish. - Bake on the upper rack
This positioning helps the homemade garlic butter spread melt first, then lightly crisp without drying out the bread.
Easy Flavor Variations
- Extra cheesy
Add a bit of shredded mozzarella or asiago to the spread for a richer, meltier finish. - Fresh herb boost
Swap some dried herbs for finely chopped fresh parsley or basil for a brighter herbed garlic spread. - Spicy kick
A pinch of red pepper flakes adds gentle heat without overpowering the garlic. - Roasted garlic version
Replace raw garlic with mashed roasted garlic for a sweeter, mellow flavor profile.
These tips and variations make this garlic bread spread easy to adapt, whether you want something classic, bold, or completely your own.
Serving & Pairing Suggestions
This garlic bread spread is incredibly versatile, making it easy to pair with both casual meals and more polished dishes. Its rich, buttery flavor and herb-forward profile complement a wide range of foods without stealing the spotlight.
Classic Ways to Serve It
- Slice the baked garlic bread into thick pieces and serve warm alongside pasta dishes, especially tomato-based or creamy sauces.
- Pair it with soups like tomato, vegetable, or chicken broth-based soups where the bread can soak up every last drop.
- Serve it as a shareable appetizer, cut into smaller portions for easy grabbing.
Creative Pairing Ideas
- Use the garlic butter for bread on baguette slices for a simple crostini base, topped with roasted vegetables or fresh tomatoes.
- Serve garlic bread alongside grilled chicken, steak, or seafood to add a comforting, savory element to the plate.
- Pair it with fresh salads to balance the richness of the herbed garlic spread with crisp, refreshing textures.
Perfect for Entertaining
Because this homemade garlic butter spread can be prepared ahead of time, it’s ideal for hosting. Bake just before serving, and you’ll have warm, golden garlic bread that feels thoughtful, familiar, and always welcome at the table.
Tools and Equipment Guide
You don’t need anything fancy to make this garlic bread spread, but having the right tools on hand helps ensure smooth preparation and consistent results. These basics keep the process simple and stress-free from start to finish.
Essential Tools
- Mixing bowl
A medium-sized bowl gives you enough space to fully combine the butter, garlic, herbs, and cheese without spilling. - Fork or spatula
Ideal for blending the softened butter into a smooth, even garlic butter spread and scraping down the sides of the bowl. - Sharp knife
Useful for mincing garlic finely and slicing the Italian bread cleanly in half. - Cutting board
Provides a stable surface for safe, precise prep work. - Baking sheet
A sturdy, rimmed baking sheet supports the bread and catches any melted butter during baking.
Optional but Helpful
- Parchment paper or foil
Makes cleanup easier and prevents sticking if the homemade garlic butter spread bubbles over slightly. - Oven mitts
Especially important when working with the broiler, where heat is intense and fast.
With these simple tools, preparing your garlic bread spread feels effortless, letting you focus on flavor rather than cleanup or complications.
Troubleshooting Common Issues
Even simple recipes can raise a few questions, especially the first time you make them. If your garlic bread spread doesn’t turn out exactly as expected, these quick fixes will help you adjust and get perfect results next time.
The bread turns soggy
- This usually means too much butter or baking at too low a rack position.
- Bake on the upper rack so the garlic butter for bread melts and evaporates slightly before crisping.
The garlic burns or tastes bitter
- Garlic can burn quickly under the broiler.
- Make sure the bread is already warmed and melted before broiling, and keep the final step short and closely watched.
Uneven browning
- This can happen if the spread isn’t evenly applied.
- Smooth the herbed garlic spread all the way to the edges and rotate the baking sheet if needed.
Bread browns too fast
- Every oven runs differently.
- If the bread darkens before the butter fully melts, lower the rack slightly or reduce broiling time.
Flavor feels too mild
- Add a pinch more garlic, herbs, or Parmesan next time.
- Homemade spreads are easy to adjust, making this garlic bread spread forgiving and flexible.
These simple troubleshooting tips help ensure your homemade garlic butter spread turns out golden, flavorful, and satisfying every time.
FAQs
Garlic Bread Spread
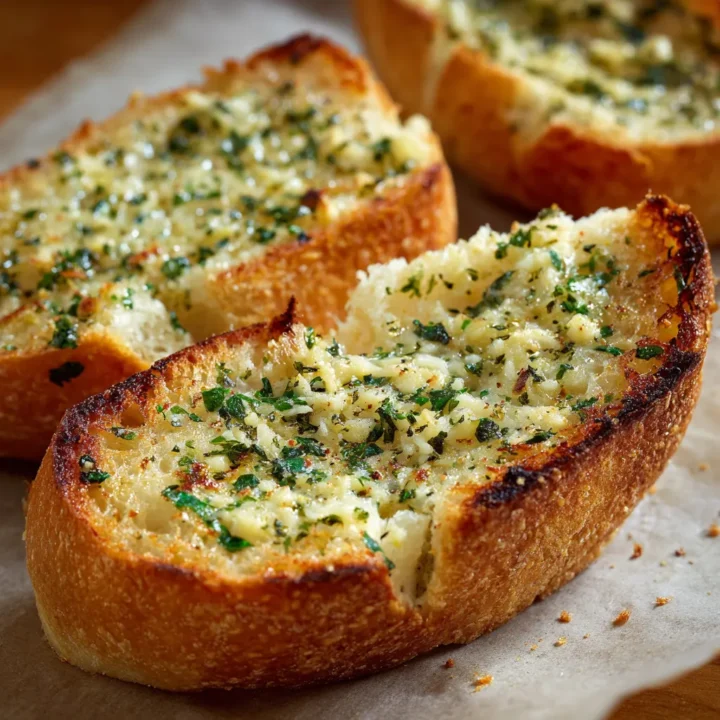
This garlic bread spread is one of those simple recipes that quietly becomes a kitchen staple. It’s easy to make, incredibly flavorful, and designed to give you consistent, bakery-style results every single time.
Ingredients
- ½ cup butter, softened
- ¼ cup grated Parmesan cheese
- 2 cloves garlic, finely minced
- ¼ teaspoon dried marjoram
- ¼ teaspoon dried basil
- ¼ teaspoon fines herbs
- ¼ teaspoon dried oregano
- ¼ teaspoon dried parsley (or to taste)
- Ground black pepper, to taste
- 1 loaf unsliced Italian bread
Instructions
- Preheat the oven to 350°F (175°C) and gather all ingredients.
- In a mixing bowl, combine the softened butter, Parmesan cheese, garlic, marjoram, basil, fines herbs, oregano, parsley, and black pepper. Mix until smooth and evenly blended.
- Slice the Italian bread loaf in half lengthwise and place both halves cut-side up on a baking sheet.
- Spread the garlic butter mixture evenly and generously over the bread halves.
- Bake on the top oven rack for 10–15 minutes, until the butter is fully melted and lightly bubbling.
- Switch the oven to broil and broil for 1–2 minutes, watching closely, until the bread reaches a golden-brown finish.
- Remove from the oven, slice, and serve warm.
Notes
- For best texture, ensure the butter is softened, not melted, before mixing.
- Mince the garlic finely to avoid harsh bites and ensure even flavor distribution.
- If preparing ahead, the spread can be mixed and refrigerated for up to 3 days before baking.
- For extra crisp edges, rotate the baking sheet once during the broiling step.
Nutrition Information:
Yield: 6 Serving Size: 1Amount Per Serving: Calories: 220Total Fat: 15gSaturated Fat: 9gSodium: 320mgCarbohydrates: 17gFiber: 1gSugar: 1gProtein: 4g